Please note: This guide is for users of a v1.8.x CMS. Please select from the options below for other versions:
So how do you create a simple Layout?
From your CMS dashboard select Layouts and then Add Layout.
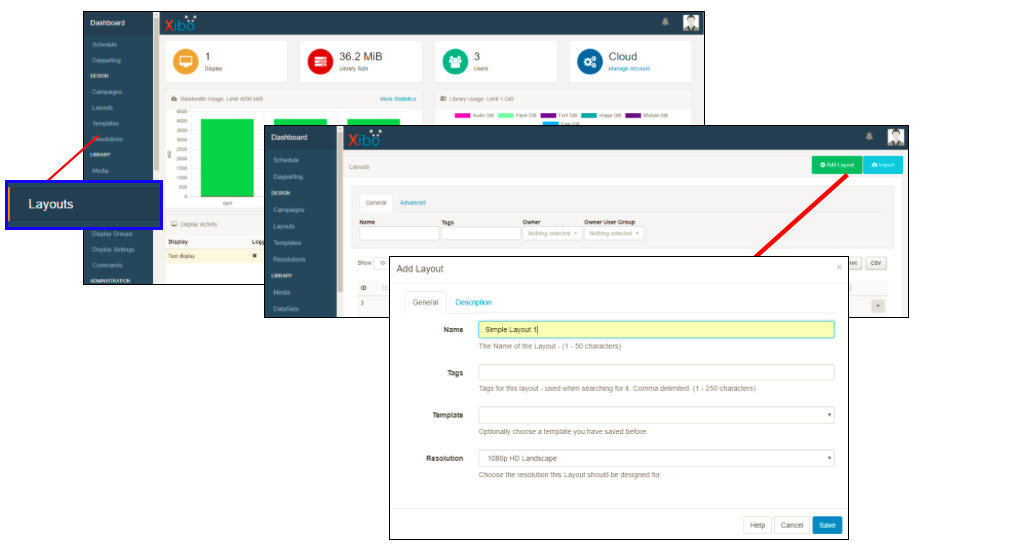
Give your Layout a name, this is for internal identification only and will not be shown anywhere on the Layout itself, Save.
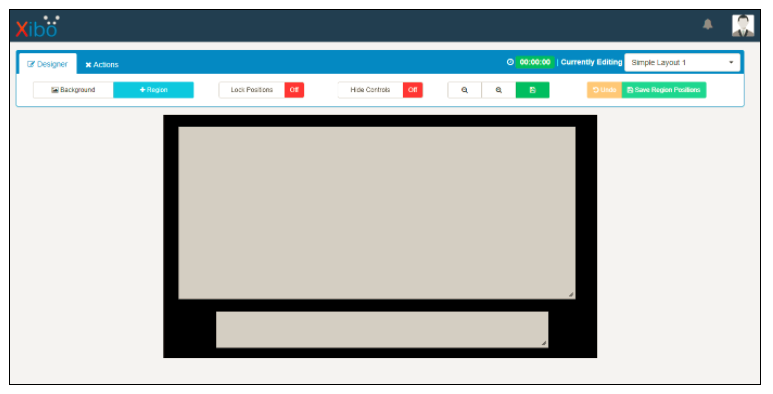
You will now be in the Designer window and by default will already have a full-size empty (grey area) Region added to your Layout.
Grab the handle in the bottom right corner of your empty Region and simply click and drag to resize. This reveals your Layout background, which by default is black in colour.

Click anywhere in your Region, hold and drag to position anywhere on your Layout and once you are happy with the positioning click Save Region Positions.
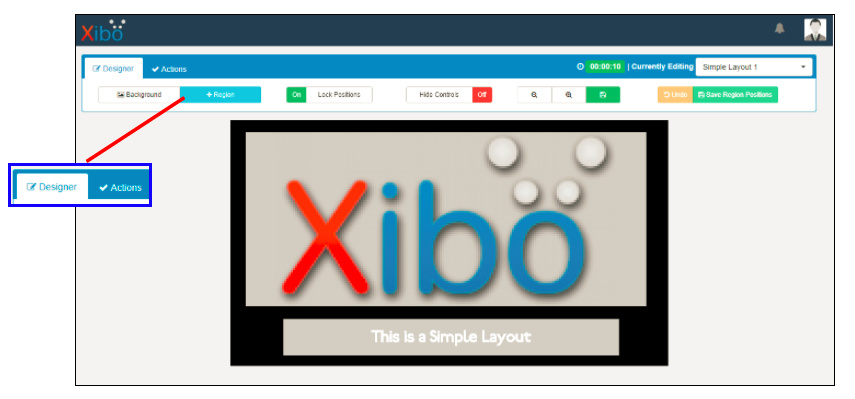
Now add a second Region, +Region to your Layout and position and size as before. Once you have saved Region Positions toggle on Lock Positions to prevent unintended movement whilst you add your content.
Each Region has a menu which is found using the drop-down menu in the top right-hand corner of each Region.
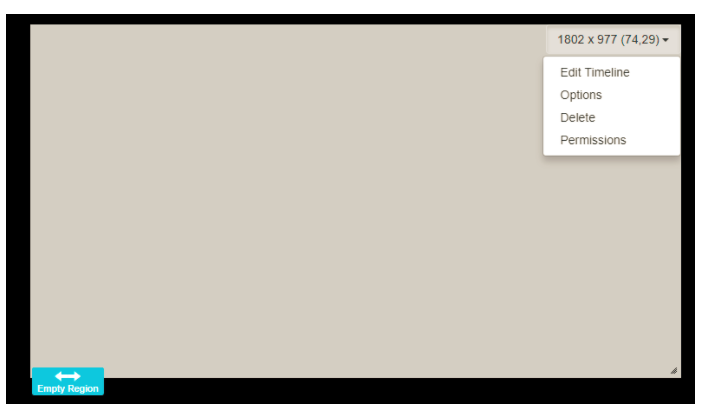
You can also access Edit Timeline by double-clicking anywhere inside a Region.
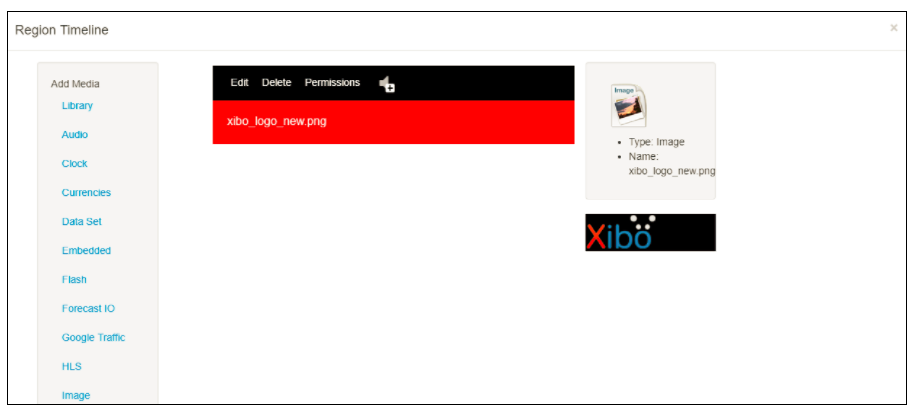
Let’s add an Image to your first Region by selecting Image in the Widget Toolbox shown on the left-hand side of your screen.
Add files already stored on your computer to upload to your CMS. Select an image file, give it a name so that you can easily identify for future use and Start Upload. Once uploaded click Done. (Your image will now be added to your CMS library which you can view later)
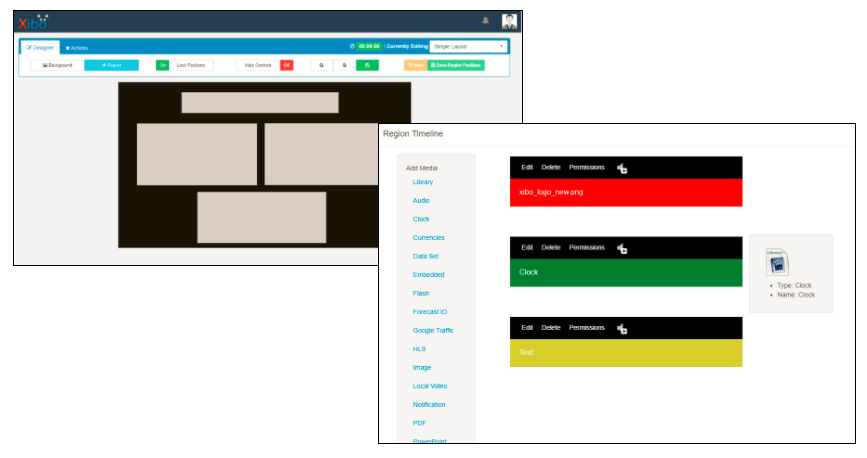
Your Region Timeline will now show your image has been added and you now have one item assigned to your Playlist., Close.
Your Layout will now show your image as assigned to your first Region and your empty second Region.
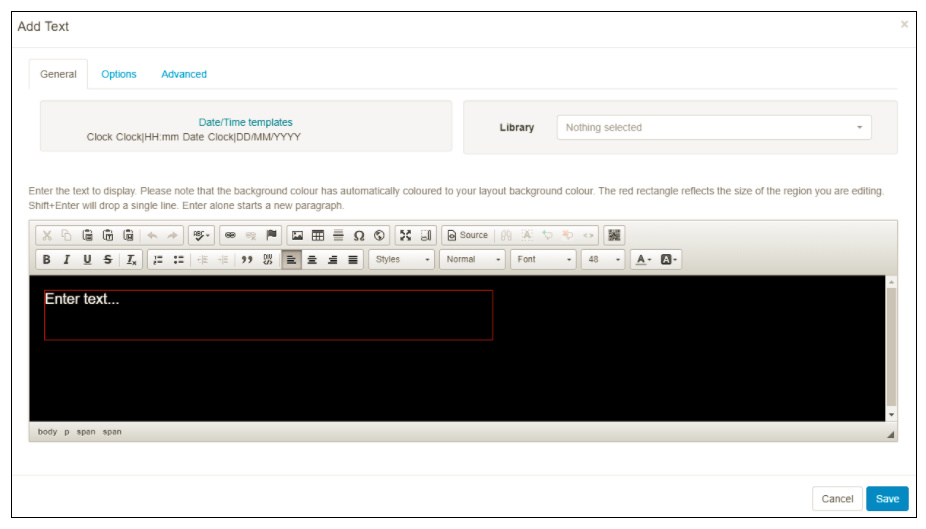
Let’s add some text to your second Region by double-clicking in the Region and scroll down to Text in the Widget Toolbox.
Enter and format text in the text editor keeping it within the Region borders, shown as a red guideline and Save.
Again your Region Timeline will show that your text has been added and you now have one item assigned to your Playlist, Close.
Your Layout will now update and show the image in your first Region and text in the second.
By toggling to the Actions tab you can Preview Layout so you can see how your Layout will play on your screens allowing you to make adjustments to ensure that your content is exactly how you want it!
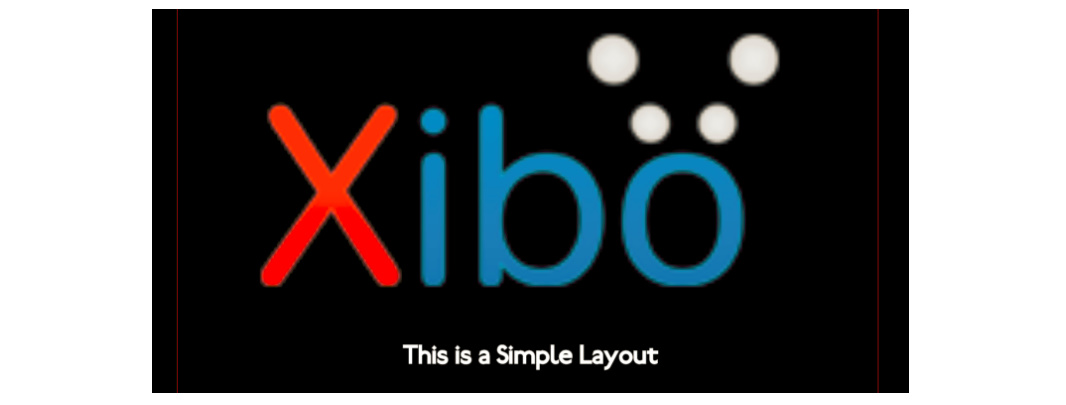
Your Preview will open in a new window and play for the total Layout duration. The limits of your display screen are shown as a red thin line so you can ensure that all your content remains fully visible within these lines when played.
You can make your Layout remain on screen for longer by increasing the duration of just one of the media items. This is because all Regions will show content until all other Regions have completed at least one loop, therefore the other media item will remain, even though the duration has not been adjusted.
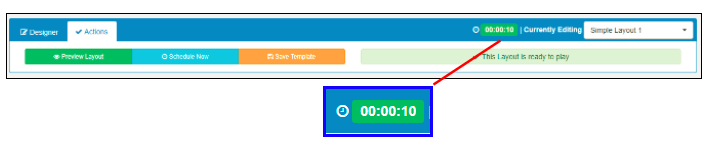
The Action bar displays the Layout duration, based on your Playlist content. Here we can see that currently, the Layout will remain on screen for 10 seconds by default. This is because text items have a duration of 5 seconds and images of 10 seconds. To see the default duration and to make changes you will need to edit the timeline.
Double click in your text region to open your Region Timeline, Edit the Text Widget, click on the Options tab. Select the checkbox to set a duration, increase this from 5 (default) to 30 seconds, Save
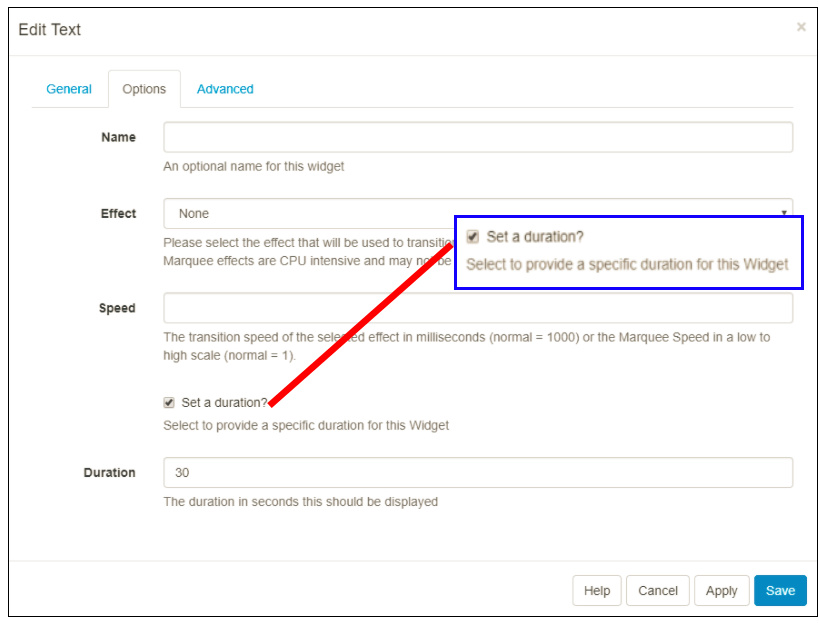
The duration will now update and show Text (30 seconds), Close. The Layout duration will now update, preview your Layout to see that both media items remain on screen for 30 seconds.

Experiment further… add more Regions to your Layout, add more Widgets to Regions and change default durations…
…change the colour of the Background of your Layout from the Layout Designer tab, select the Background tab and use the colour picker to set a background colour, upload a background image.

Follow the following rule…
A Layout must have at least one Region and all Regions on your Layout must hold content.
…to ensure that all your Layouts are ready to play!
Now you have mastered a simple layout take a look at Setting up a cafe menu sign with Xibo!
Happy content creating!