Updated June 2020
Please note: If you are using the 1.8 series CMS, please use the following link: Getting Started Guide - Cafe Menu 1.8.
Setting up a cafe menu sign with Xibo
1. Introduction
The combination of the Xibo CMS and the Xibo Player Software operating together is extremely powerful. It has the potential to allow you to control hundreds of different Displays running hundreds of different Layouts simultaneously.
This tutorial will provide you with a step-by-step introduction to the process of setting up a simple, single-screen display.
We have tried to provide a realistic scenario for the tutorial which allows us to take you through the setup procedure and lets us talk about practical design considerations you should be making while you layout your designs.
2. Scenario
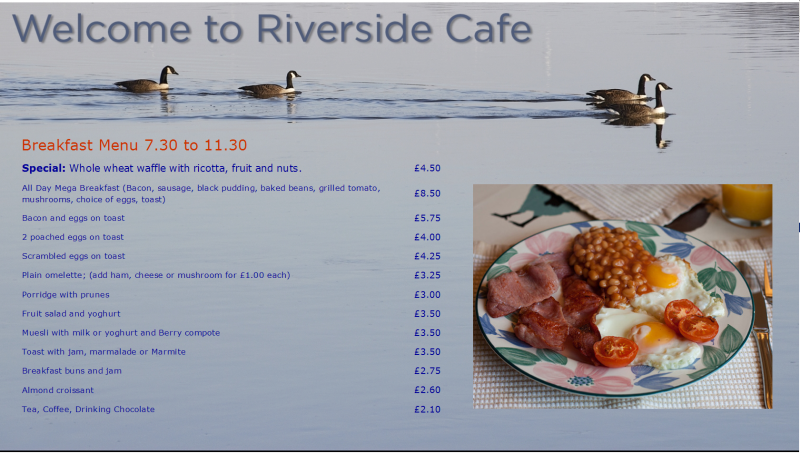
The Riverside Cafe is a small cafe near the river, popular with boat owners and canoeists during the daytime but also does a busy trade during the evening.
The cafe is open from 7.30 am through to 10.00 pm. It operates three different menus across the day for Breakfast (7.30 to 11.30), Lunch (11.30 to 3.30) and Teatime (3.30 to 10.00). The cafe is closed all day on Wednesday and on Sunday evenings.
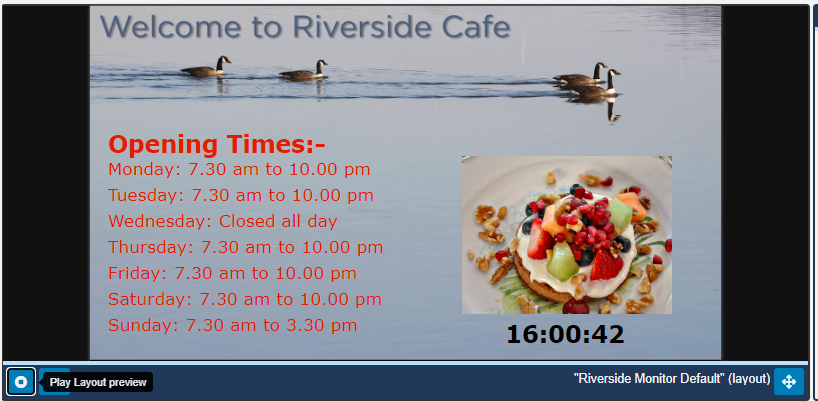
The cafe owner has decided to install a digital sign to be displayed on a single screen located on a wall close to the Point of Sale where it can be seen through the window when the cafe is closed. When open it will display a menu board which will update to show the current offering. When the cafe is closed it will show a promotional screen about the cafe’s opening times.
This is an easy task using the Xibo CMS. You will need to create four different Layouts – one for each menu and a Default Layout to be shown when the cafe is closed. You will then need to Schedule each Layout so that it displays at the correct time of day.
3. Before you begin
Our tutorial assumes that you already have a Xibo digital signage system set up and running . If not, please see how to get started.
If you are simply looking to evaluate Xibo using this tutorial, the fastest and simplest option is to:
- Download and install a free Xibo Signage Player on your PC or laptop.
- Take advantage of our 14 day free trial of Xibo in the Cloud
This will allow you to get your digital signage system up and running quickly without the complication and bother of having to install the Xibo CMS and a MySQL database on a server.
If you would prefer to use an Android phone or tablet as a display, you could install our Xibo for Android app. Like Xibo in the Cloud, this is a commercial offering, but has a 14 day free trial period which should give you plenty of time to complete this tutorial and see the system in action!
Download Archive
You will need to download an archive containing all the graphics files and other materials used in this tutorial here.
4. Setting up the Display in the CMS
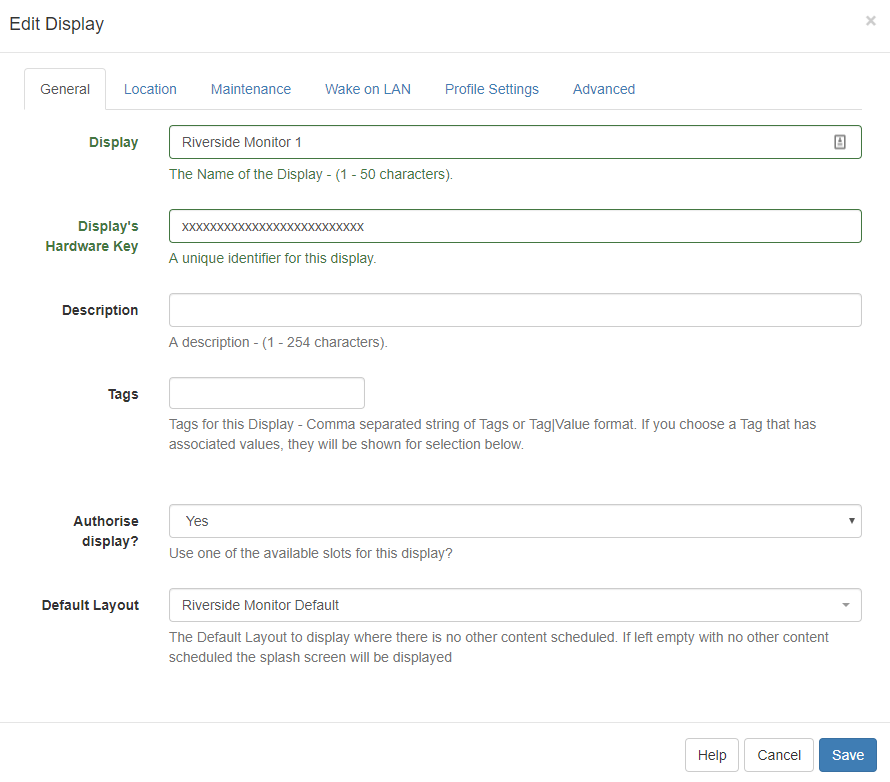
Once you have installed the Player software and registered with the CMS, you can make a number of adjustments from the Displays section of the CMS main menu. The Displays page can be used to adjust many individual characteristics of the display screen to suit your system.

For the purpose of this tutorial I have re-named my Display, Riverside Monitor 1. We will come back to this screen and set our own Layout to be the Default for this monitor once we have created it.
5. Creating basic Layouts
You will need to create four different Layouts one for each of the three menus and our own Default Layout to be shown when the cafe is closed. These will then need to be Scheduled so that each Layout displays at the correct time of day.
Layouts are the complete screen design which is made up of media content assigned to Regions and a background. Regions define areas on your Layout and hold content and contain a timeline of Media to display.
We are going to keep things simple and set up basic Layouts containing a single Region with a text message. Once these have been Scheduled at the correct times we will return and focus on the visual appearance of each of the Layouts.
We will start by creating our own Default Layout which will then be shown when the cafe is closed and in the event that there is a problem with any of the Scheduled Layouts, so we won’t be left with a blank screen!
- Select Layouts under the Design section of the CMS menu.
- Click on Add Layout and call it “Riverside Monitor Default”
- Save
Please note : Version 2 earlier than 2.2.0 require all newly added Layouts to be ‘Checked Out’ to enable editing as they will open in a Read Only Mode .
The Layout Designer will open.
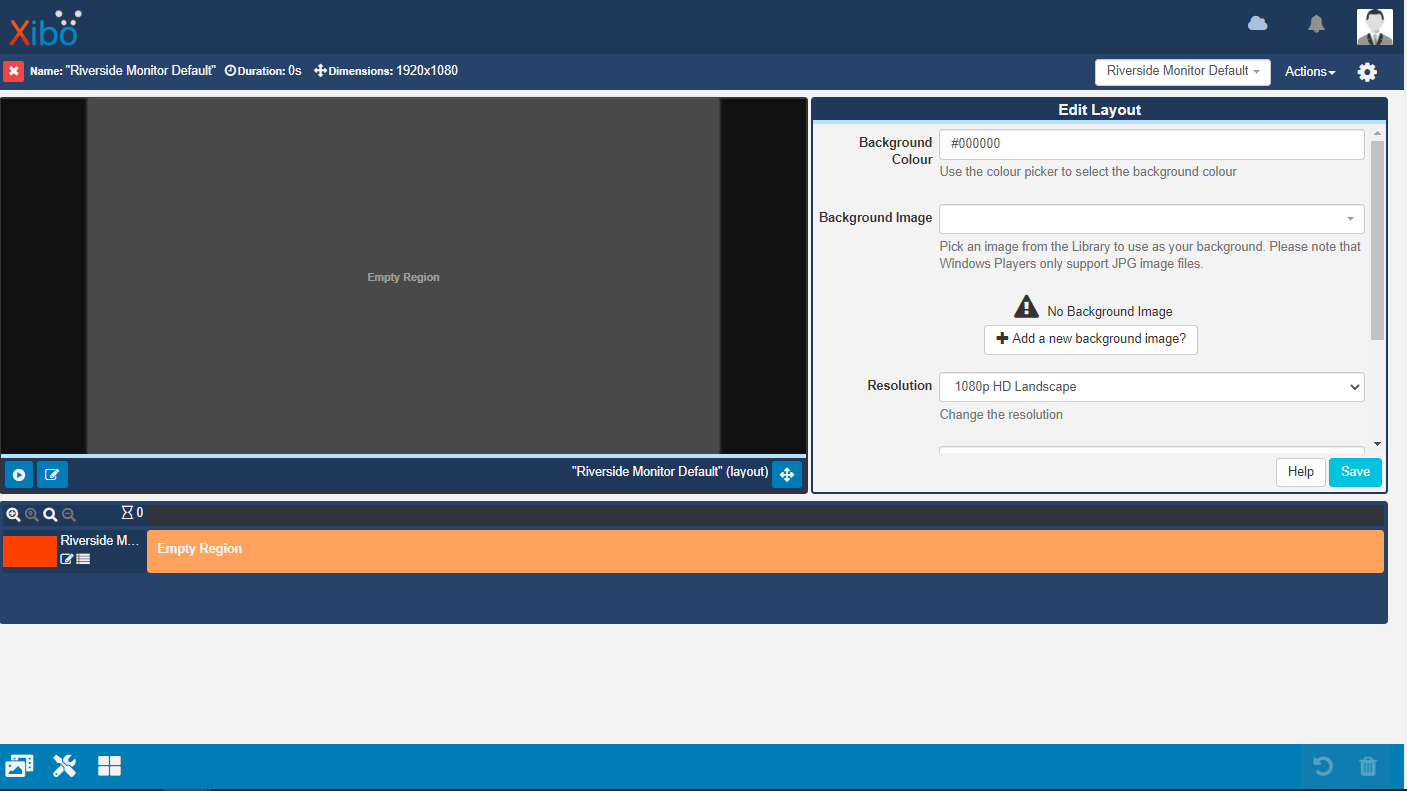
The Layout Designer is at the heart of content creation where you can bring your designs to life. We will start by setting a background for our Layout.
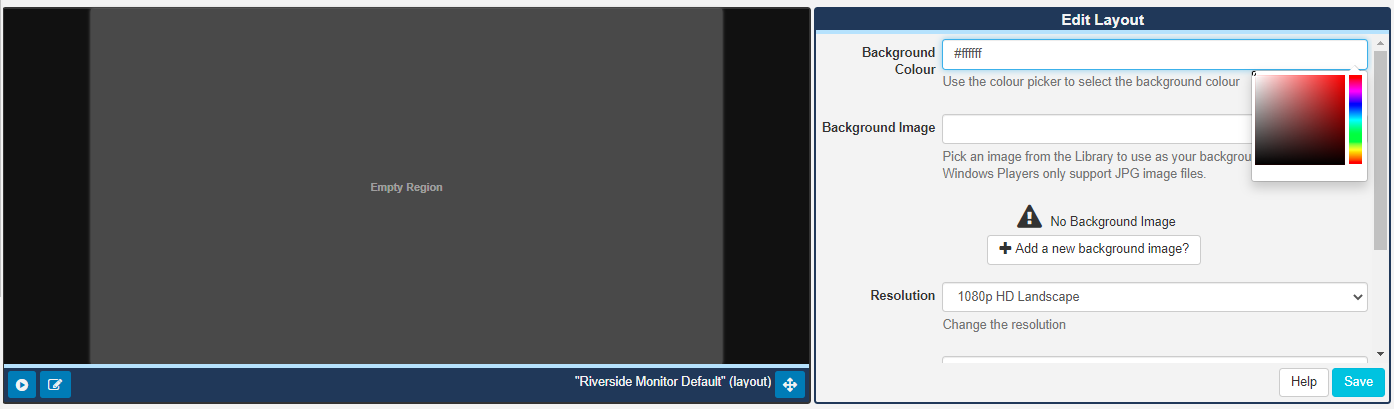
Using the Edit Layout form click in the Background Colour field and use the colour picker or enter “#ffffff” to select white as our background, Save.
By default, a new Layout will always open with a full sized empty Region. We can use this Region to display our message.
- Click on Widgets from the toolbar and locate the Text Widget
- Click on the Text Widget to highlight
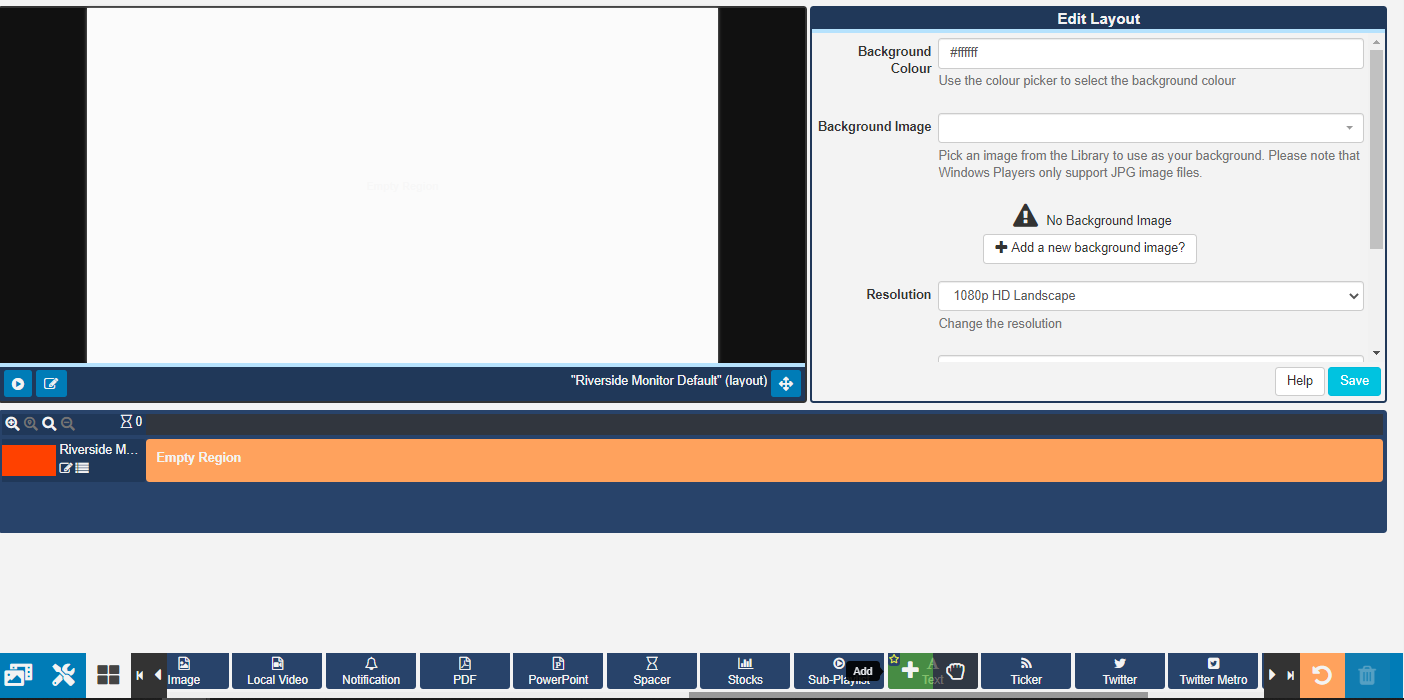
- Add by clicking in the Region, or you could use the grab option to drag and drop.
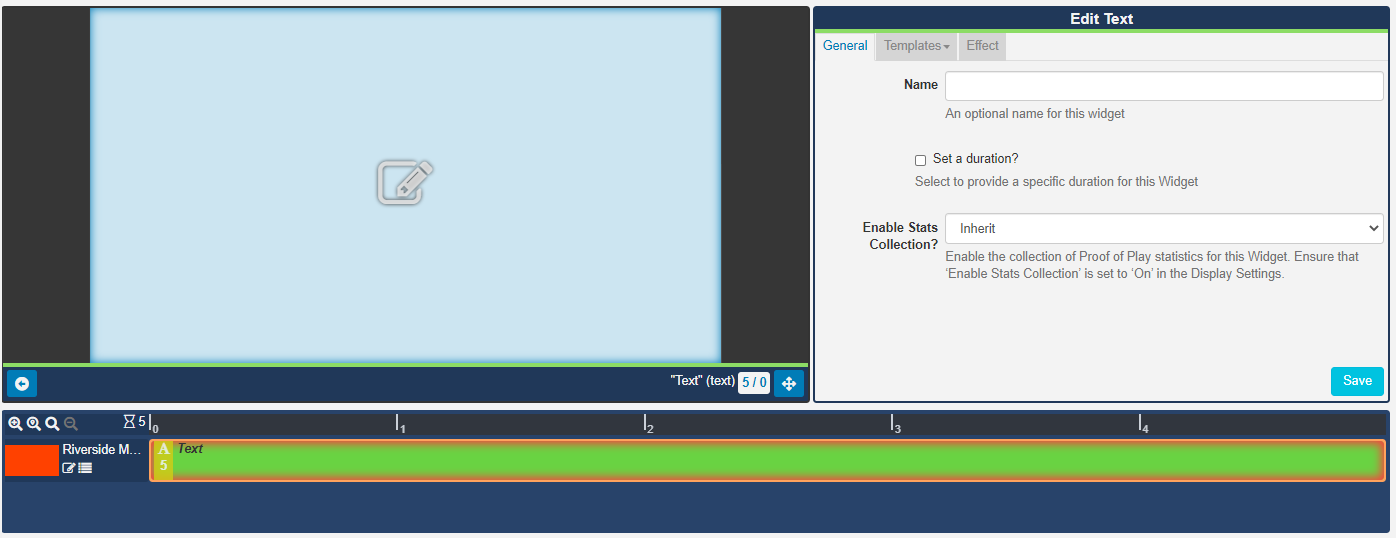
- Click on the edit icon in the Preview window to open the inline editor
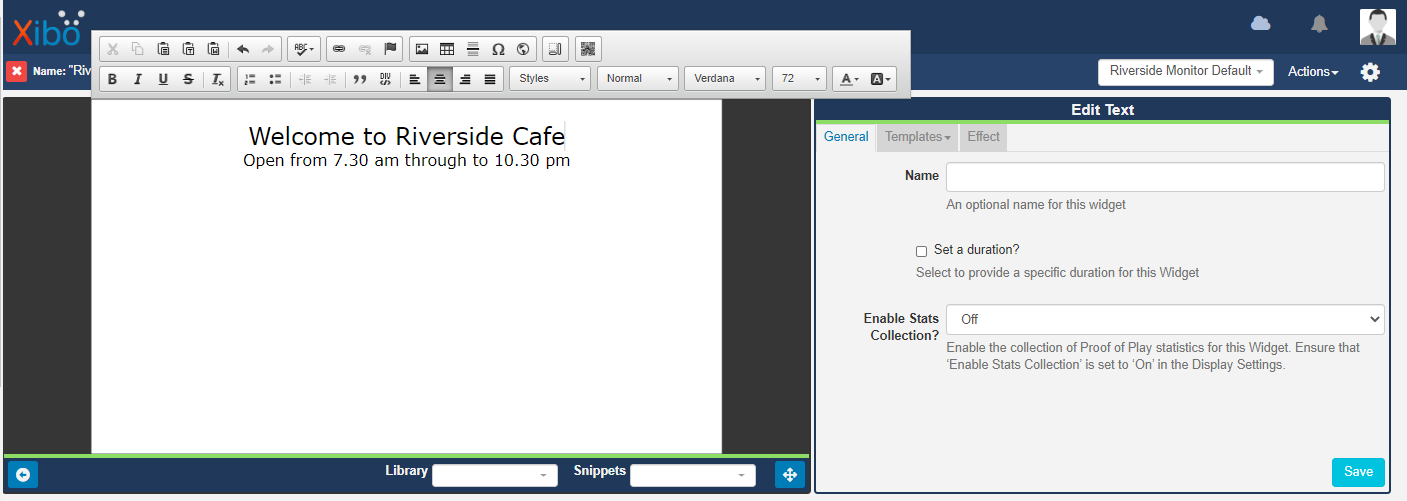
- Use your mouse to highlight ‘Enter text…’ and type ‘Welcome to Riverside Cafe’, press Shift+Enter to create a new line.
- Type ‘Open from 7.30 am through to 10.30 pm’
- Drag the mouse to highlight both lines of text and select Verdana from the font menu
- Select Center from the text alignment group.
- Place the cursor at the beginning of the first line of text and press Enter to drop the text down.
- Highlight the first line ‘Welcome to Riverside Cafe’ and select font size 72.
- Highlight the second line ’ Open from 7.30 am through to 10.30 am’ and select font size 48.
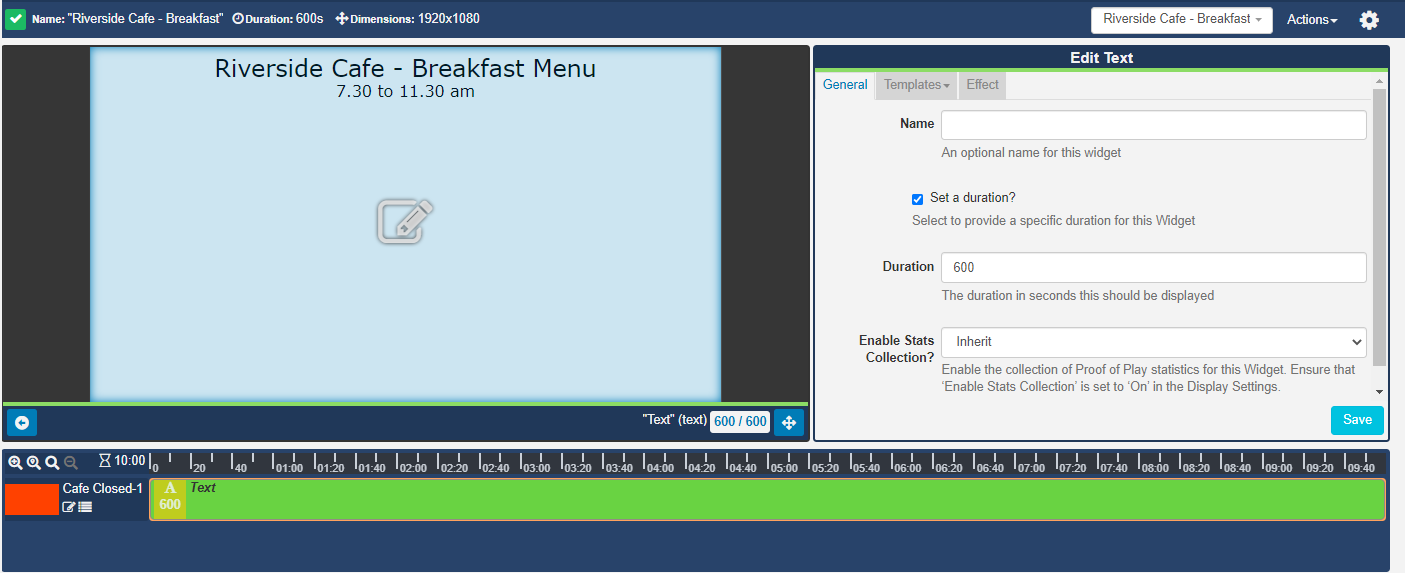
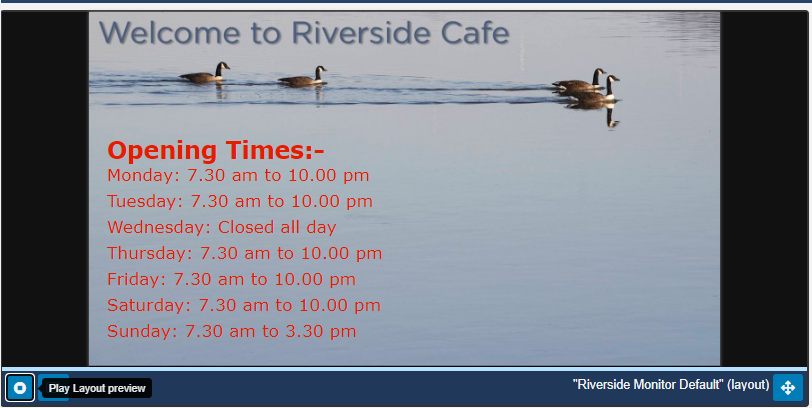
The result should look like the screenshot below:
12.Using the General tab on the Edit Text form, tick the Set a duration box and enter 600 (seconds) in the duration field. This means that the Layout will run for 10 minutes before it is reloaded.
13. Save
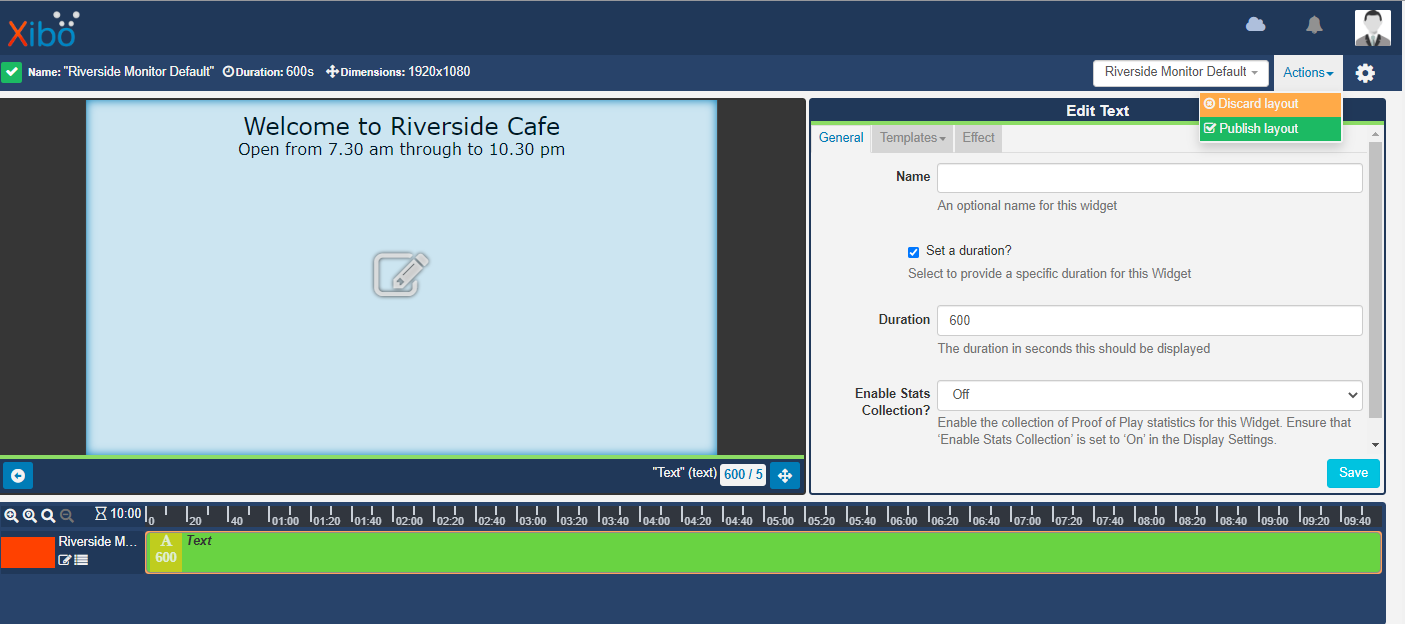
- Click on the Actions menu on the top toolbar and select Publish layout.
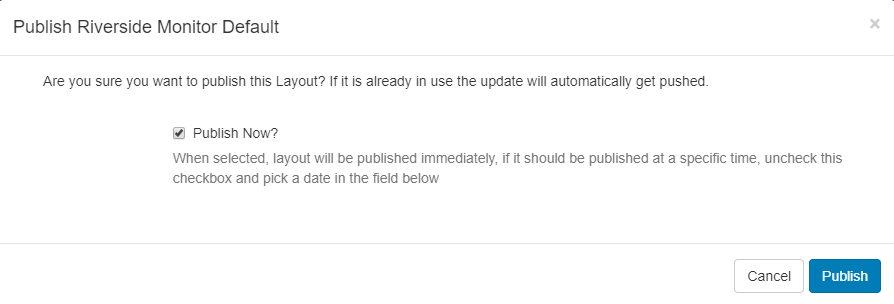
- Ensure that the tick box is selected to Publish Now .
- Click on Publish to confirm.
Once published we can save this Layout as a Template to speed up the process of creating the three additional Layouts that are needed.
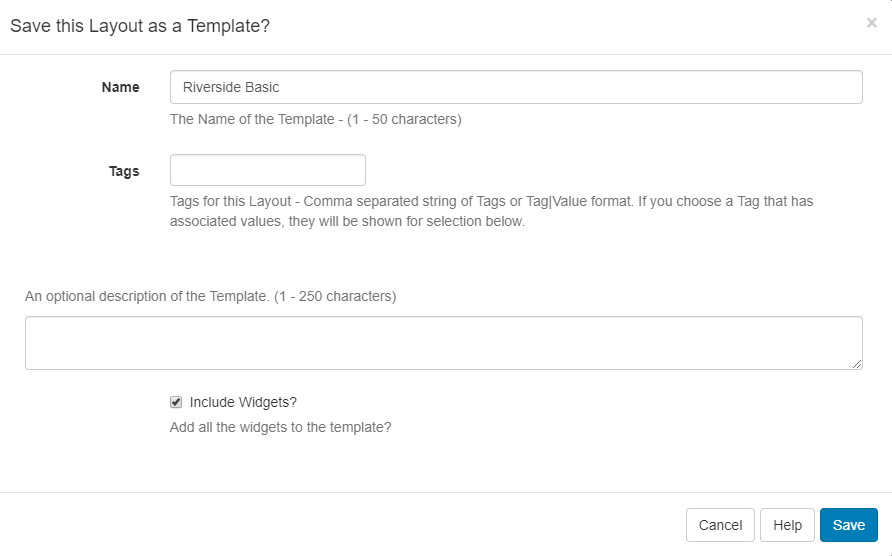
- Select the Actions menu and select Save Template .
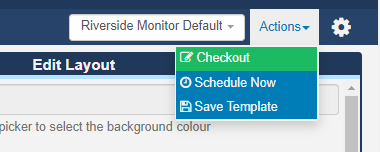
- Type “Riverside Basic” into the Name field and tick to Include Widgets , Click Save .
We can now use the Riverside Basic Template to create a new Layout for the Breakfast Menu:
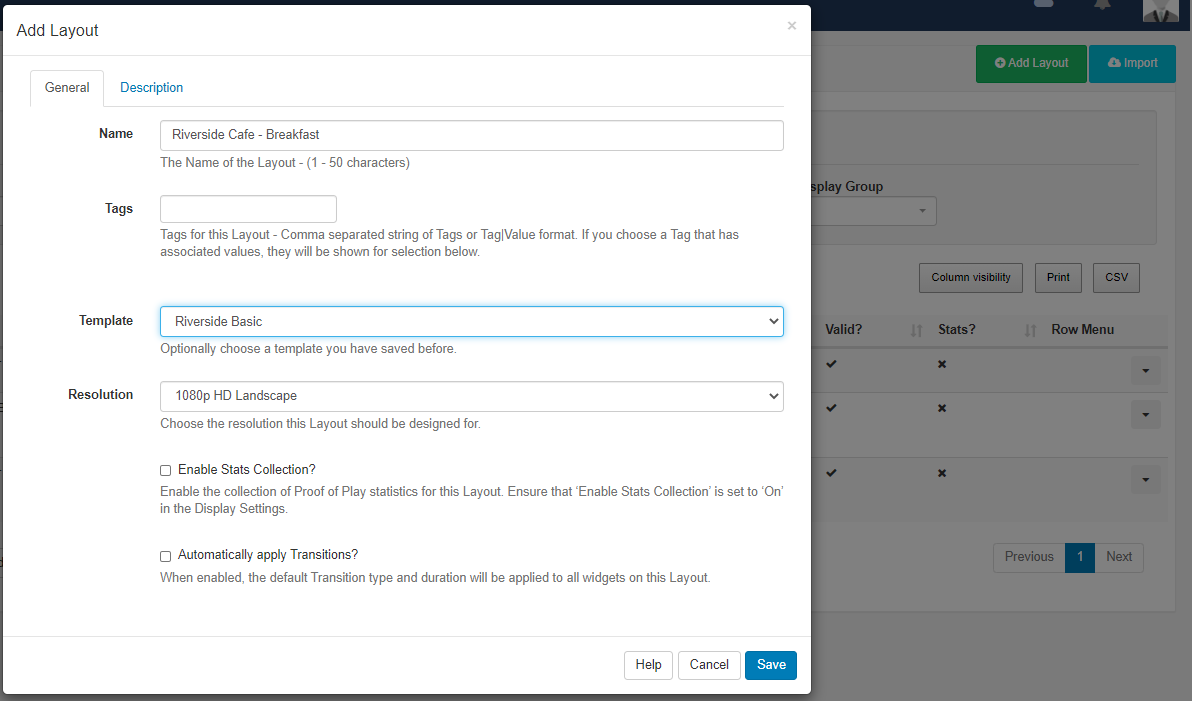
- Click on Layouts under the Design section of the main menu and Add Layout .
- Name it ‘Riverside Cafe - Breakfast’
- Use the Template drop down and select Riverside Basic .
- Save.
The new Layout will open in the Layout Designer.
Now we can edit the existing text of this Layout:
- Click on the Region containing the Text Widget .
- Click on the edit icon in the Preview window to open the inline editor.
- Edit the first line to read ‘Riverside Cafe - Breakfast Menu’
- Edit the second line to read ’ 7.30 to 11.30 am’
- Save .
- Use the Actions menu to Publish layout and select to Publish Now .
Exercise:
Try it out for yourself. Use what we have covered already and create another two Layouts from the Template:
- Lunch (11.30 to 3.00)
- Teatime (3.30 to 10.00)
6. Setting a Default Layout
You will recall that in the beginning I re-named a Display to Riverside Monitor 1 and had the standard Xibo Default Layout set. As we have created our own default we can now assign our own Layout instead.
- Click on Displays
- Use the row menu for the selected Display and click Edit .
- On the General tab use the drop down menu for Default Layout and select ‘Riverside Monitor Default’
- Save .
If you now test the results of your work so far by running a Xibo Player , you should see that the Riverside Monitor Default Layout is now being displayed continuously. This is because the Default Layout acts as a fallback screen that will show in the absence of any Scheduled Layout .
7. Scheduling Repeated Events
We now need to schedule the three menu Layouts so that they will be displayed on the correct days and at the correct times.
The Xibo CMS Scheduler is extremely powerful and will allow you to schedule a specific Layout to be shown on a specific monitor at a specific time, years in advance of the current date. It will also allow recurring events, set up to repeat with minute by minute accuracy if required. Individual events can be overridden by giving alternative events Priority. This will allow you to build up a complex Schedule which can be easily adapted to account for variations and special occasions such as holidays.
We will begin by setting up the Breakfast Menu layout so that it displays at the correct time of day:
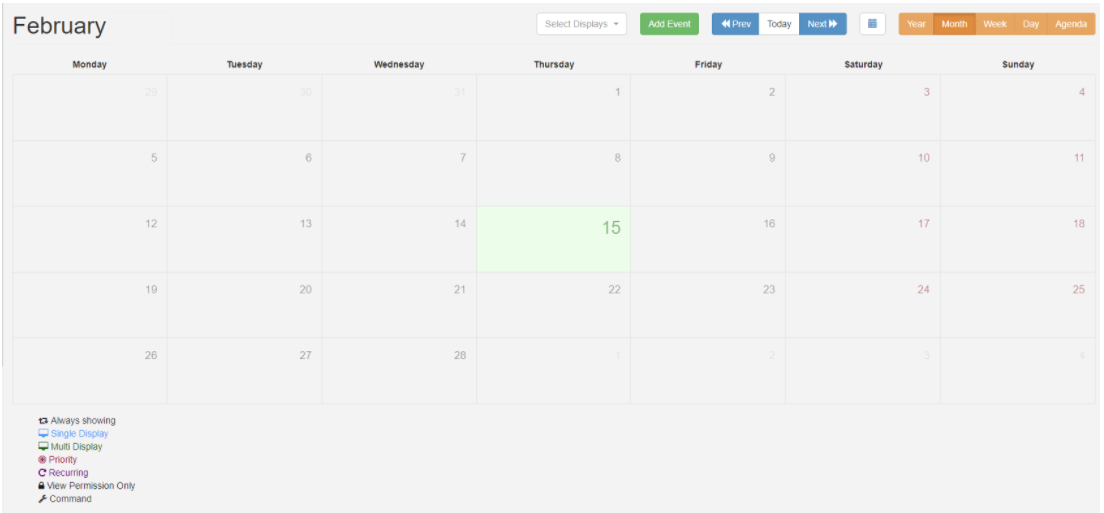
- Click on Schedule on the CMS menu.
- By default, the CMS Scheduler opens in Month view with the current day selected. You can use the buttons to the right to switch between alternate views. For now, we will continue using the Month view.
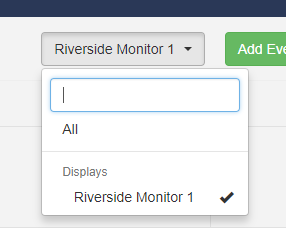
- Select Riverside Monitor 1 from the drop-down list of available Displays .
- Click on today’s date to make sure it is selected and then click Add Event . The Schedule Event form will open.

- Make sure that the Dayparting selection is at Custom .
- Click in the Start Time box and select today’s date and a start time of 7.30.
- Set the End Time for today at 11.30.
- Finally, select the Riverside-Breakfast layout from the Layout/Campaign drop-down list.
- Click Save.
Dayparting makes your scheduling easier. You can create specific parts of the day, for example, a Daypart named Breakfast with pre-configured times could be selected without the need to specify Start and End Times. Read here for further information regarding creating Dayparts.
Our newly scheduled event will be shown as a blue (single display) monitor icon on the CMS calendar. We now need to set it up so that it Repeats on a daily basis:
- Click on the monitor icon to open the Edit Event form.
- Select the Repeats tab.
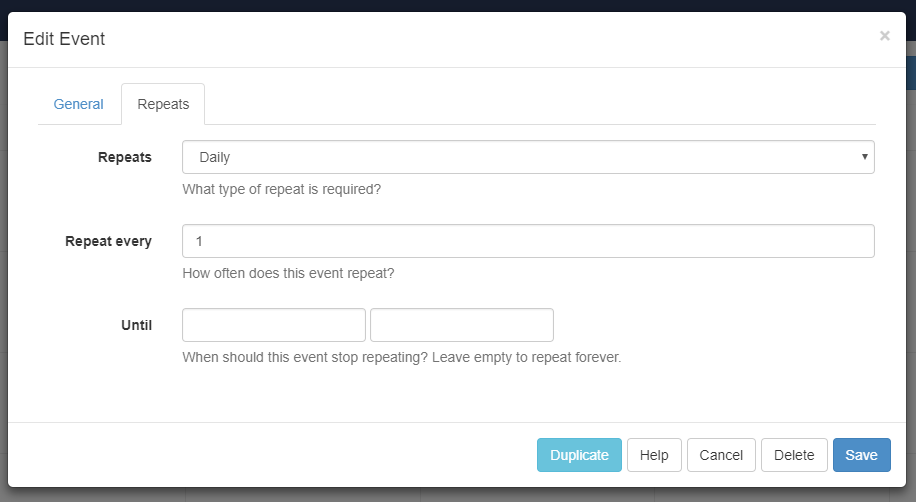
- From the drop-down list select Daily .
- Set Repeat every to a value of 1.
- Finally, set the Until value to a date in the future or leave blank to repeat forever.
- Click Save .
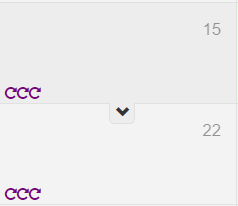
The Event will now be shown on the schedule with the Recurring Event symbol for every day going forward.
We will now set up the Lunch menu Events and then, to save time, we will set up the Teatime menu Events using the Duplicate button in the Edit Event form:
- Click on today’s date to make sure it is selected and then click Add Event. The Schedule Event form will open.
- Click in the Start Time box and select 11.30.
- Set the End Time for today at 15.00.
- Select the Riverside Cafe Lunch Menu Layout from the Layout/Campaign drop-down list.
- Select the Repeats tab.
- From the drop-down list select Daily.
- Set Repeat every to a value of 1.
- Set the Until value to a date in the future or leave blank to repeat forever.
- We can now save this Event and use it to create a new Event. Click on the Event icon for the Lunch Event we have just scheduled then click the Duplicate button. This will create a copy of the Lunch Menu Event with all the settings of the previous event in place ready to edit.
- Edit the Start time to 15.00 and the end time to 22.30.
- Select Riverside – Teatime from the Layout/Campaign drop-down list.
- Click Save and check that all three Events are now shown as recurring Events on each page.
8. Scheduling ‘exceptional’ Events
The result should be that the Breakfast , Lunch and Teatime Layouts will now be displayed at the correct times every day of the week. The Default Layout will display at all times where an Event has not been scheduled, i.e from 22.30 through to 7.30 the following morning.
However, the cafe does not open all day every day of the year. As we have already mentioned, the cafe is closed all day on Wednesday and on Sunday evenings and it is also closed on Christmas and New Years day. In addition, there may be occasions when the cafe needs to close temporarily for unexpected reasons, such as illness, extreme weather or there may be times when the menu needs to change to reflect a special offer, for example.
It is not possible to delete an individual Repeat of an Event within the Scheduler without deleting all of the programmed Repeats. This is by design. To adapt the scheduling of the Display to accommodate these exceptional events we need to first add additional Events and then give those Events priority so that they override the existing Event.
For this tutorial, we will use the Default Layout for those times when the cafe is closed. However, it would easily be possible to create special Layouts for particular occasions like Christmas Day to give a seasonal feel.
We will start by setting up the regular Wednesday closing Display:
- Click Add Event .
- Set the Start Time to 7.30 on the next available Wednesday and the End Time to 22.30 on the same day.
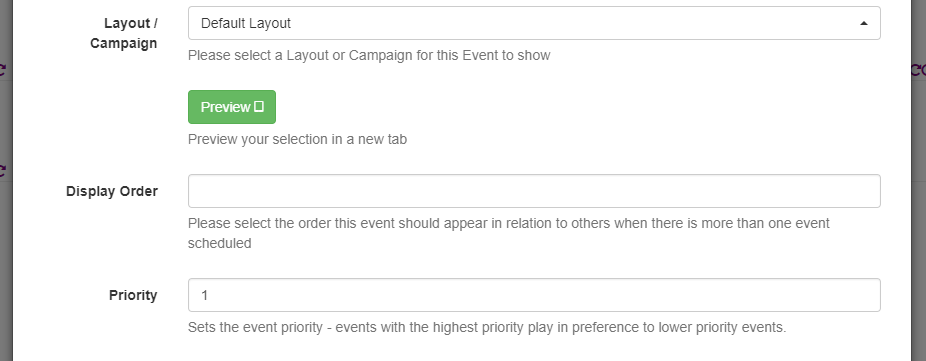
- Set Layout/Campaign to Default Layout .
- Set Priority to 1 (Events with the highest numerical Priority play in preference to lower numerical Priority Events. As we have no other Priority Events set, 1 is highest in this scenario).
- Select the Repeats tab.
- Set Repeats to Weekly .
- Repeat every select 1
- Leave the Until box empty to repeat forever.
- Click Save .
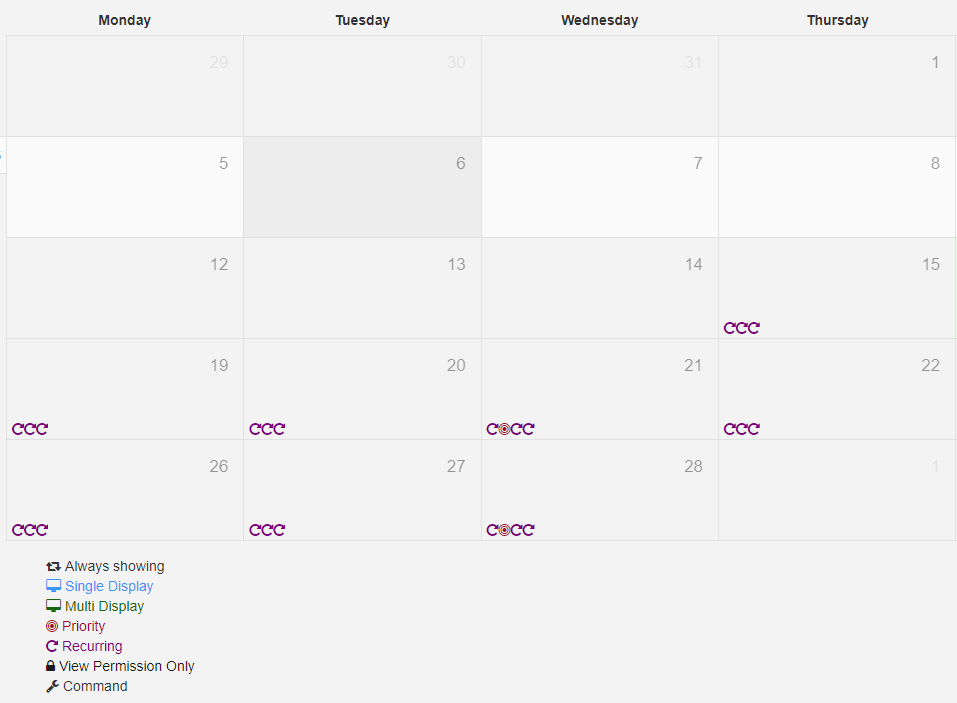
The Scheduler will now show a new Event occurring every Wednesday, indicated by the Priority symbol. This Event will override the existing daily Event and the Default Layout will be displayed.
Exercise:
Set up the Sunday early closing priority event, so that the default screen is shown from 15.00 onward.
9. Further Layout design
Now that we have all three Layouts scheduled so that they are displayed at the correct times, we can now turn our attention to their visual design. This part of the tutorial will cover the design of the Default and Breakfast Menu Layouts .
We will start with our Default Layout which will be displayed whenever the cafe is closed and needs to be viewable by passers-by through the cafe window. This last point is an important practical consideration when planning the design text and visual elements must be visible, and readable. Text, in particular, must be of a sufficient size to be read at a distance.
In this process, we will add a background Image , a Text area, a Clock , and an Image Slideshow to the Layout .
The choice of a background Image is important for any project like this. If your main aim is to provide information then do avoid using busy backgrounds that may make the text difficult to read. Instead ensure your background provides clear areas where you can add content.
We have used a custom background for this tutorial, and have provided a resource archive of graphics for use in this section which can be downloaded here. Once downloaded, extract all the files to a convenient location on your computer.
There are many alternative background images available to use as a free download in our Layout Exchange
Adding Media to the Library
The Images to be used in the Layout need to be added to the CMS Library. You can do this individually as you add them to the Layout, but it is faster and more convenient to add them all in bulk.
- Navigate to the Media page under the Library section on the CMS Menu.
- Click Add Media .
- Select Add files .
The Upload media form will allow you to upload jpg, jpeg, png, bmp, gif files up to the maximum size configured by your Administrator.
- Navigate to the tutorial resource file folder that you downloaded onto your computer.
- Hold down the Control key (to allow the selection of multiple files) and select the following files: “Riverside_Cafe_Background.png”, “Coffee.png”, “Full English.png”, Wholewheat waffle.png, “strawberry waffle.png”.
- In the Tags field type ‘cafe’, (this will make it easier to find these files later)!
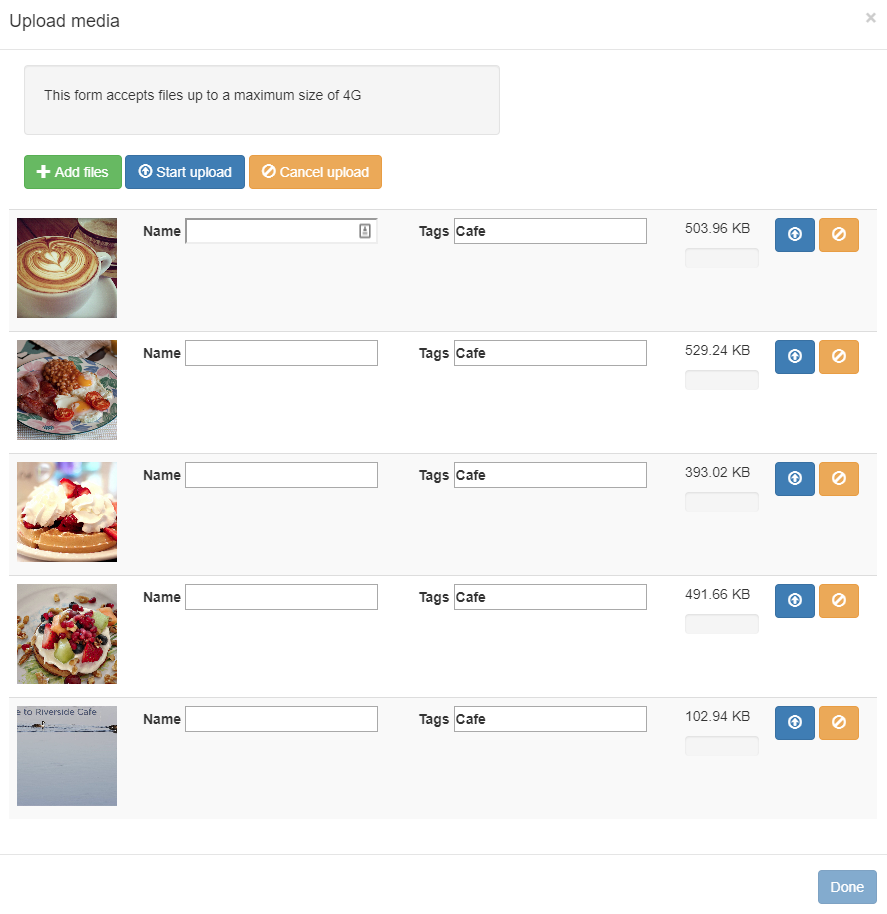
- Click on Start upload .
- Done
Your Library should now include all the uploaded files, available for use in your Layouts.
First, we will add the background image:
We can now add a background image to our Default Layout to replace the existing white background we currently have:
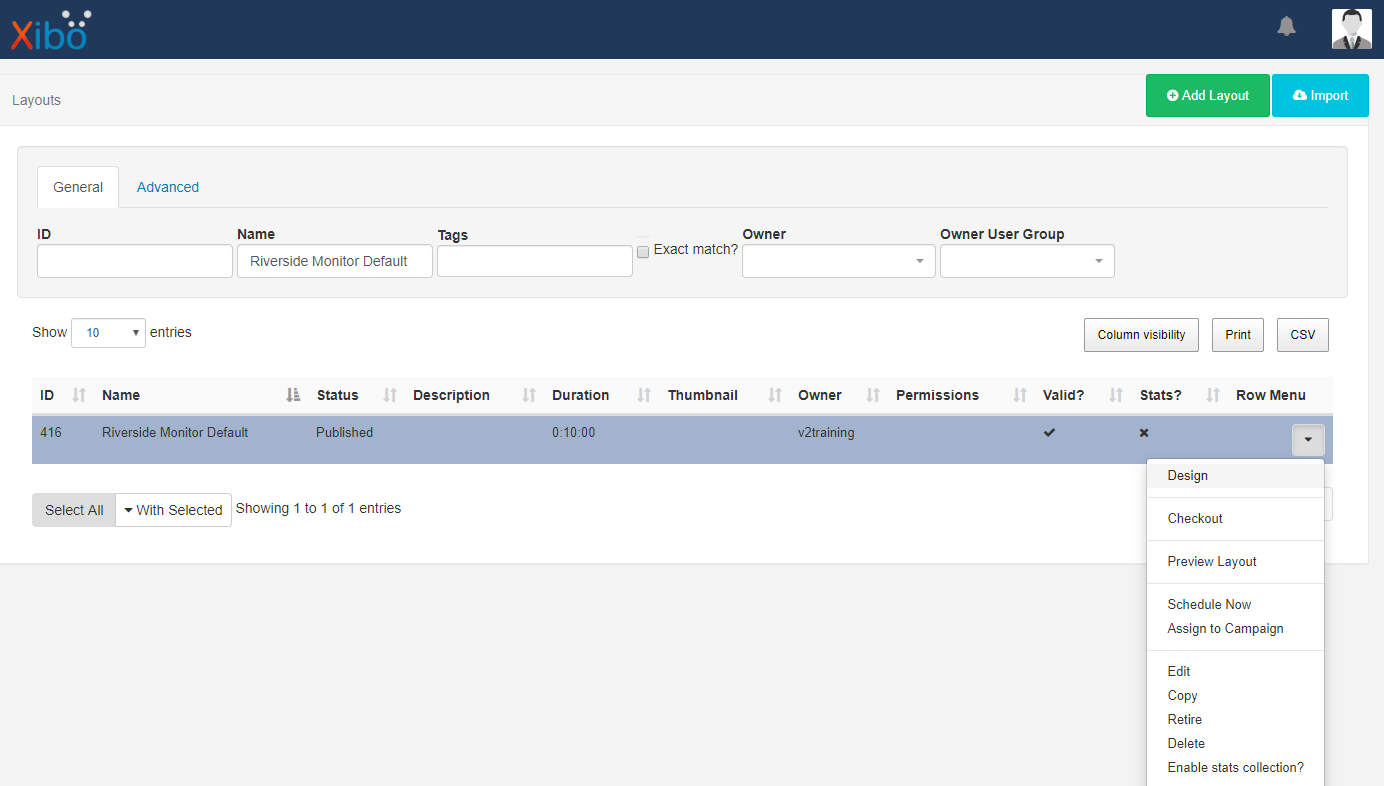
- Go to the Layouts page under the Design section of the Menu and click on the row menu of the Riverside Monitor Default Layout .
- Select Design .
- Checkout to enable editing.
- Use the Edit Layout form to select ‘Riverside_Cafe_Background.jpg’ from the dropdown menu in the Background Image field.
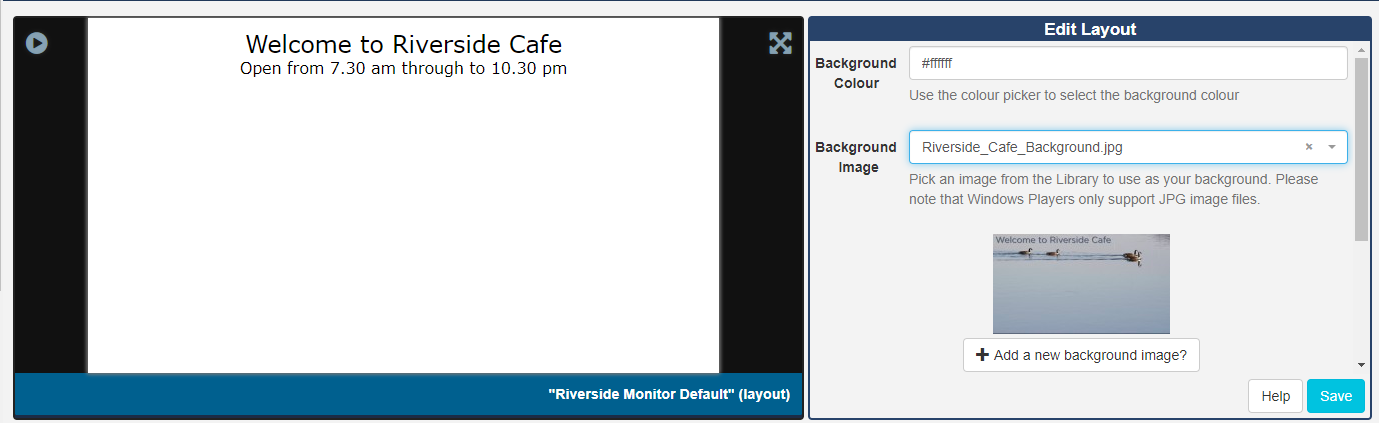
- Save.
The background image should now completely fill the Layout.
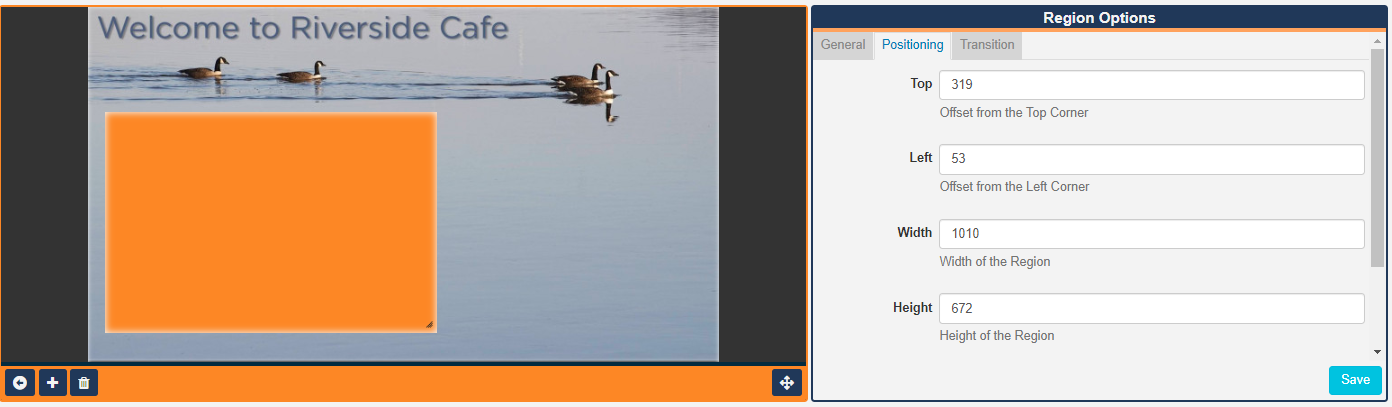
Now we need to edit the Region on the Layout and resize:
- Click on the ‘edit’ icon located in the bottom left hand corner of the viewer to open the Layout Editor.
- Click anywhere inside the Region to edit and open the Region Options form.
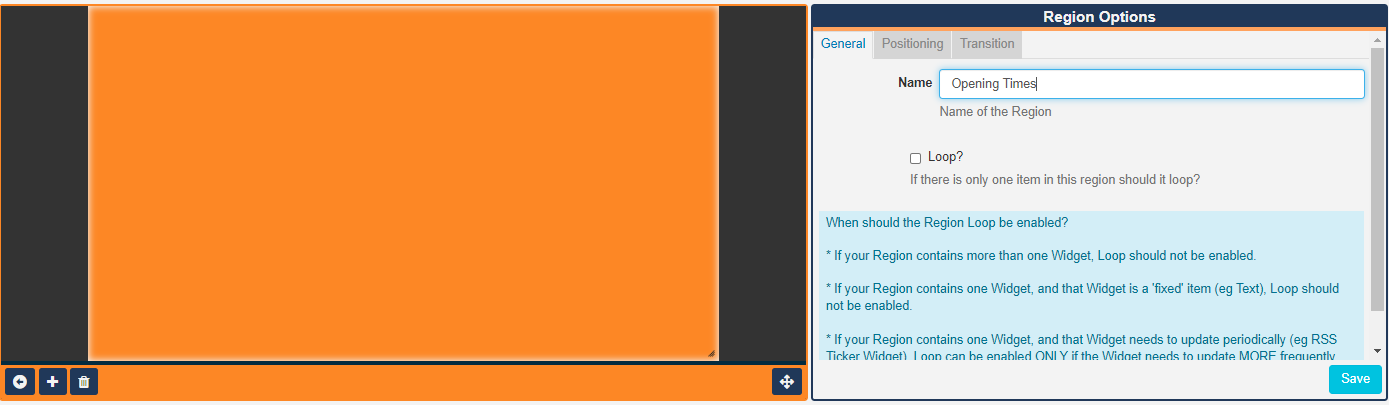
- Give the Region a Name - ‘Opening Times’
- Click on the Positioning tab and enter the following in the appropriate fields:
Top - 340
Left - 55
Width - 914
Height - 698 - Save
- Click on the back arrow in the bottom left corner of the viewer to return to the Layout View.
Now lets edit the Text :
- Click on the Text Widget on the Layout Timeline.
- And then click on the edit icon on the viewer to open the inline editor.
- Delete all of the existing text so you can start with a blank canvas.
- Copy and paste the following into the inline editor:
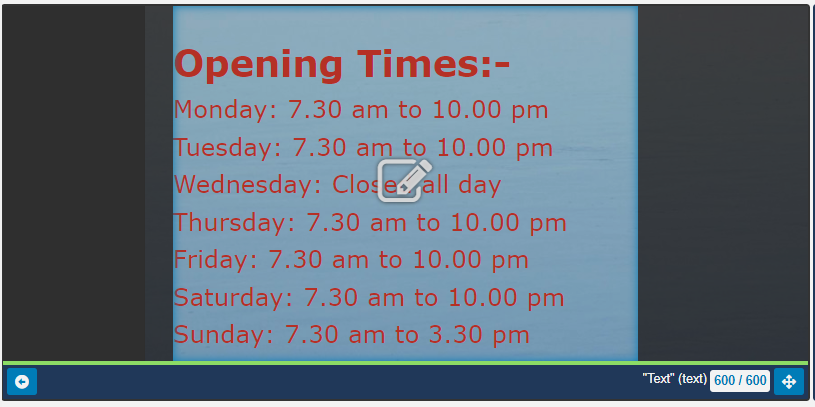
Opening Times:-
Monday: 7.30 am to 10.00 pm
Tuesday: 7.30 am to 10.00 pm
Wednesday: Closed all day
Thursday: 7.30 am to 10.00 pm
Friday: 7.30 am to 10.00 pm
Saturday: 7.30 am to 10.00 pm
Sunday: 7.30 am to 3.30 pm
- Highlight all the text and use the text editor to do the following:
Align = Left
Font = Verdana
Size = 48px
Text Colour = #cc3300 (click on ‘More Colours’ on the colour selector) - Select the top line of the text ‘Opening Times:-’’ and select ‘Bold’ and set the Size as ‘72 px’.
- Save.
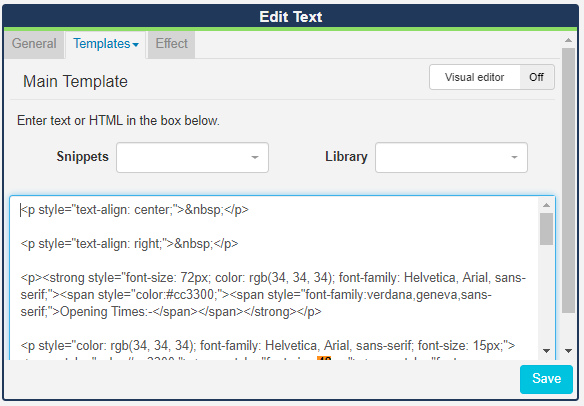
Now we can edit the HTML source code which will allow you to fine-tune the formatting and add more advanced code. In this particular case, we would like to select a font size other than the options provided by the inline editors dropdown list:
- Click on Templates on the Edit Text form and select Main from the drop down menu.
- Click on the Visual editor button to toggle off and show the HTML source code below.
- Use the search tool to highlight all instances of ‘48px’, the current size of the main body text. Change these all to ‘52px’.
- Save.
- Click the back arrow, in the bottom corner of the viewer to return to the Layout View.
We can now take a look at our Layout and ensure that everything is as it should be.
Click on the play icon to Preview.
We now need to add an Image slideshow to the Layout, so first we need to add another Region:
- Click on the edit icon of the viewer to open the Layout Editor mode.
- Click on the + button to add another Region to the Layout.
- Name this Region ‘Image slide show’
- From the Positioning tab enter the following:
Top = 456
Left = 1132
Width = 640
Height = 480 - Save
- Your Region will update its position and re size as shown

- Click on the back arrow to exit the editor and return to the Layout View.
We can now add some media files to this new Region using the Library Search function:
- Click on the Library Search button on the bottom toolbar.
- In the Tag field enter ‘cafe’ and enter.
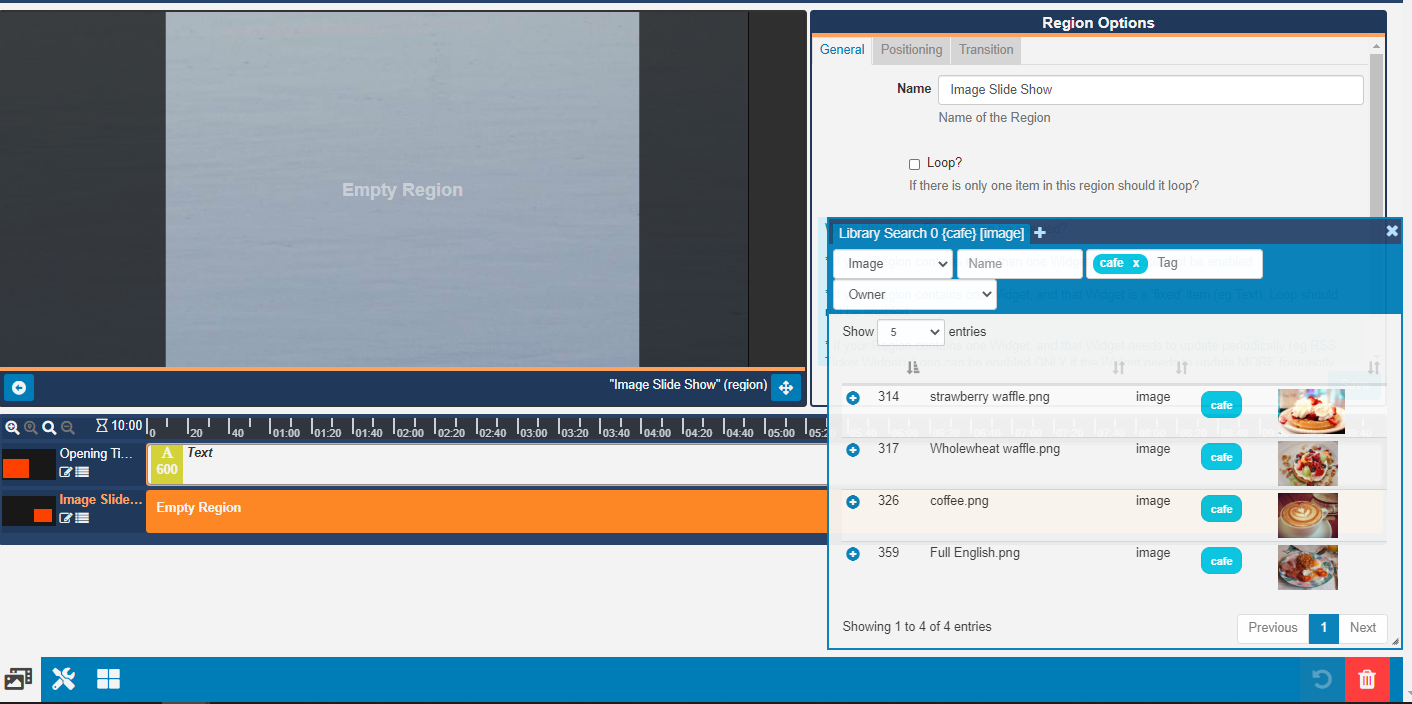
You can move the Library Search window to anywhere on your screen as well as resizing the window to suit you!
- Click on the blue cross to select the image file and add it to a media queue.
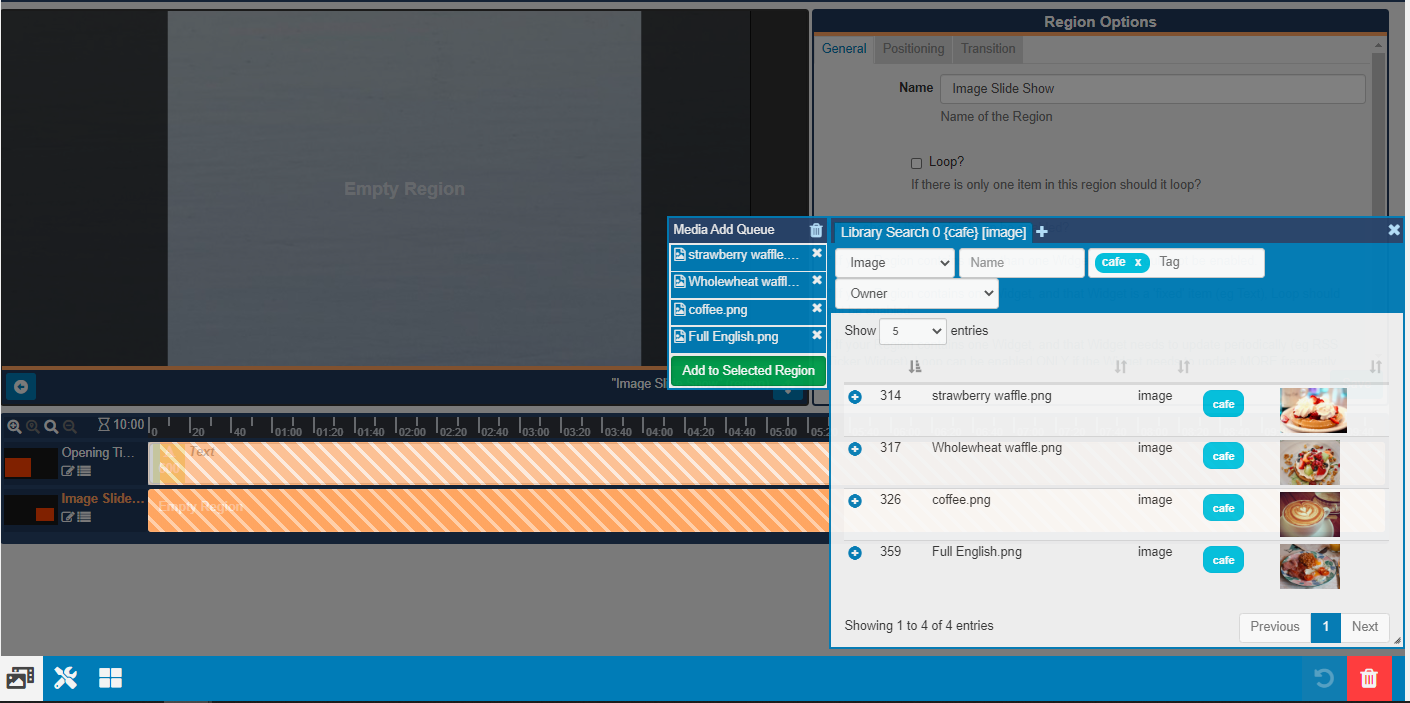
- Click in the lower empty Region to add the queued media.
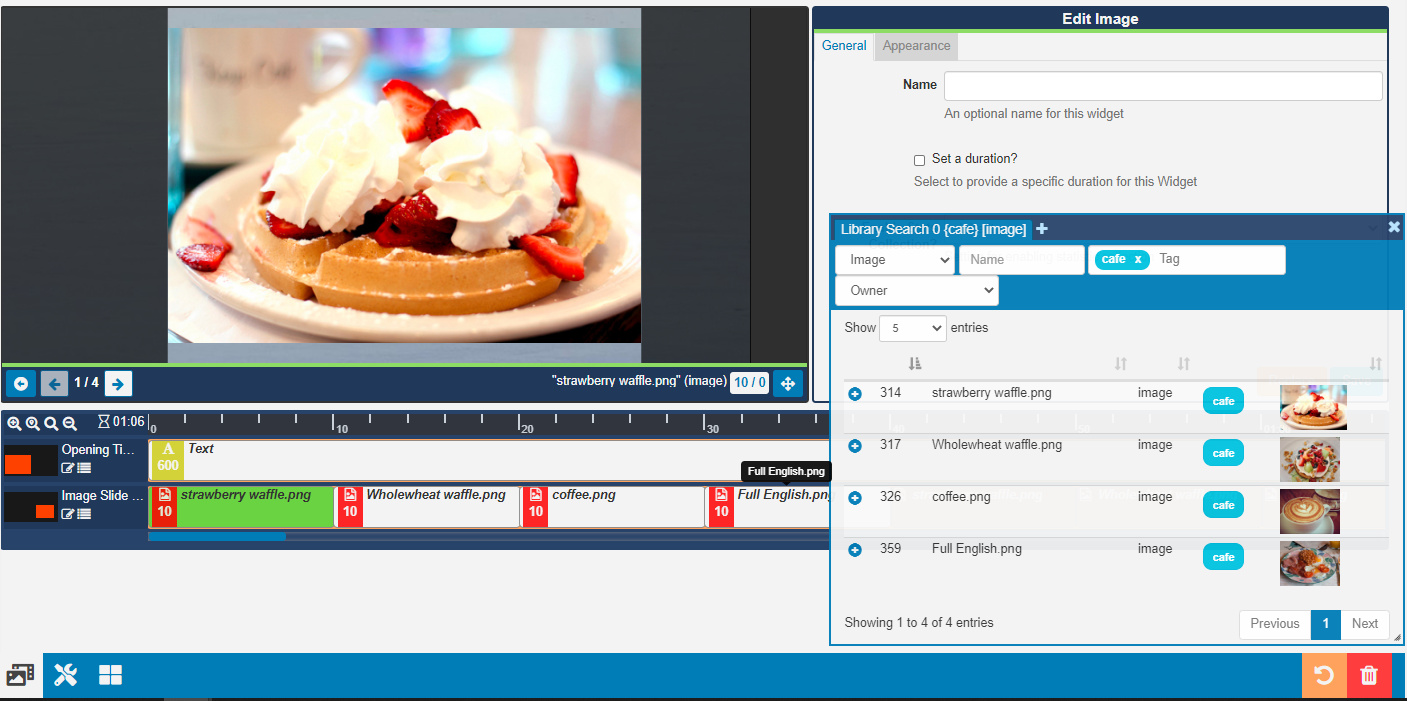
Once added, close down the Library search window.
The Layout Timeline shows the four images in the sequence that they will be displayed. To change the order, simply drag the Images to their new position in the list, or right click and use the arrow keys.
You can change default durations and edit various other aspects of how they will display, by clicking on the Image Widget and using the available Edit Options.
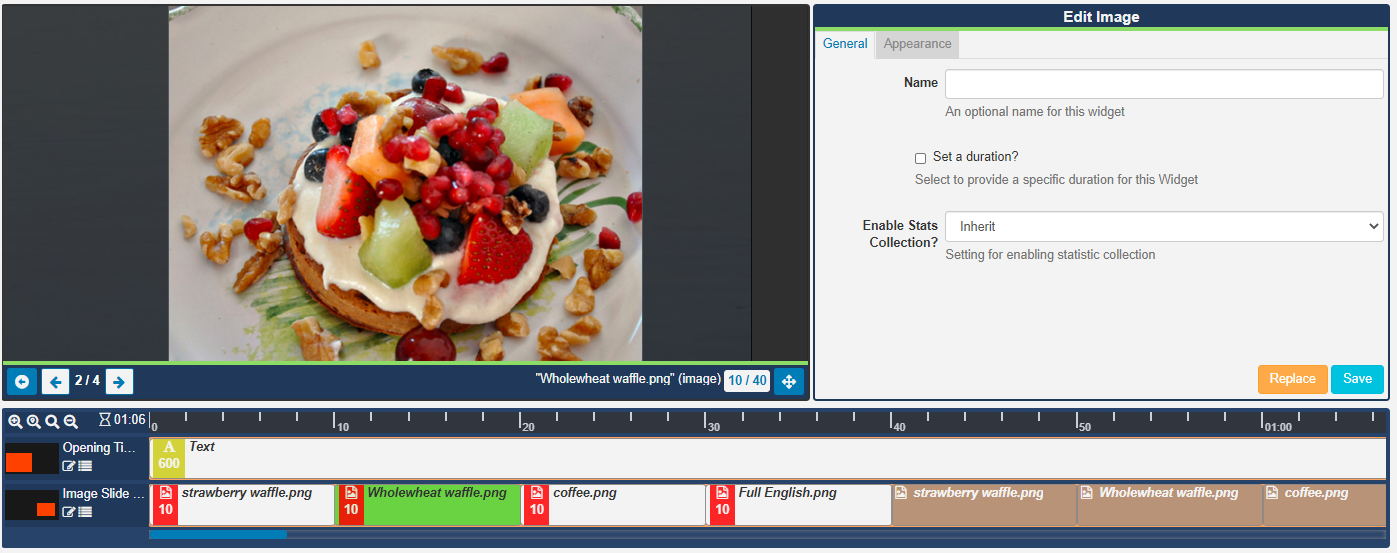
Use the arrows in the bottom left corner of the viewer to scroll through the Images to view. Click on the back arrow and to play a Preview of the full Layout to check that the slideshow images show as intended.
Now we want to add a Clock to the Layout, to display in its own Region:
- Click the arrow to return to the Layout View
- Click on the edit icon to open Edit Layout mode.
- Click on the + button to add another Region.
- Name this Region ‘Clock’
- From the Positioning tab enter the following:
Top = 952
Left = 1194
Width = 504
Height = 110 - Save
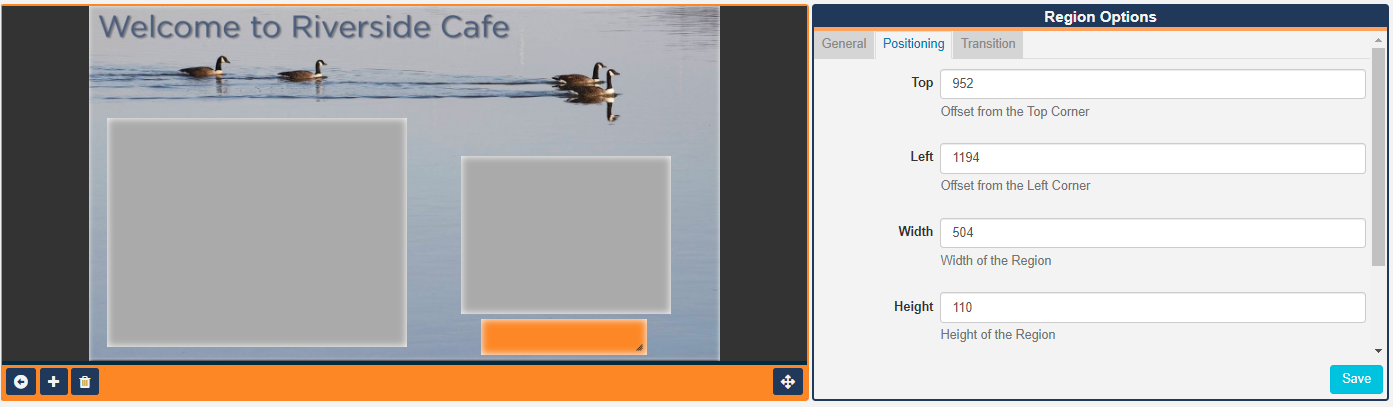
- Use the arrow to exit the editor and return to the Layout View.
- Click on Widgets on the bottom toolbar and navigate to the Clock Widget.
- Click or drag to add to the empty Region.
- Tick the Set a duration box and set duration to 30 seconds.
- From the Appearance tab, set the Clock Type to Digital.
- Click on the Editor tab and click on the Visual Editor button to toggle on.
- Click on the edit icon in the Preview window to open the editor and which should show [HH:mm:ss] to provide a 6 digit display showing the current hours, minutes and seconds.
- Highlight all of this text and set the following using the text editor; Bold, Align Centre, Font = Verdana, Font Size = 72px.

14. Save
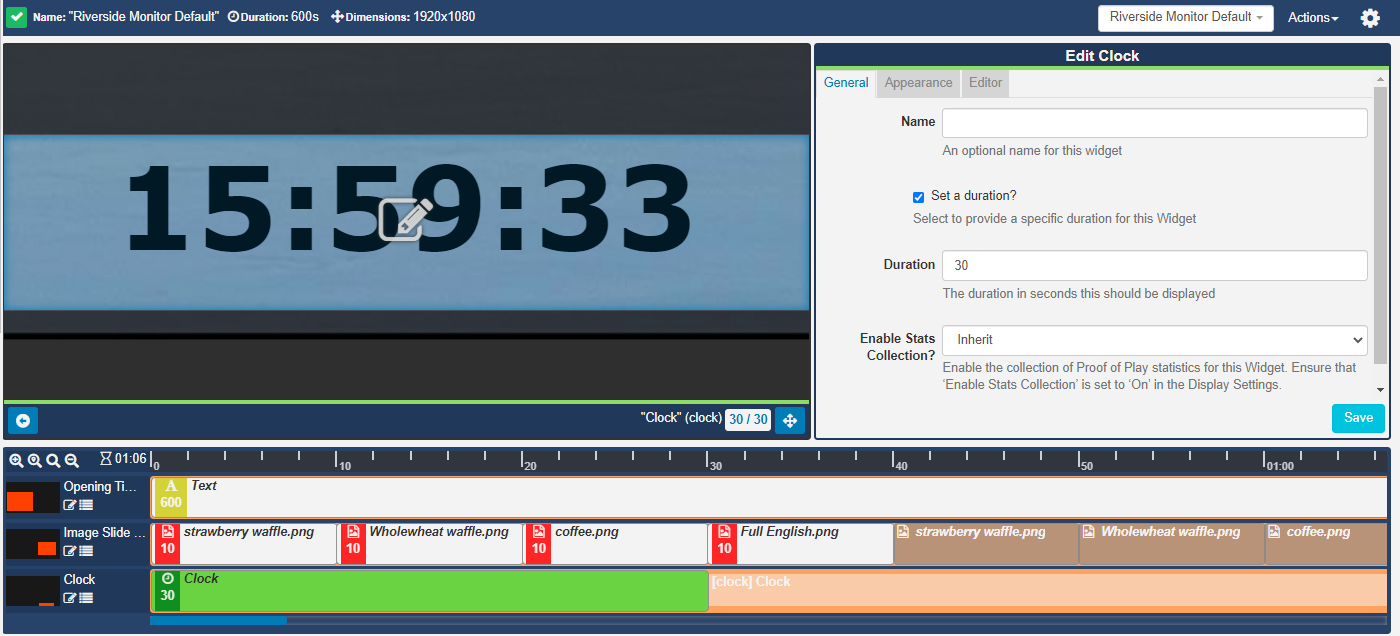
Click on the back arrow to see the entire Layout design, and Preview to make sure that everything is showing as it should.
Use the Actions menu to Publish the Layout so that we can check to ensure that the Layout is working correctly on the Display:
- Once Published, select Schedule Now from the Actions tab.
- The Layout to show should already be selected ’ Riverside Monitor Default’
- In the Minutes field enter 10
- Select the Display
- Set a Priority value to override other scheduled Layouts
- Save.
This should complete the creation of the Default Layout, which will now show at all times that the Cafe is closed when no other Layouts are scheduled.
10. Further Layout design – creating the Breakfast Menu
We can now move on to create the Breakfast Menu Layout . This will make use of the same background image that we used for the default screen and will contain a single text region for the actual menu, alongside a slideshow of breakfast menu items.
The design requirements for this Layout are different to those of the Default Layout as this is intended to be read by customers as they place their order at the Point Of Sale. This means we can make use of smaller text, and because of this, the information density of the display can be much higher.
Exercise:
Checkout the Riverside Cafe – Breakfast Layout that was created in the first exercise and do the following:
-
Add the Background Image ‘Riverside_Cafe_Background.png’ to the Layout.
-
Resize and reposition the existing Region as follows:
Name = Breakfast Menu
Top =319
Left = 53
Width = 1010
Height = 672.
- Click the arrow to exit edit mode.
Importing HTML Formatted Text
The big advantage of using HTML based text regions, apart from providing access to unlimited formatting options, is that there are many third-party applications that can be used to produce HTML code which can be easily added using the text editor.
This means display content can be created and edited by a third party without any need to access the Xibo CMS. Information can be edited in office applications such as MS Word or any one of a number of dedicated HTML editors. Once the editing is complete all the author needs do is email the file to you so that you can insert it in the appropriate place using the Xibo CMS.
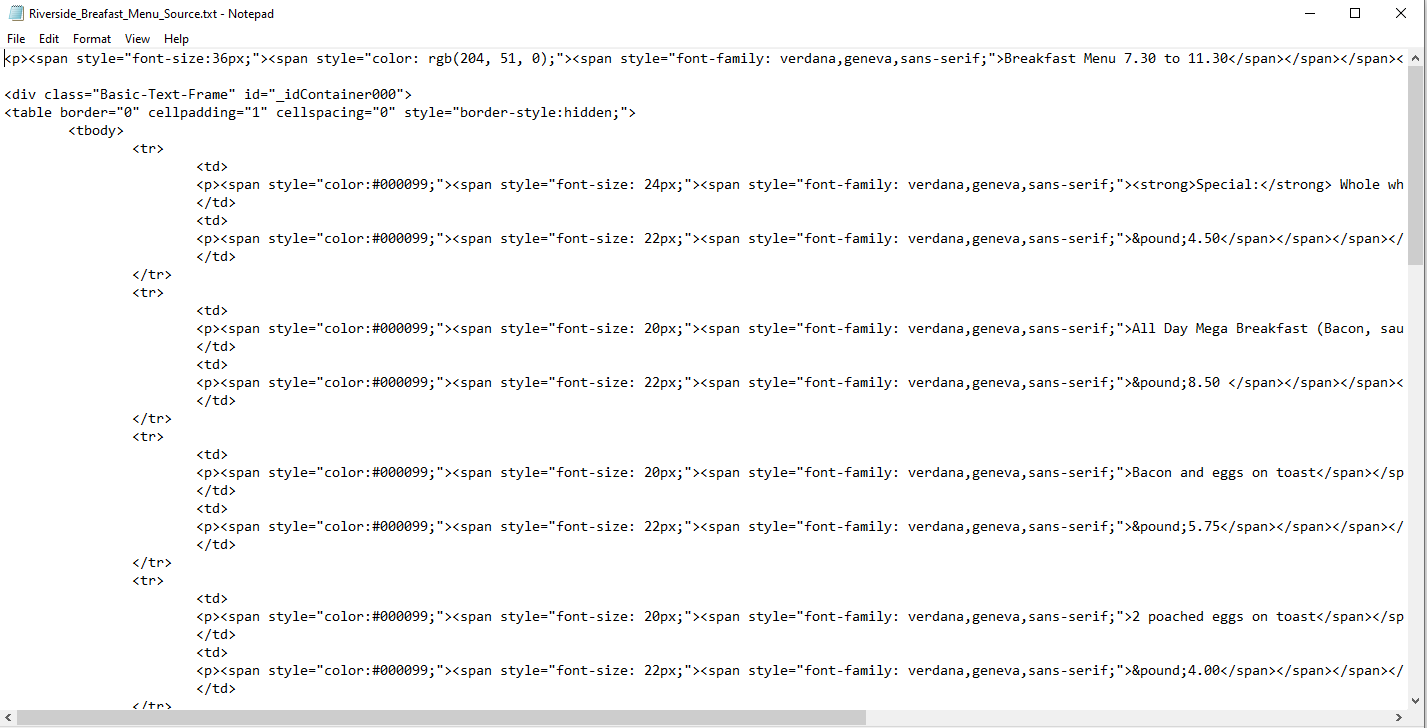
To demonstrate this we have provided a text file called ‘Riverside_Breafast_Menu_Source.txt’, which can be found in the tutorial resources folder.
Please Note: To do this reliably you need to open the source file in a pure text editor such as, on Windows machine, Notepad. Do not use a word processor such as Word, as this may attempt to add additional formatting code to the document.
Now we can edit the Breakfast menu Text Region:
- Click in the Text Region on the Layout Timeline to open the Edit Text form.
- Select the Templates header and click on Main . Ensure that the Visual editor is toggled Off so that we can use the HTML box.
- Delete the existing code.
- Open the ‘Riverside_Breakfast_Menu_Source.txt’ file in a text editor application (such as Notepad).
- Select all of the text in the document and then Copy (or use the Ctrl C keyboard shortcut).
- Paste the source code into the HTML box.
- Save .
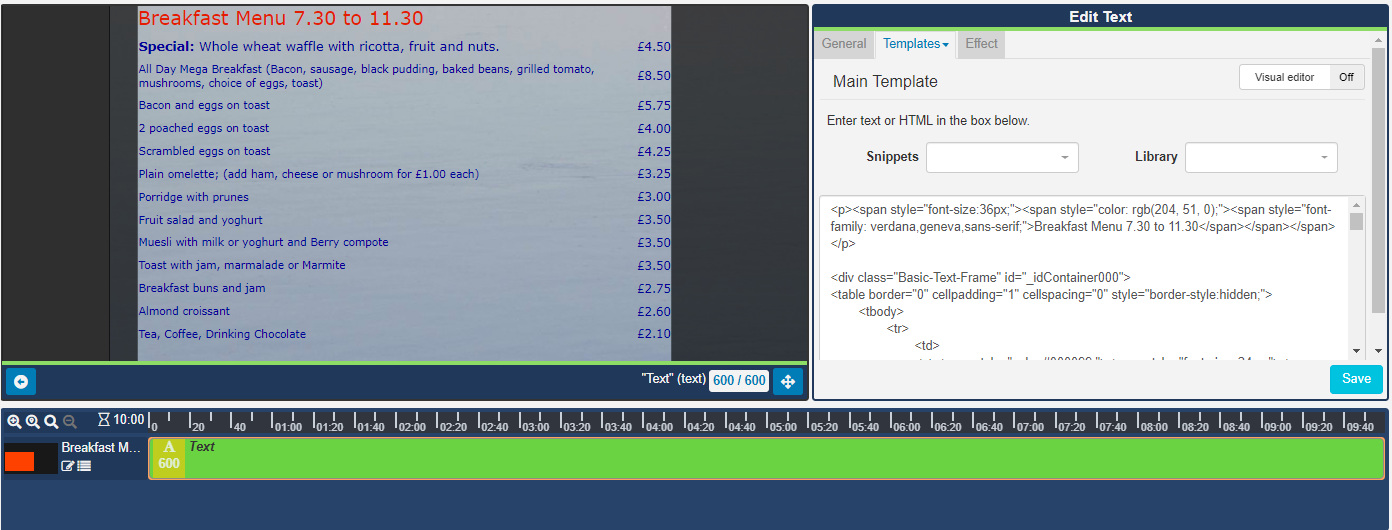
The Preview window will now show a fully formatted menu containing a table of breakfast items and their prices.
It is a worthwhile exercise to study the source code for this menu listing to see how it is formatted. You will notice that the list of items and prices is comprised of a table. This is a very convenient way of formatting this kind of information, particularly because it makes it very easy to easy to align the columns.
The final touch is to add a slideshow to the Layout
Exercise:
To do this create a new Region in the Layout and resize and reposition it as follows:
Name = Breakfast Slideshow
Top =384
Left = 1113
Width = 722
Height = 540
Now add only the breakfast item Images to create a slideshow similar to the one used in the Default Layout.
11. Next steps
You should now have a fairly good grasp of how to use the Xibo CMS to create and schedule dynamically changing signs. However, it is important to realise that we have only touched on a small part of the software’s capabilities here. There are many other aspects to explore.
There are many different ways of achieving these results and what we have shown you is by no means the only or best way of doing this. We encourage you to experiment with both the methods and workflow to find your optimum way of working.
Additional help available now:
https://community.xibo.org.uk/
Photo Credits
Images used for this tutorial:
Photo: Riverside Cafe by Graham Wyatt CC (www.gpwyatt.co.uk)
Photo: Breakfast at Keys by JFXie CC flickr.com – Converted to PNG format
(Breakfast at Keys | Out for breakfast before school with som… | JFXie | Flickr)
Photo: The Full English by Neil Conway CC flickr.com – Converted to PNG format
(https://www.flickr.com /photos/neilconway/4460785994)
Photo: breakfast by Meg Lessard CC flickr.com – Converted to PNG format