Please note: This guide is for users of a v2.3.x and v3.0.x CMS. Please select from the options below for other versions:
So how do you create a simple Layout?
To create a Layout you need to configure Regions and add content. Follow the steps below to easily create a simple Layout to get you started!
1. Add Layout
From the CMS main menu select Layouts located under the Design section and then Add Layout.
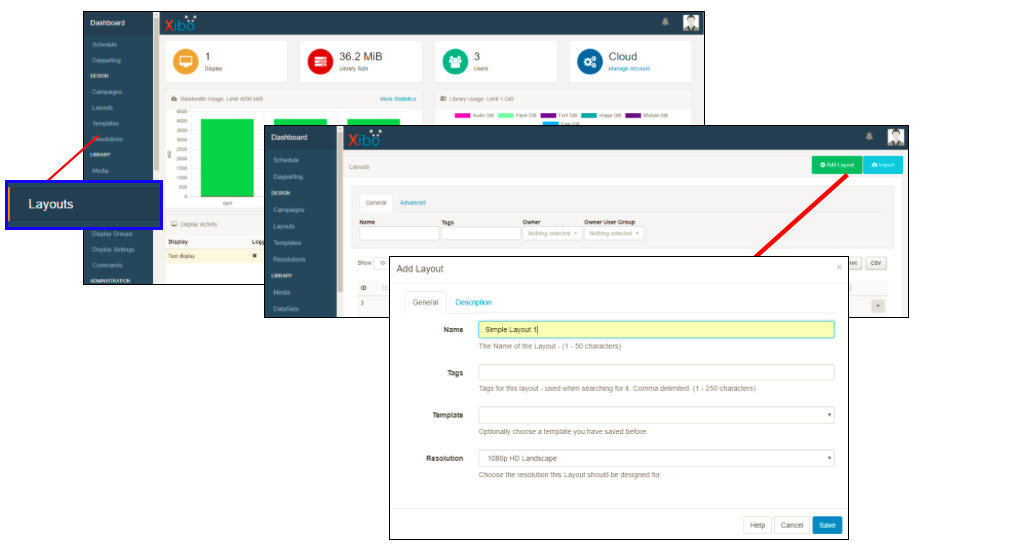
Give your Layout a name, this is for internal identification only and will not be shown anywhere on the Layout itself, Save.
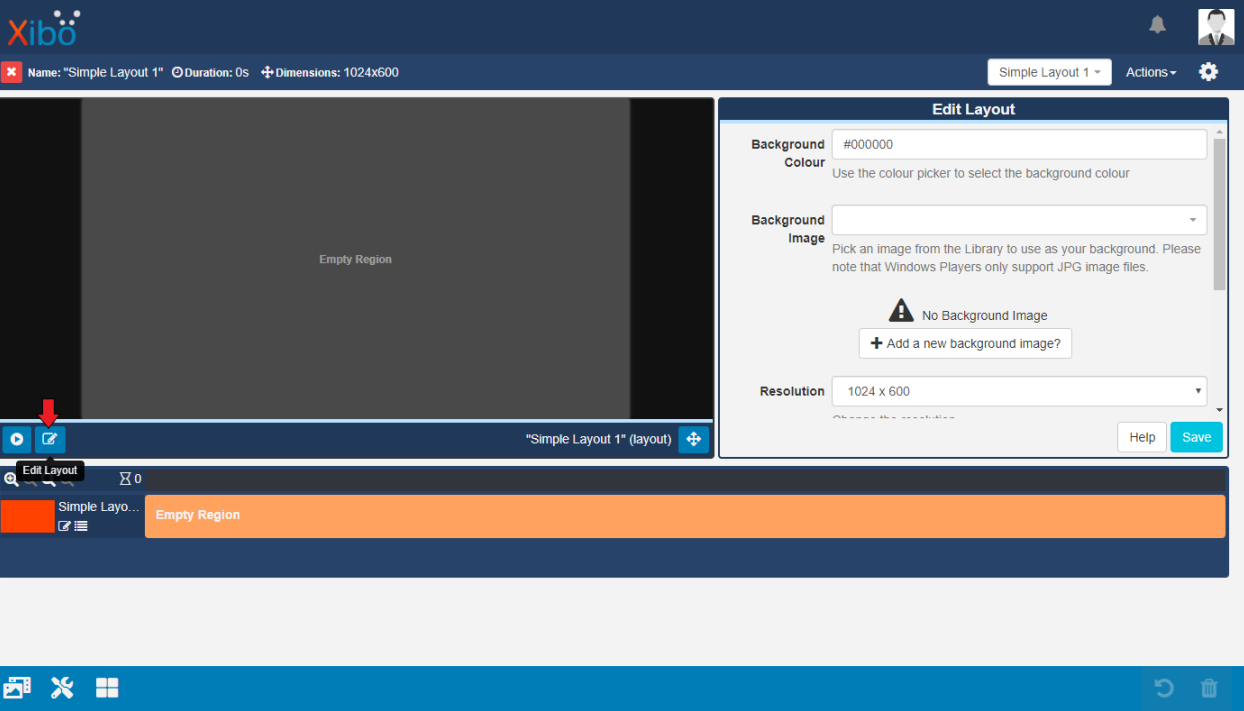
The Layout Designer will open and by default will contain one full-sized empty Region.
2. Configure Regions
Click on the edit icon, situated on the bottom of the Preview window to open the Edit Layout mode.
When in ‘edit’ mode, the bottom bar will be highlighted orange!
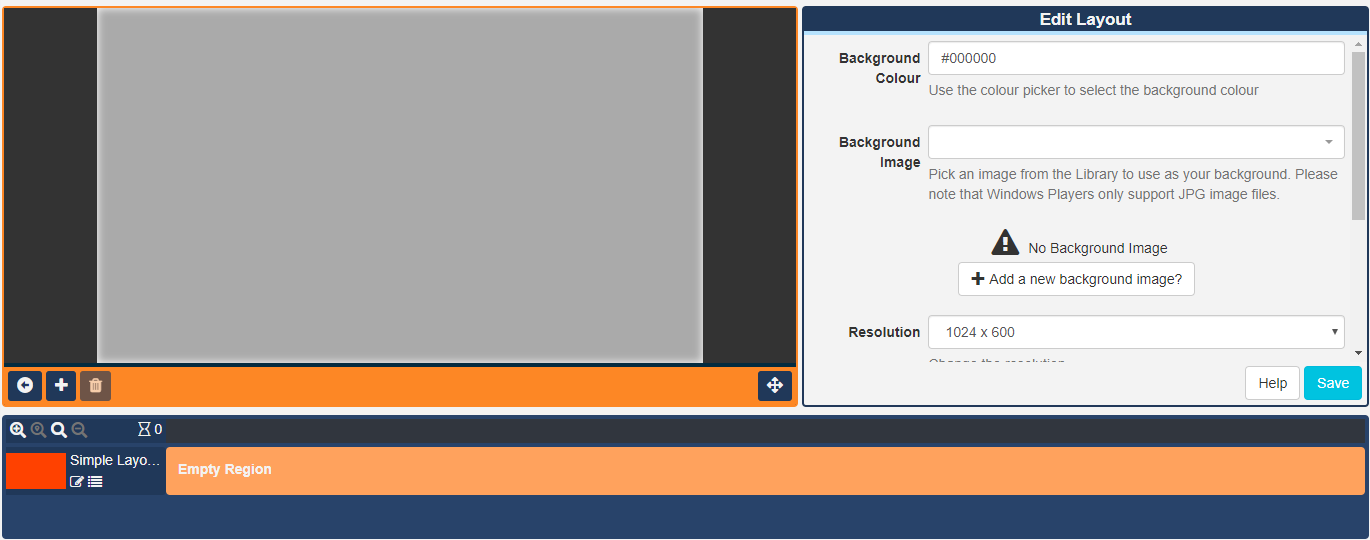
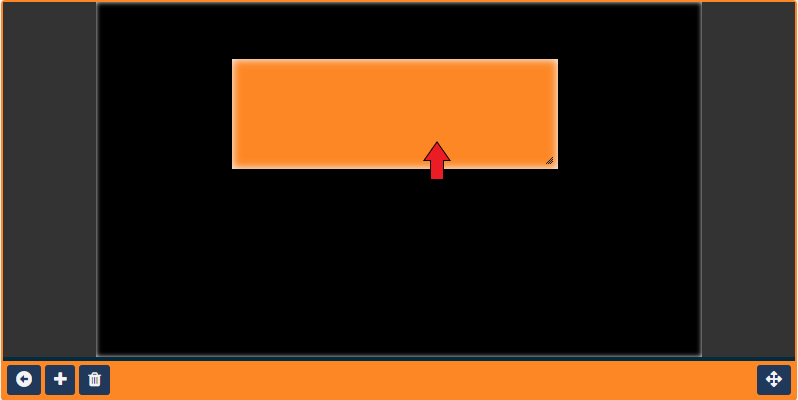
Click anywhere inside the empty Region to make edits to the Region and open the Regions Options form which can be used for precise Positioning and the application of Exit Transitions.
In this example we shall use the resize handle located in the bottom right of the Region. Simply click and drag to resize.
This will reveal the Layout background, which by default is black in colour.
Click anywhere in the Region, and drag to position anywhere on the Layout canvas.
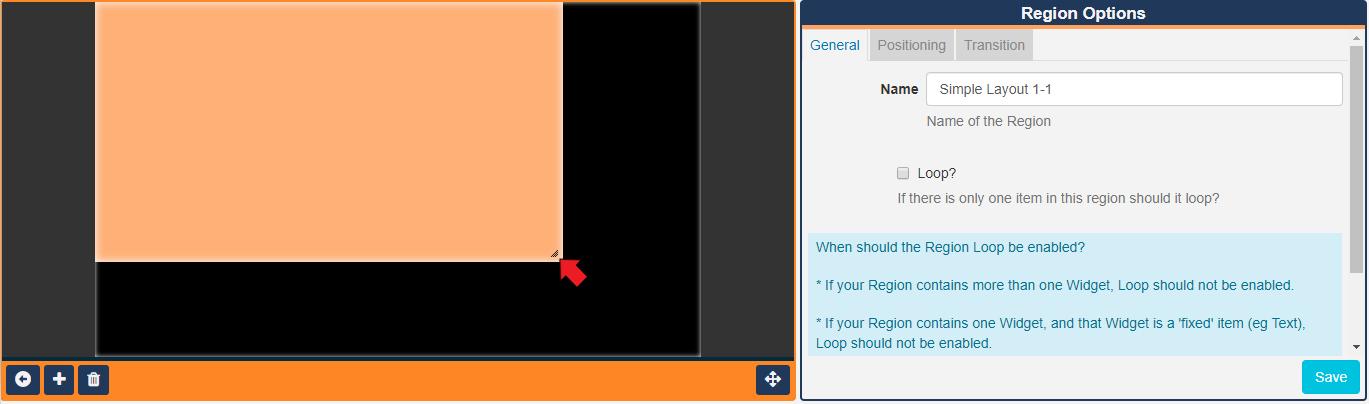
Now add a second Region by clicking on the + button and resize and position this Region.
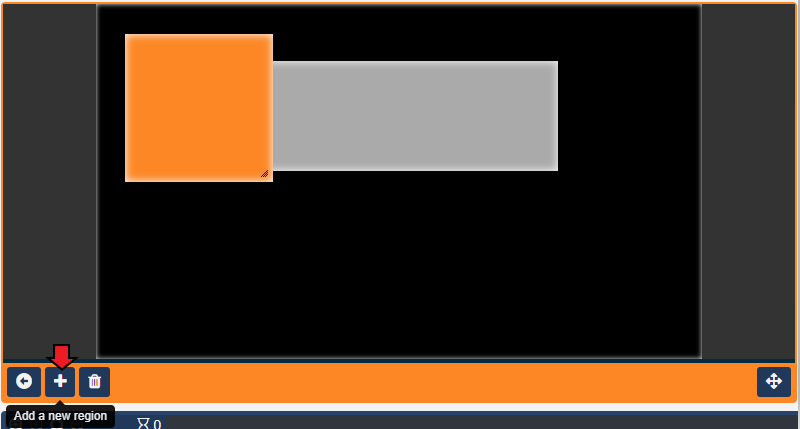
Save using the button on the Region Options form or by clicking anywhere on the canvas to click out of selected Region.
Click on the arrow button, located next to the + button, to return to the Layout View.
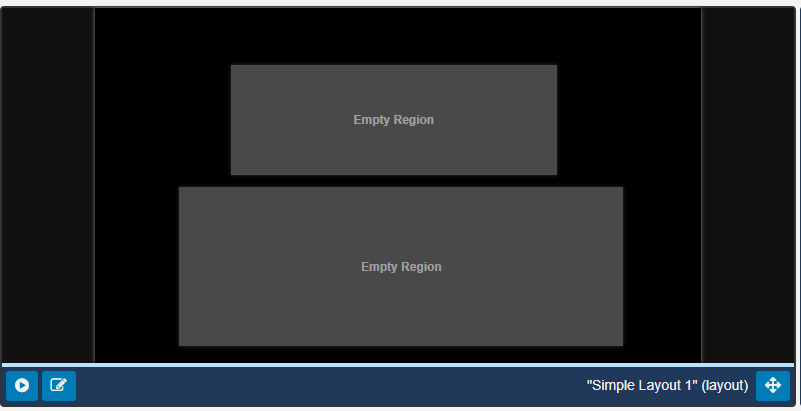
As you are no longer in edit mode the toolbar will change from orange to blue!
Now we have two empty Regions that have been placed on our canvas we can add some content.
3. Add Content
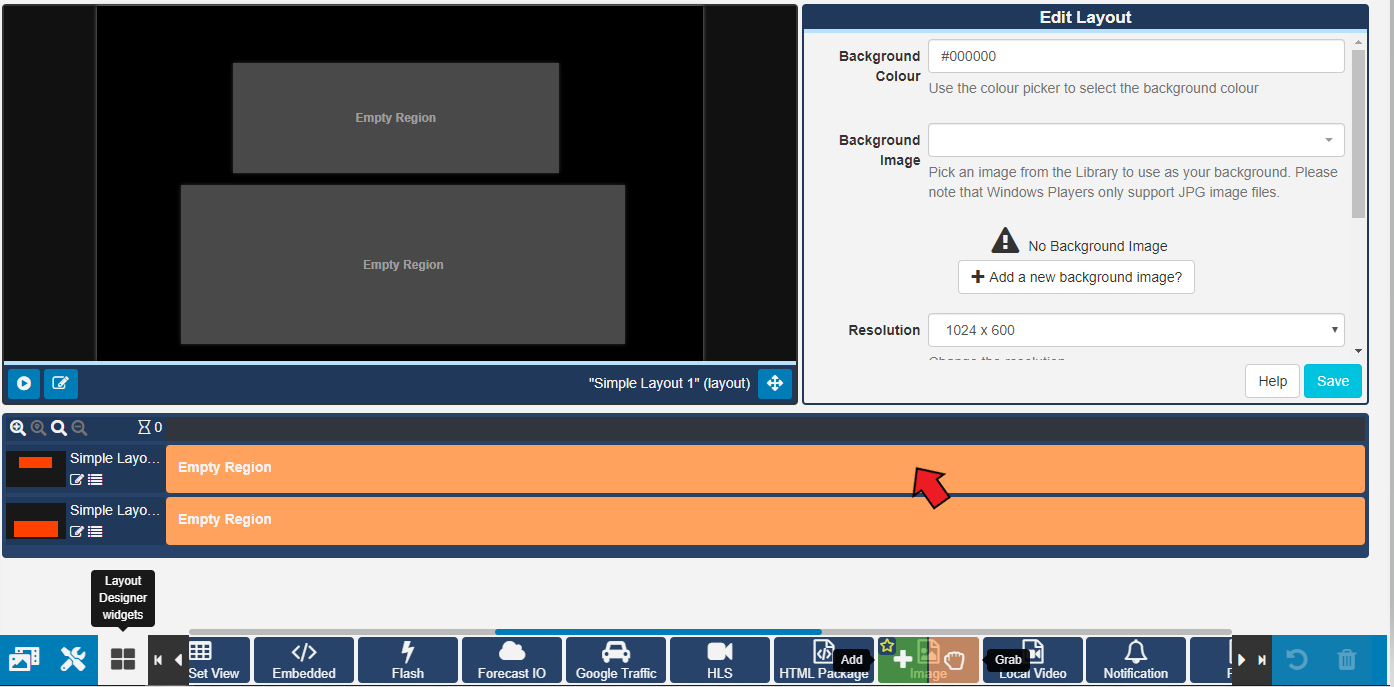
Let’s start by adding an Image to the first Region.
Click on the Widgets button on the bottom toolbar and use the arrows to scroll to locate the Image Widget. Click to Add or Grab to drag and drop and click directly into the top Region on the Timeline.
You can also click to Star and add to your favourites so that the Image Widget would appear at the beginning of the Widget list for easier selection.
The Upload Media form will open, click on Add files and select the image file on your computer you want to upload to the CMS Library. Give it a name so that you can easily identify it in your Library for future use and Start Upload.
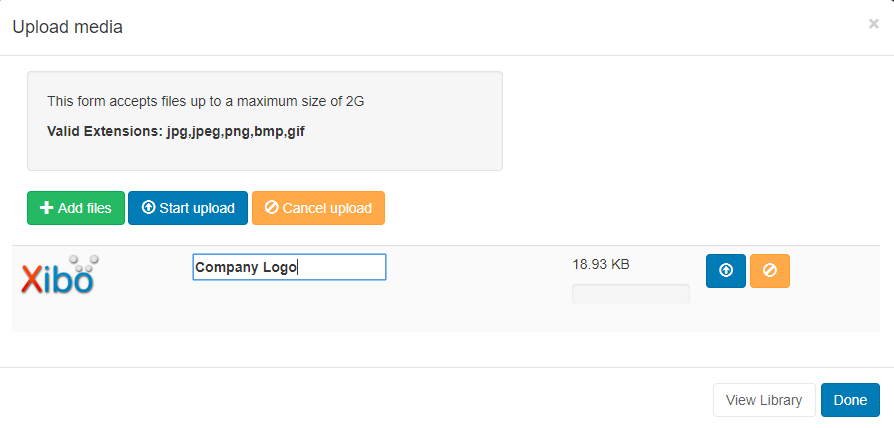
Once uploaded click Done.
Your image will now be added to your Library which can be viewed in your CMS Library and selected to add to further Layouts using the Library Search feature!
Your Layout Timeline will now show that you have added an Image, which in this example has a total duration of 10 seconds.

You will notice that the Layout Status, located on the top toolbar is a red cross, this means that the Layout is invalid and will not play if Scheduled.
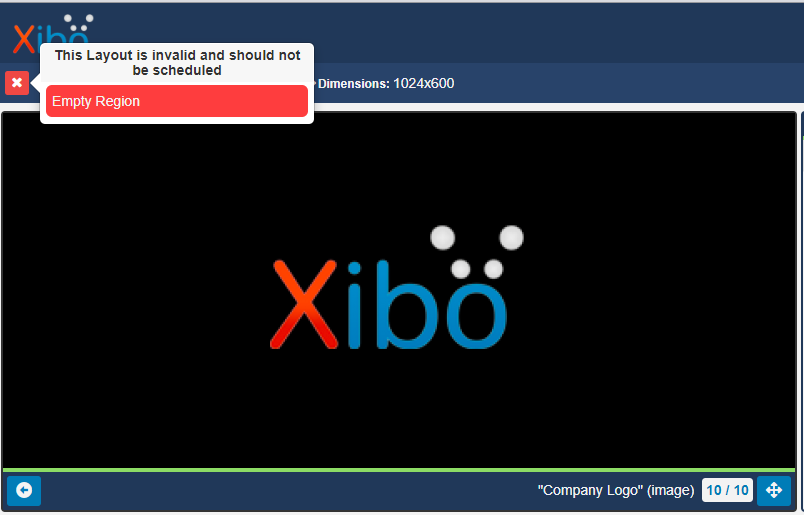
This is because the Layout contains an empty Region, so let’s add something to that second empty Region.
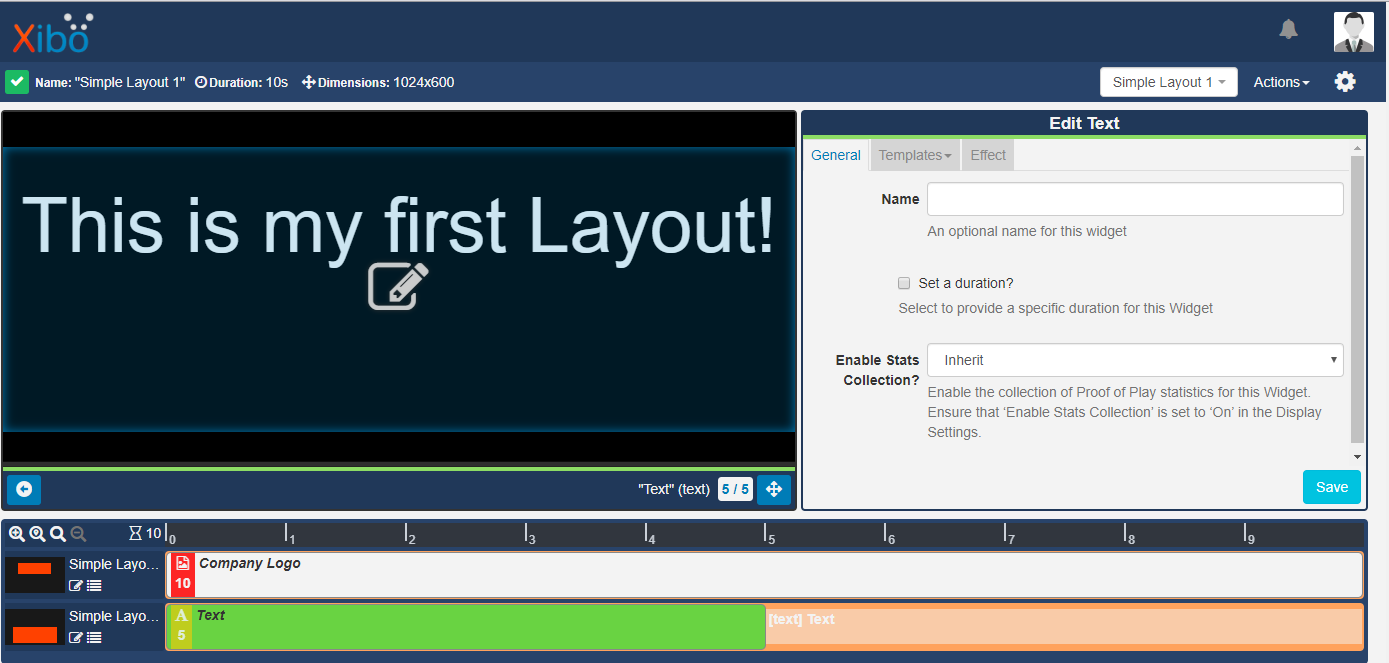
Locate the Text Widget from the bottom toolbar and add it to the empty Region as before.
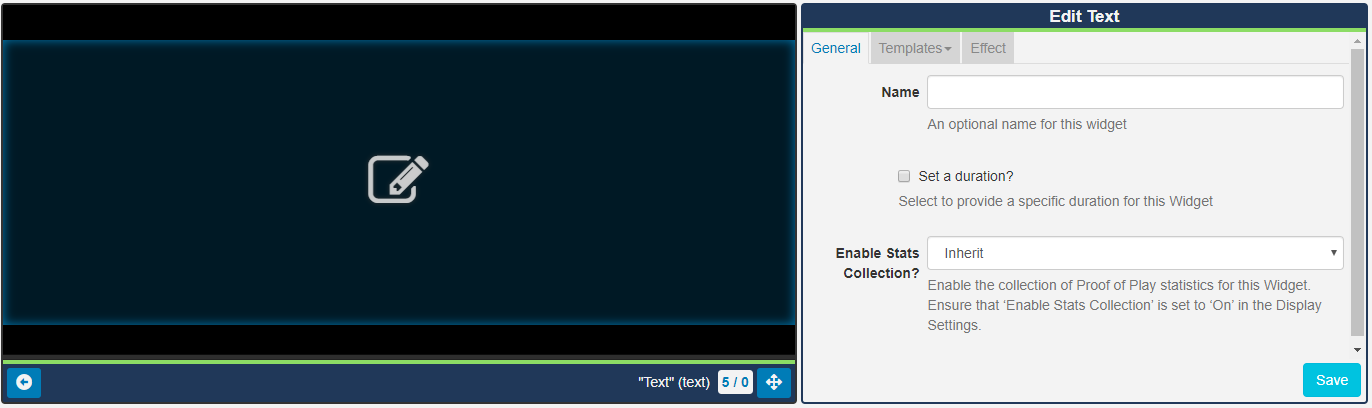
Click on the edit icon on the preview window to open the inline editor.
Enter text and formatting ensuring that you keep your text within the Region borders, shown as thin lines, to ensure that all your text is displayed. Once you are happy, click on the Save button.
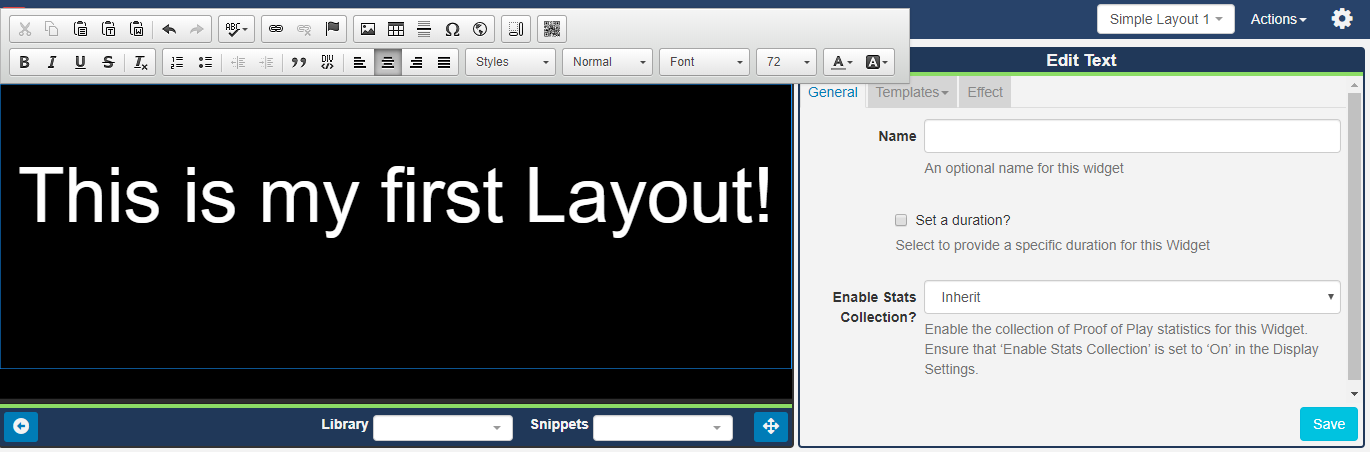
The Layout Timeline will show that your text has been added and the Layout status has now changed to a green tick and would therefore play if Scheduled.
Click the arrow in the left corner of the Preview window to go back to the Layout View.
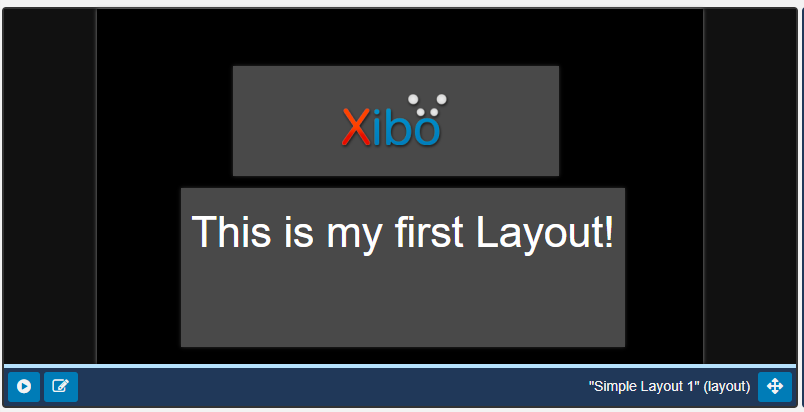
From here you can Preview the Layouts and see exactly how your Layout will play on your displays and make any necessary adjustments to ensure that your content is exactly how you want it!
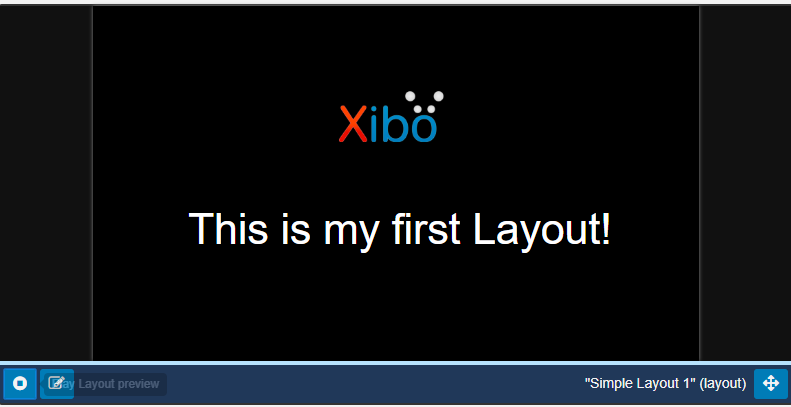
Click to Play the Layout Preview.
The preview will play for the total Layout duration and will show the limits of your display screen as thin borders. Ensure that all your content remains fully visible within these guidelines when played.
You can make the Layout remain on screen for longer by increasing the duration of just one of the media items. This is because all Regions will show content until all other Regions have completed at least one loop, therefore the other media item will remain, even though the duration has not been adjusted.
Click in the Region that contains theText Widget to edit. Tick the Set a duration box and override the time to 30 seconds and Save.

The Layout Timeline will now update to show the Text Widget duration of 30 seconds and as this is now the longest running Region on the Layout the total Layout duration is shown as 30 seconds.
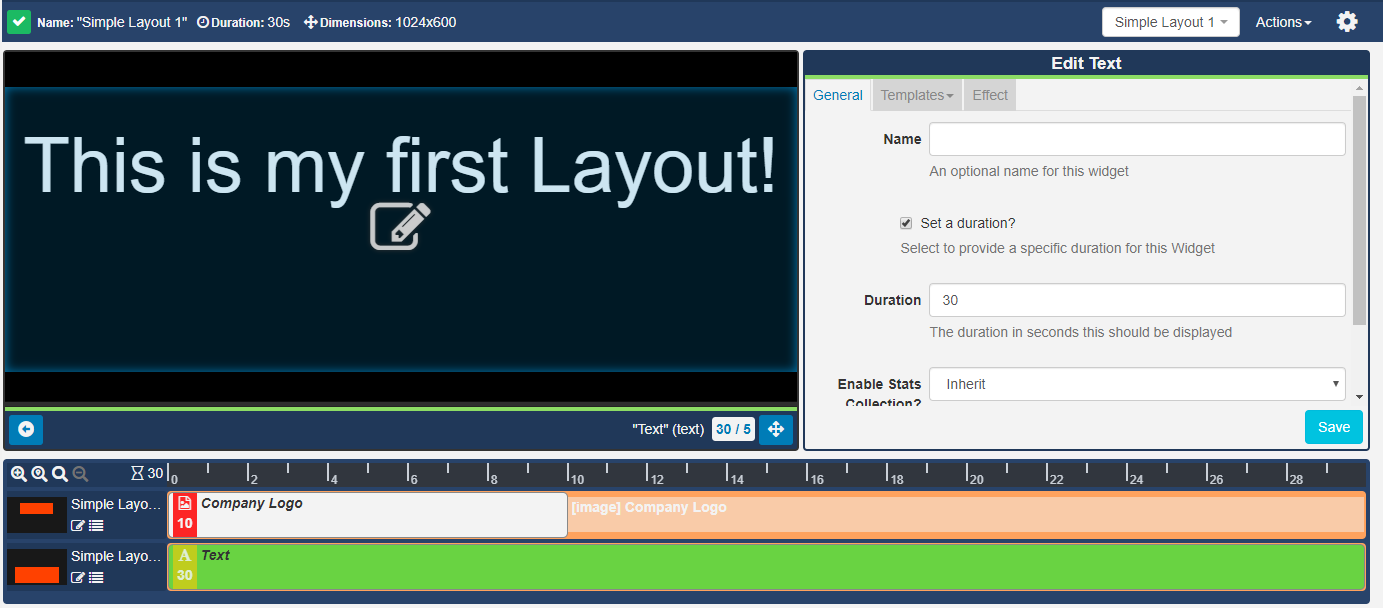
The Layout Timeline also shows that the Image will remain on screen for the duration of the Layout from the greyed out entry displayed.
Click on the arrow on the Preview window to go back to Preview the complete Layout, which will now show that both media items will remain on screen for 30 seconds.
You have successfully created a simple Layout!
Remember to Publish your Layout
Layouts must be set to Publish prior to scheduling to your Displays.

Experiment further
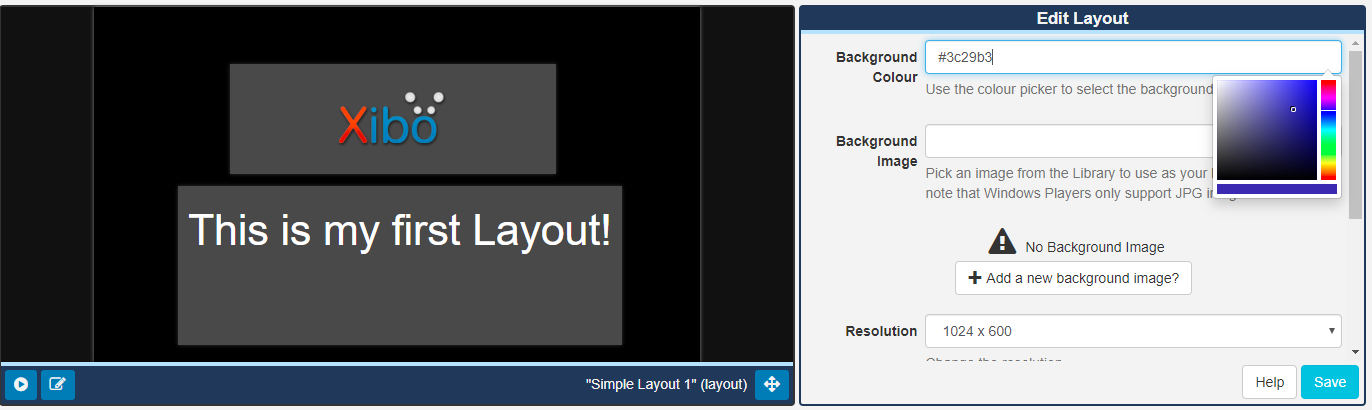
Change the colour of the background of your Layout by using the colour picker to set a background colour or upload an image to use as a background using the Edit Layout form.
Take a look at the many available Widgets and add them to your Layouts.
Follow the following rule…
A Layout must have at least one Region and all Regions on your Layout must hold content.
…to ensure that all your Layouts are ready to Publish and Schedule.
The possibilities are endless…Happy content creating!