With the release of our V4 CMS a few things have changed with existing features and functionality to improve the overall user experience and improve User workflows.
This guide will take existing Users through those changes and explore the User experience in v4!
We have a great post which goes into more detail about the decision making process of how the v4 Layout Editor was shaped here: Layout Editor Evolution in v4
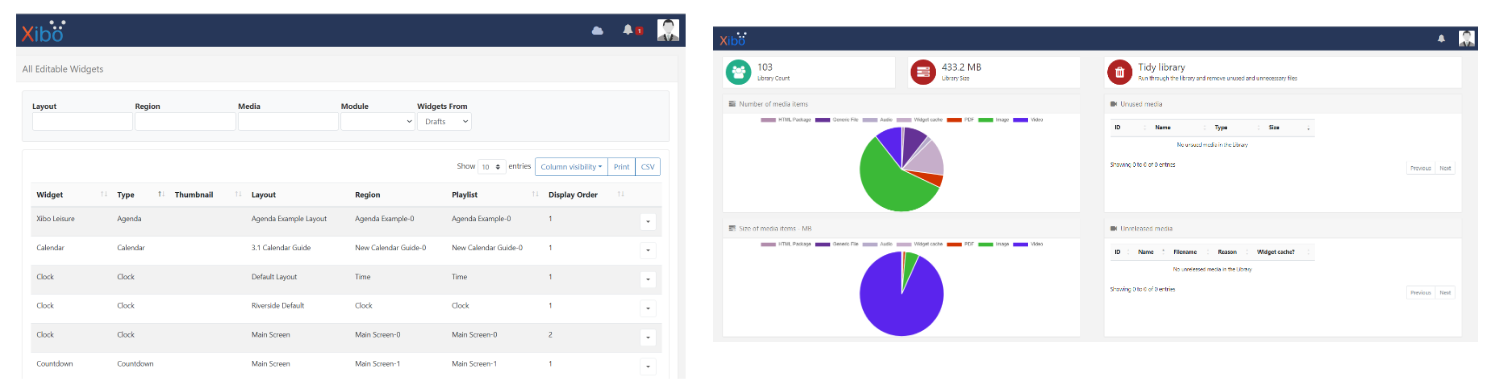
On logging into a v4 CMS you will notice not much has changed, however if you are a User who has been assigned the Media Manager Dashboard you will now have access to an improved Media Dashboard which gives you a helpful overview of the system from the perspective of Media management to easily see number and size of media items as well as showing any unused or unreleased Media held in the Library.
V3 Media Dashboard versus v4 Media Dashboard on the right!
The main focus for v4 was the entire Layout editing experience and so the majority of changes can be found in the Layout Editor (was Layout Designer).
Adding a Layout
Looking at the journey of a User who wants to create a Layout in earlier versions, on clicking the Add Layout button Users are presented with options that must be completed before saving to open the Layout (Designer).
Workflow in V3: Add Layout > Select Layout Template > Complete form > Open Layout Designer.
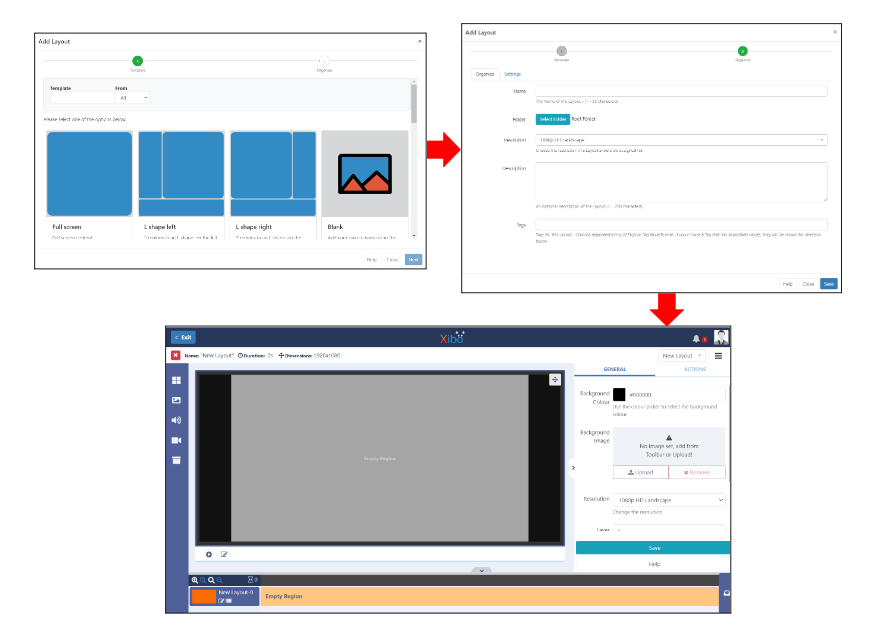
In v4, on clicking the Add Layout button you are now taken straight to the Layout Editor with a blank canvas, so you can get started with adding content right from the start.
NEW v4 Workflow: Add Layout > Open Layout Editor
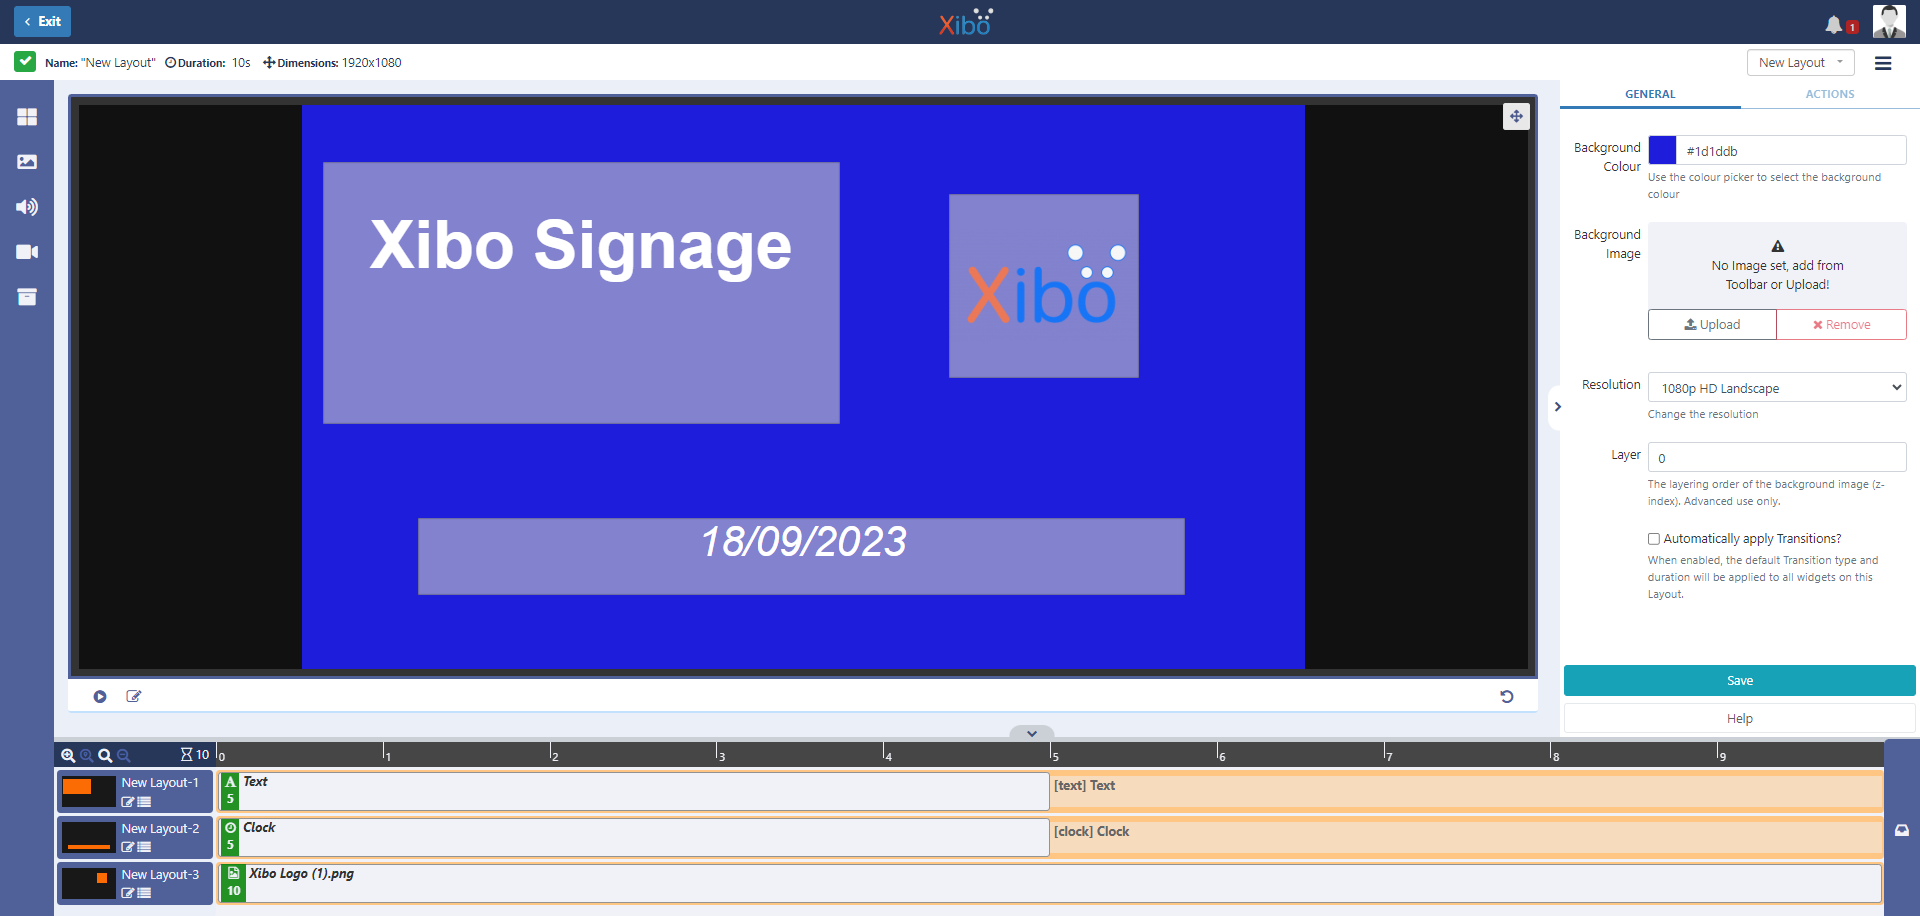
The Layout Resolution and Transition Defaults can be set using the Layout options in the Properties Panel.
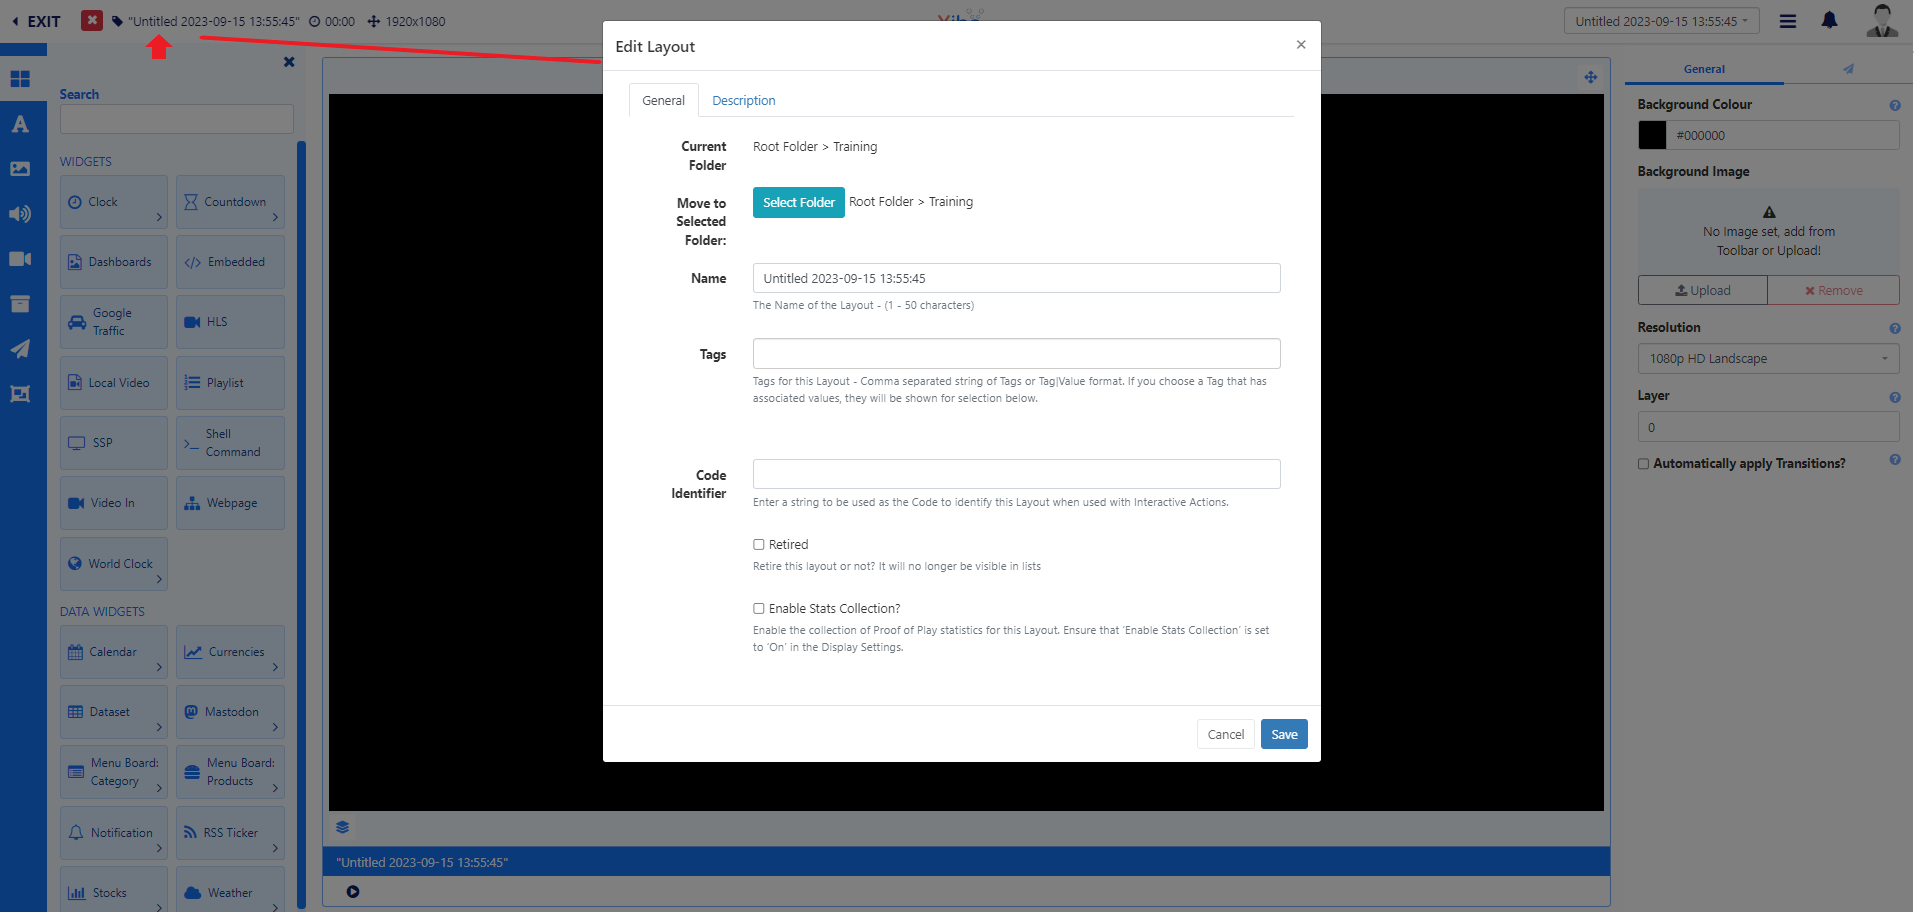
To give your Layout a name and select Folders, Tags, enable the collection of stats for Proof of Play reports, etc, click on the Untitled name to open those options:
Use a Template design
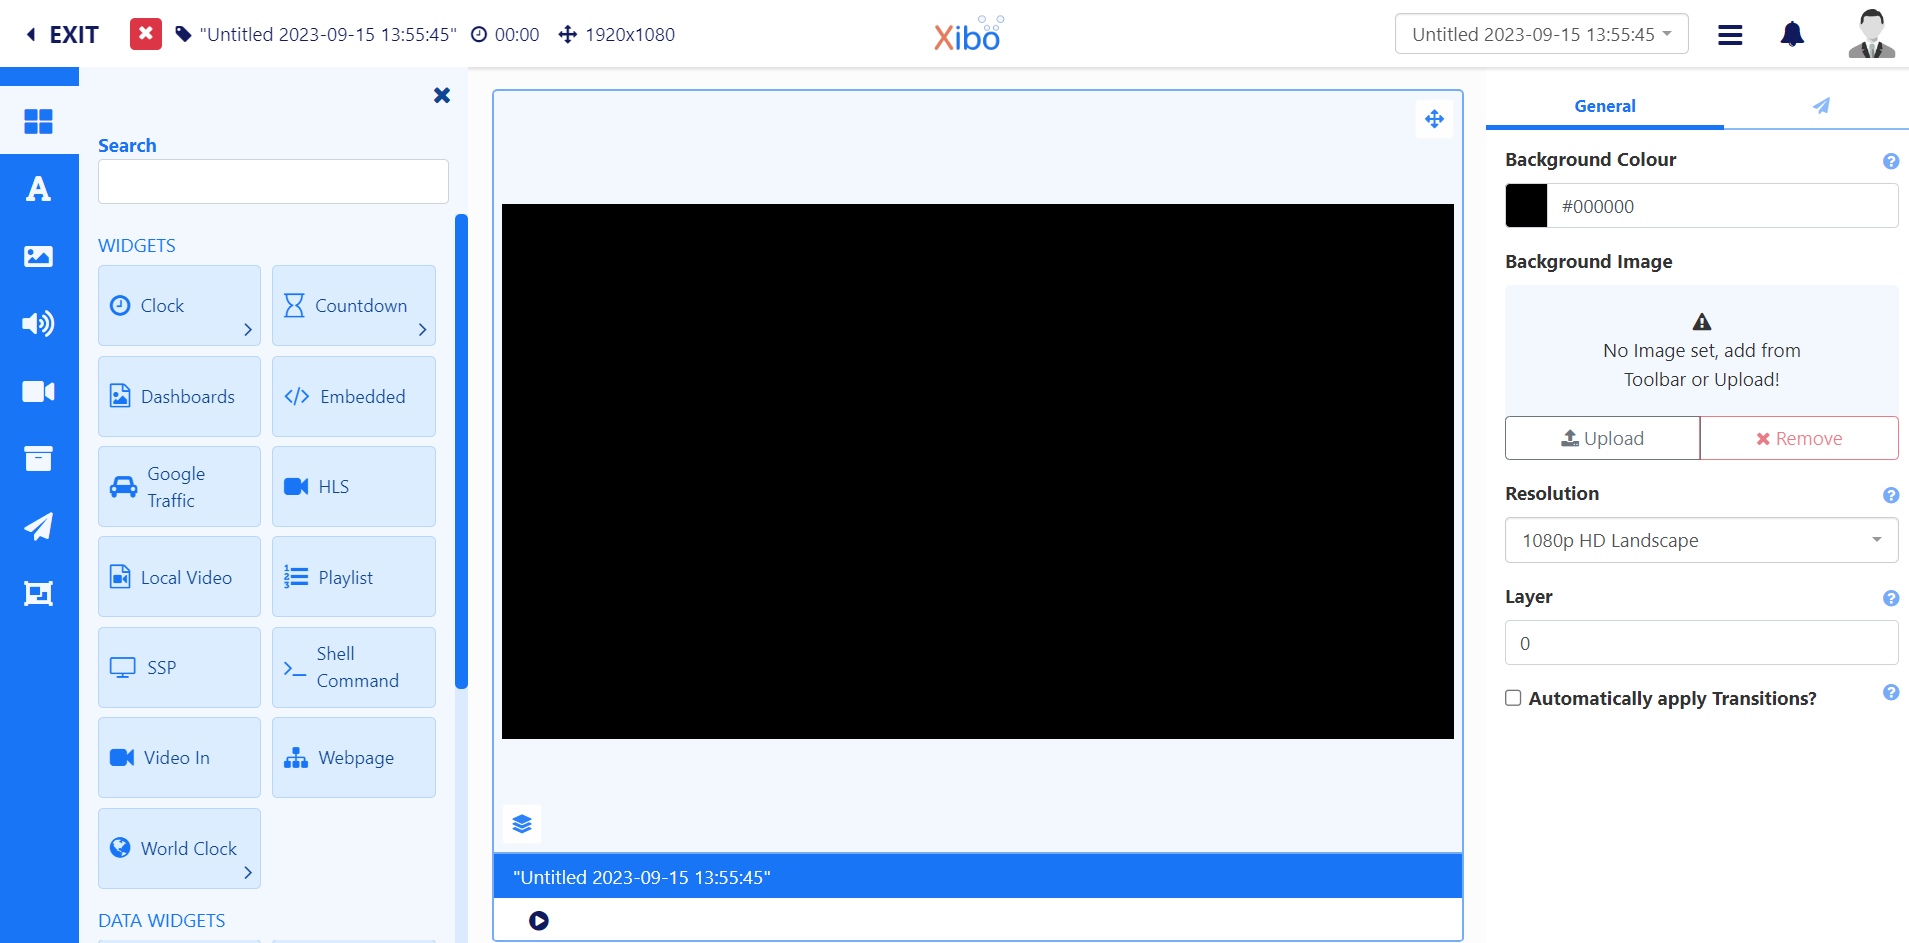
If you want to use a Template these are now selected inside the Layout Editor from the Toolbar:
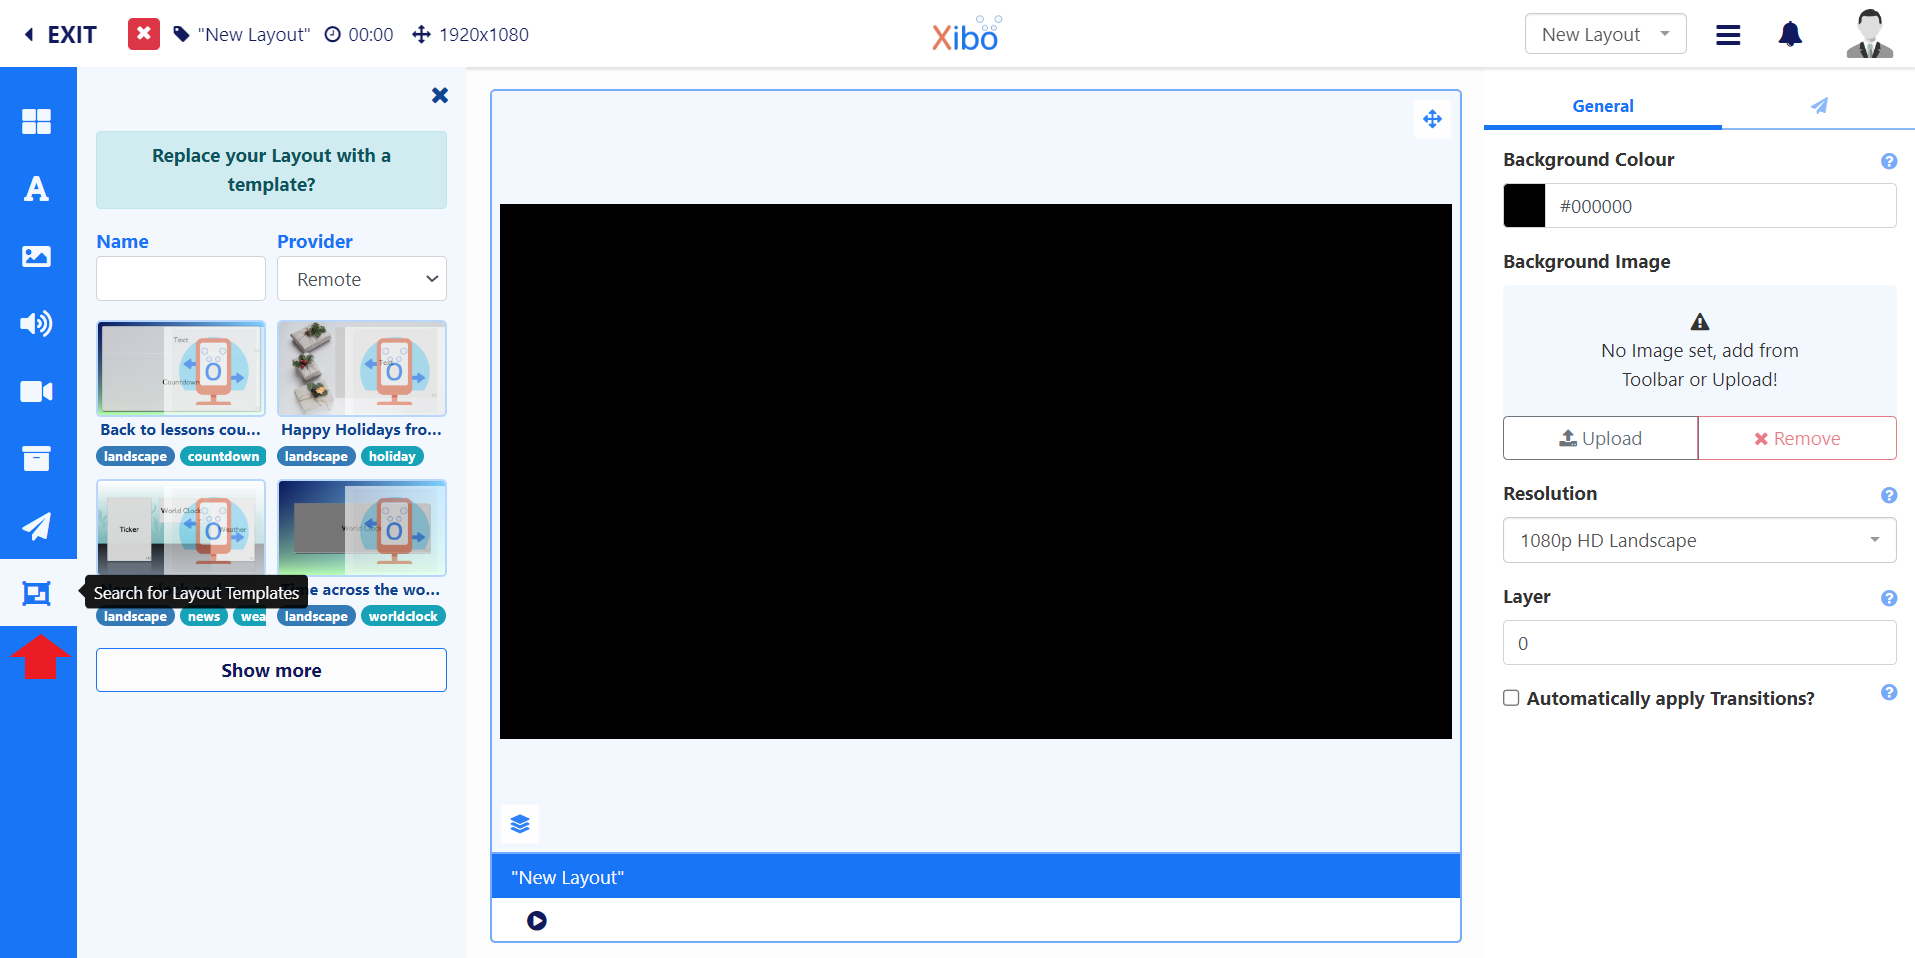
Use the filters to search Templates by Name as well as remotely and locally, and simply drag and drop to the canvas. This also allows you to easily see the design in detail and to select an alternate Template if needed.
You will be shown a confirmation message on adding a Template to the canvas as it will overwrite any existing design you may already have on the canvas!
Adding Content to Layouts
In earlier versions, Users had to add a Region, resize and position in order to add content to a Layout.
Workflow in V3 : Add Region > Click to select and re-position > Click to select and resize > Repeat to add multiple Regions > Close Region Editor > Add content to Region > Configure:
We have removed the need to add a Region with all items positioned and resized directly on the canvas.
NEW v4 Workflow: Add item > Position > Size > Configure
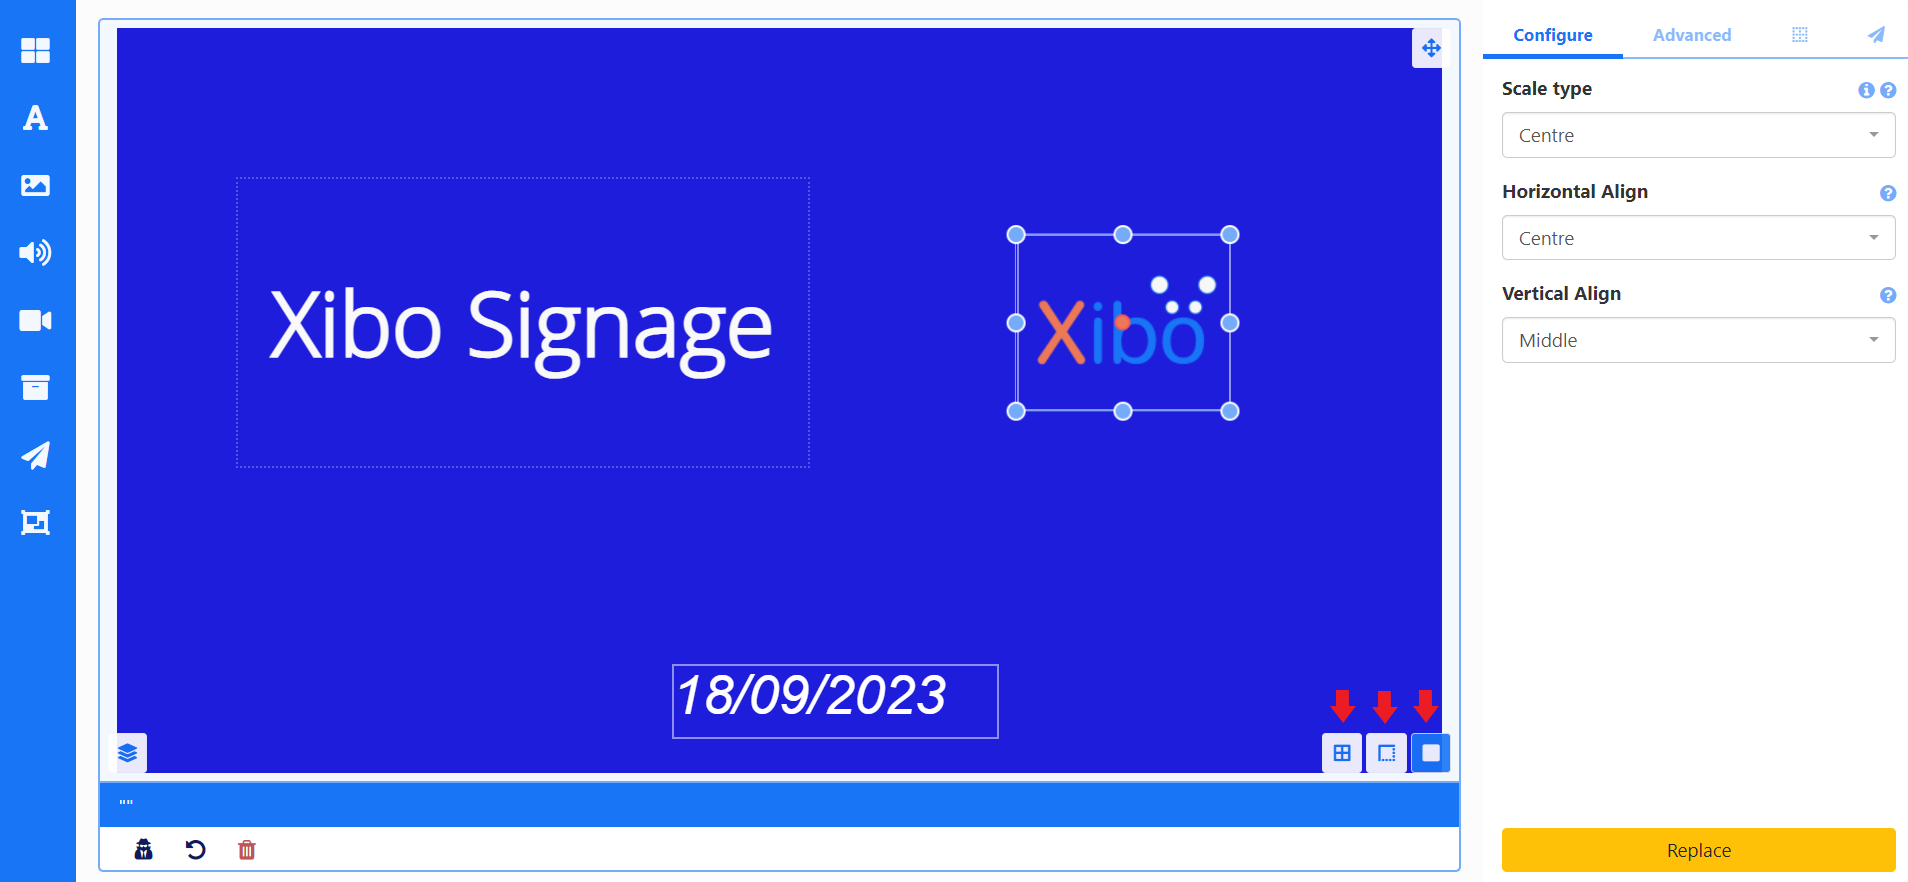
The new resizing and rotation tools gives users far more control over the placement and sizing of content in the Viewer. Use the snap buttons in the bottom right of the viewer to easily Snap to Grid, Borders and Elements when adding items. Everything is updated as you design so you can easily tweak designs as you go and clearly see how it all fits together.
Right click an item to open a context menu to easily move items backwards and forwards through the layers.
Users who want to continue creating Layouts with pre-defined areas so that other Users can add content to them at a later date can use Zones by creating Templates!
Layer Control
Located in the bottom left of the Viewer, the Layer Control manager shows all Durations and Layer properties of all items added to the Layout:
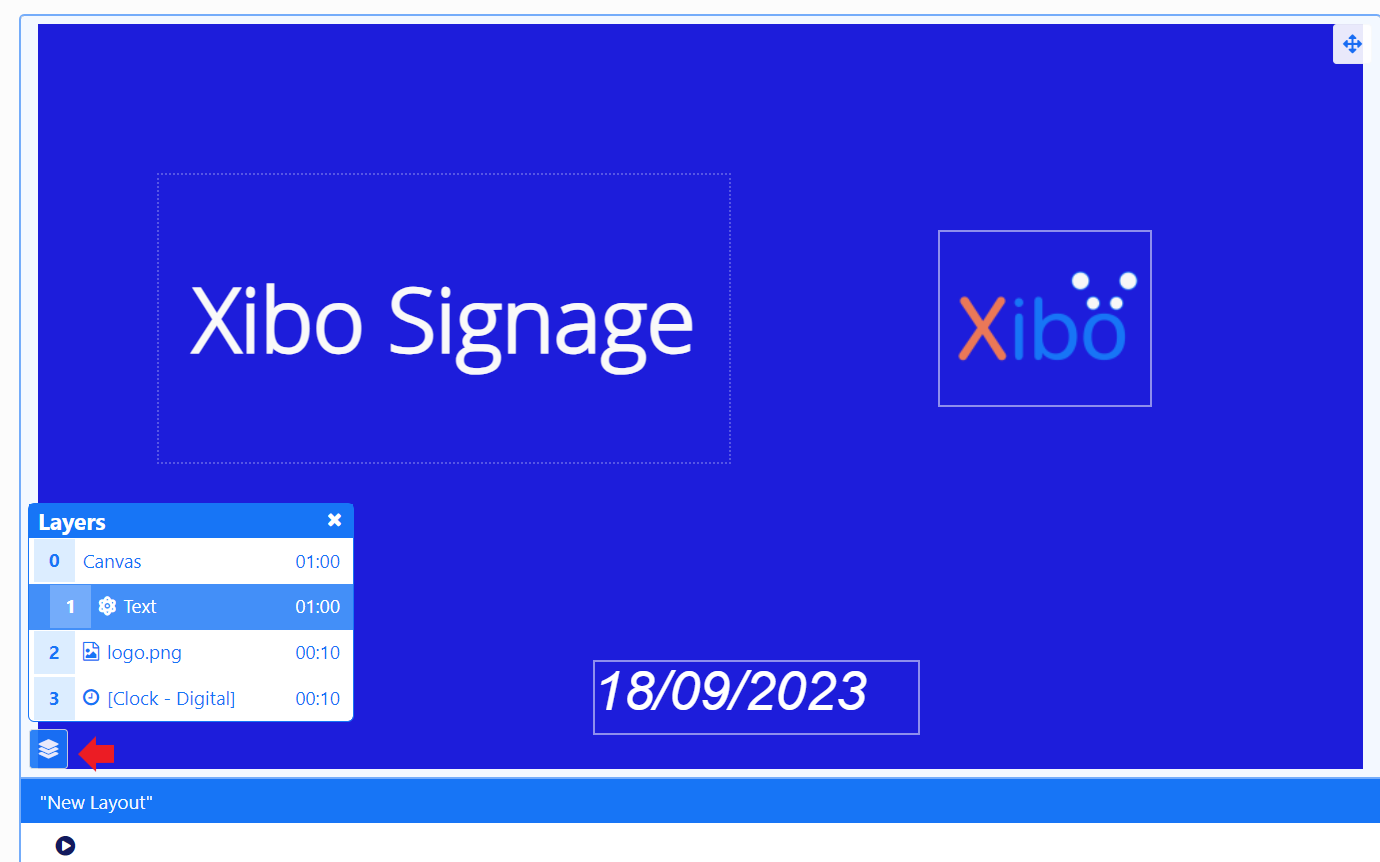
Select items from this panel to easily select content positioned behind other items to make edits. Durations and Positioning can be set as before using the Configuration Options for items in the Properties Panel.
Playlists
Playlists are used to add a Timeline of content to Layouts in order to show a collection of media items sequentially in a slideshow format. As Layouts have always been considered as a single slide in a presentation, there is no timeline in the Layout Editor in v4.
In earlier versions a User would need to first add a Region then add content to it.
Workflow in v3: Open Region Editor > Add Region > Select Region to Position and Size > Exit Region Editor > Add content to Region

In v4 the Playlist Widget is added to a Layout which items are then added using the Playlist Editor, which creates a timeline of content:
NEW v4 Workflow: Add Playlist Widget to Layout > Click to Edit > Add content
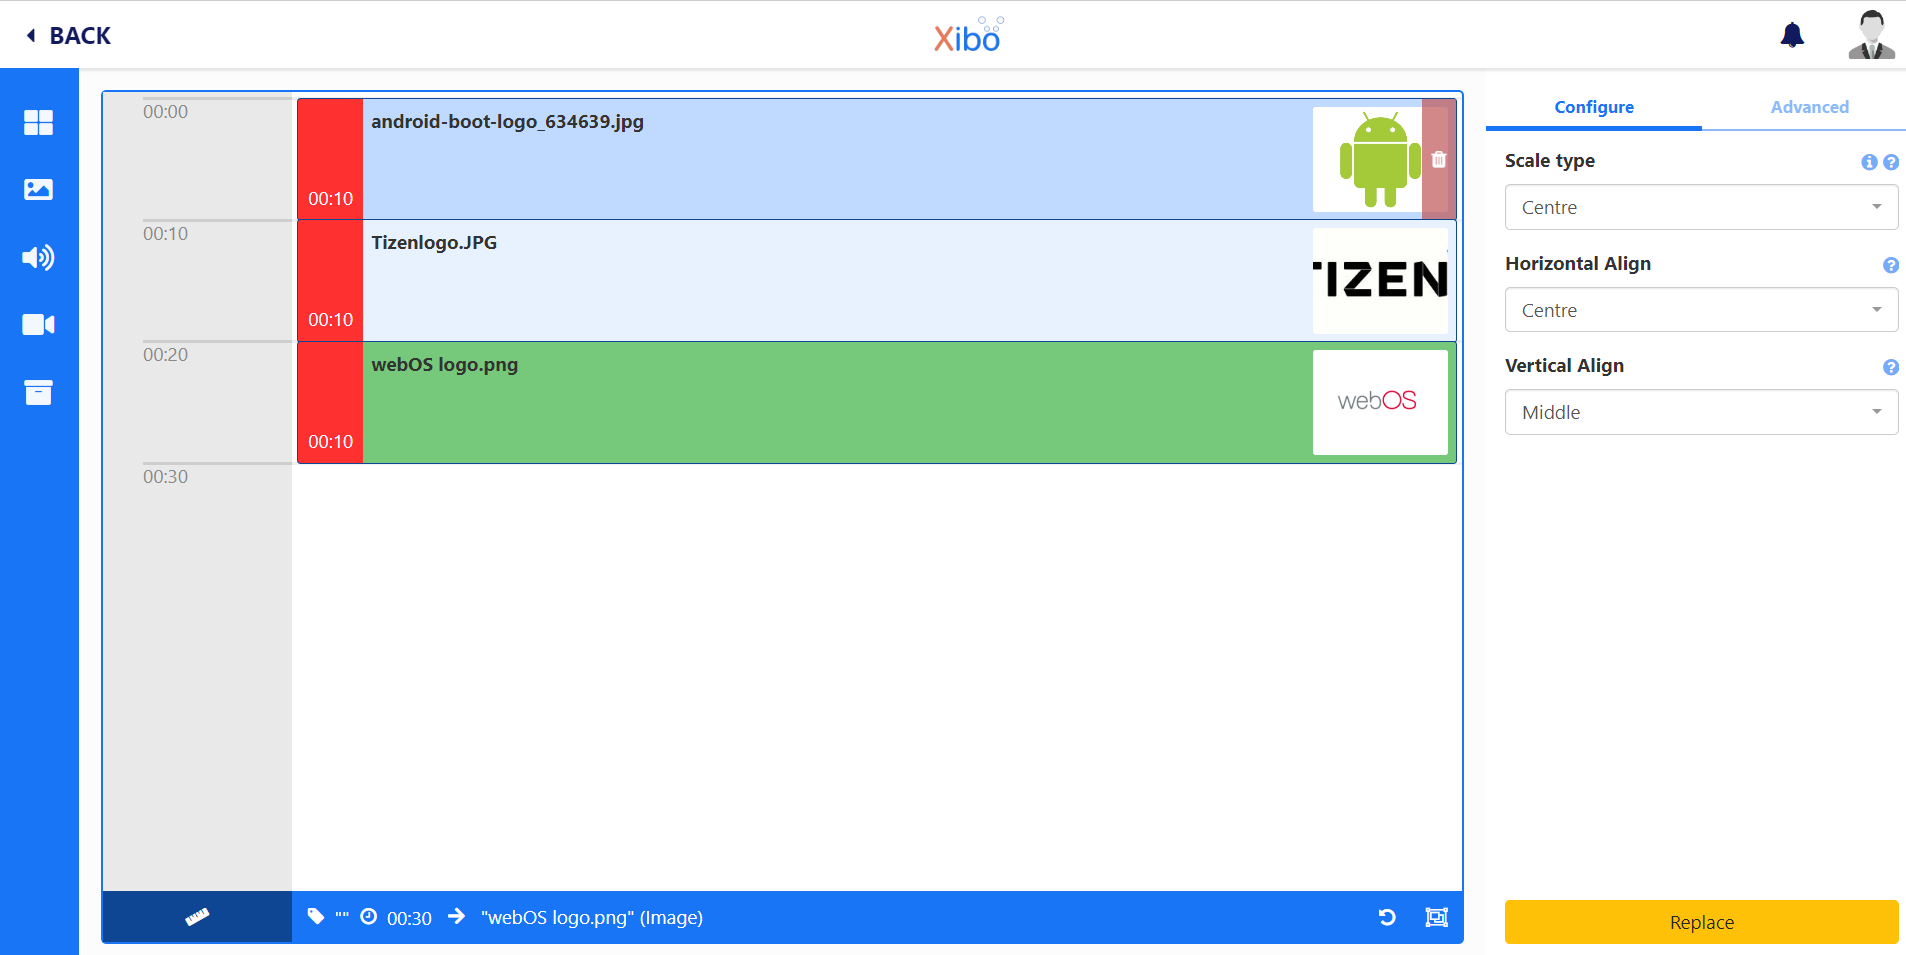
All functionality of the v3 Timeline remains and therefore items can have Expiry Dates set, media added to a specific point on the timeline, re-ordered etc.
You can use the ruler icon in the bottom left of the Playlist Editor to change the scale of the Timeline to make it easier to view and manage added Media!
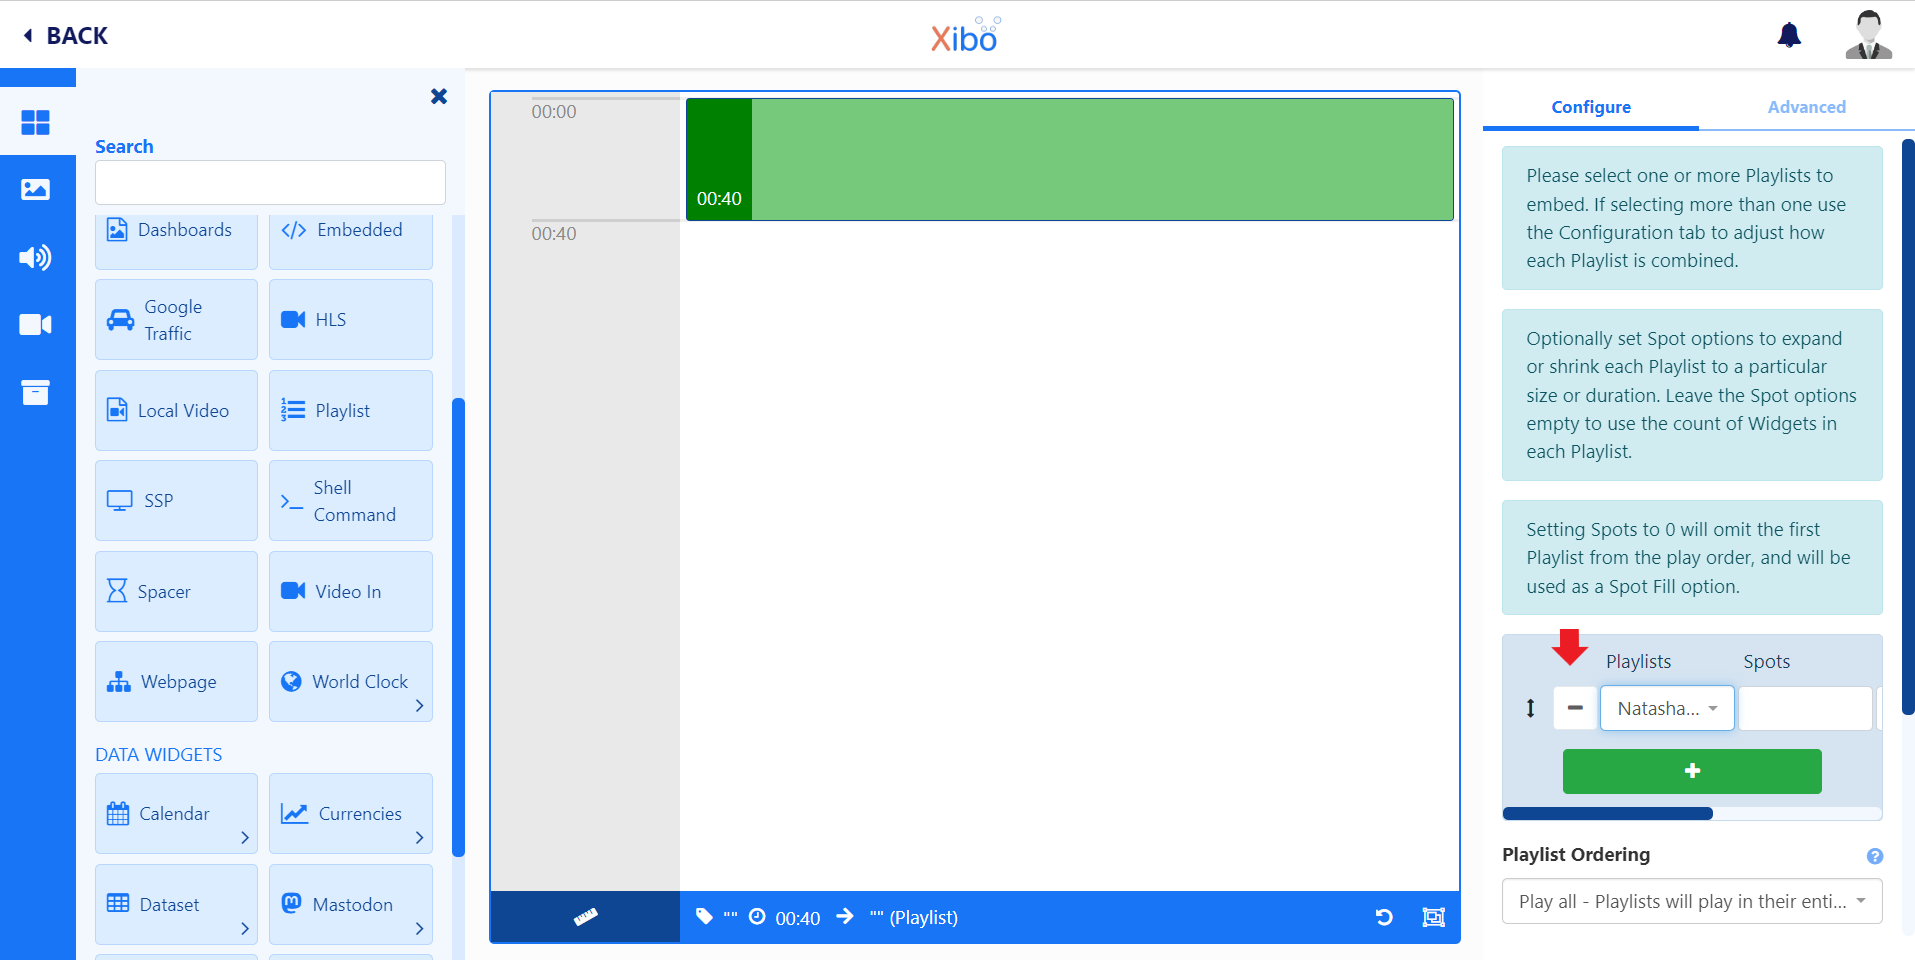
If you want to add Playlists that have been created independently to Layouts or utilise the features of the Sub-Playlist Widget (which was introduced in v2) you would also use the Playlist Widget:
- Add a Playlist Widget to your Layout.
- Add the Playlist Widget to the Timeline.
- Select the Playlist(s) from the drop-down menu.
- Configure Spot options, play ordering (Sub-Playlist Widget functions)
Widgets
Widgets still retain their existing functionality and include Templates (Static) from previous versions. We have included Elements (Global and Data) which give a User a whole new way of adding Widgets to build on their designs.
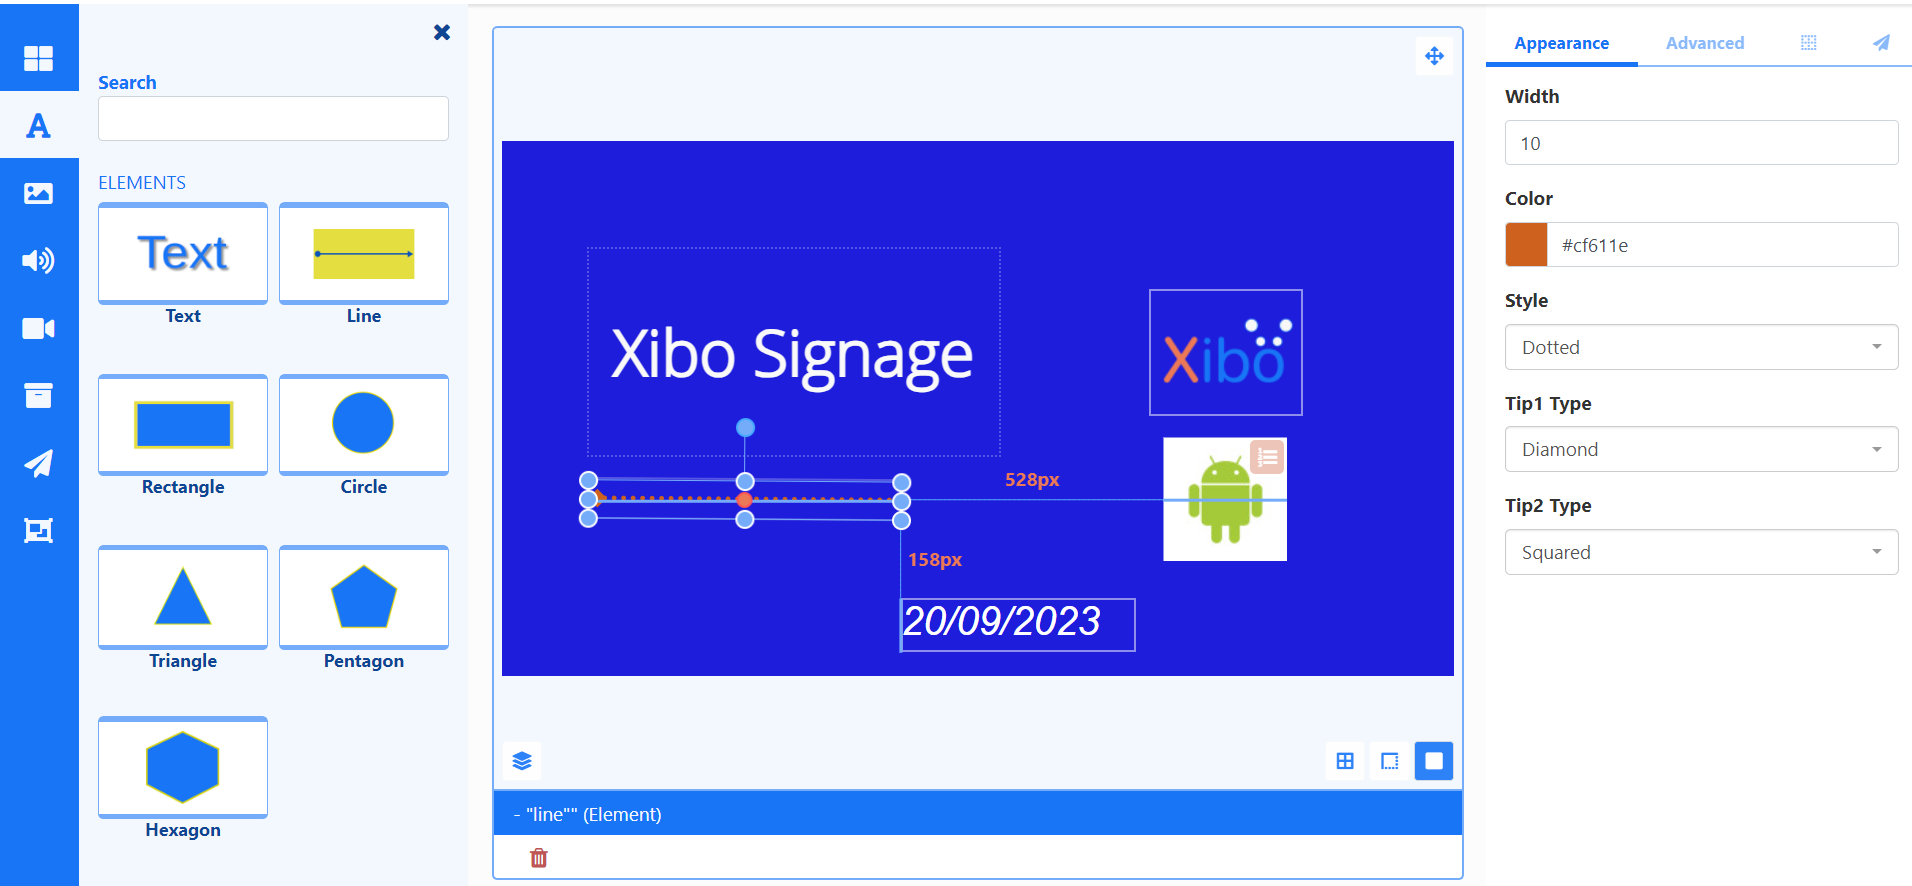
Elements give users far more freedom with designs (use Data Slots to control paging of data, Group Elements and use Stencils), much more than the pre-existing static templates offer and so we encourage Users to start using these Elements rather than the Static Templates!
With the introduction of Data Elements, certain Widgets available in earlier versions, are now no longer necessary as a stand alone Widget as they can be created with the placement and configuration of Elements:
- Agenda - configured using Elements in the Calendar Widget.
- DataSet Ticker - configured using Elements in the DataSet Widget.
- DataSet View - configured using Elements in the DataSet Widget.
- Sub-Playlist - configured using the Playlist Widget.
All File based Widgets (Images, Audio, PDF, PowerPoint etc) which were available as their own Widget in earlier versions, have been removed from the Widget toolbar in v4 as they were already available from the Library Search functionality!
Two Widgets have also been removed from the Layout Editor as they are no longer appropriate for use with Layouts, such as the Rich Text Editor replaced with the Global Text Element and the Spacer to create an ‘empty slot’ in a timeline. However, these two Widgets are available when creating Playlists and can be added using the Playlist Editor.
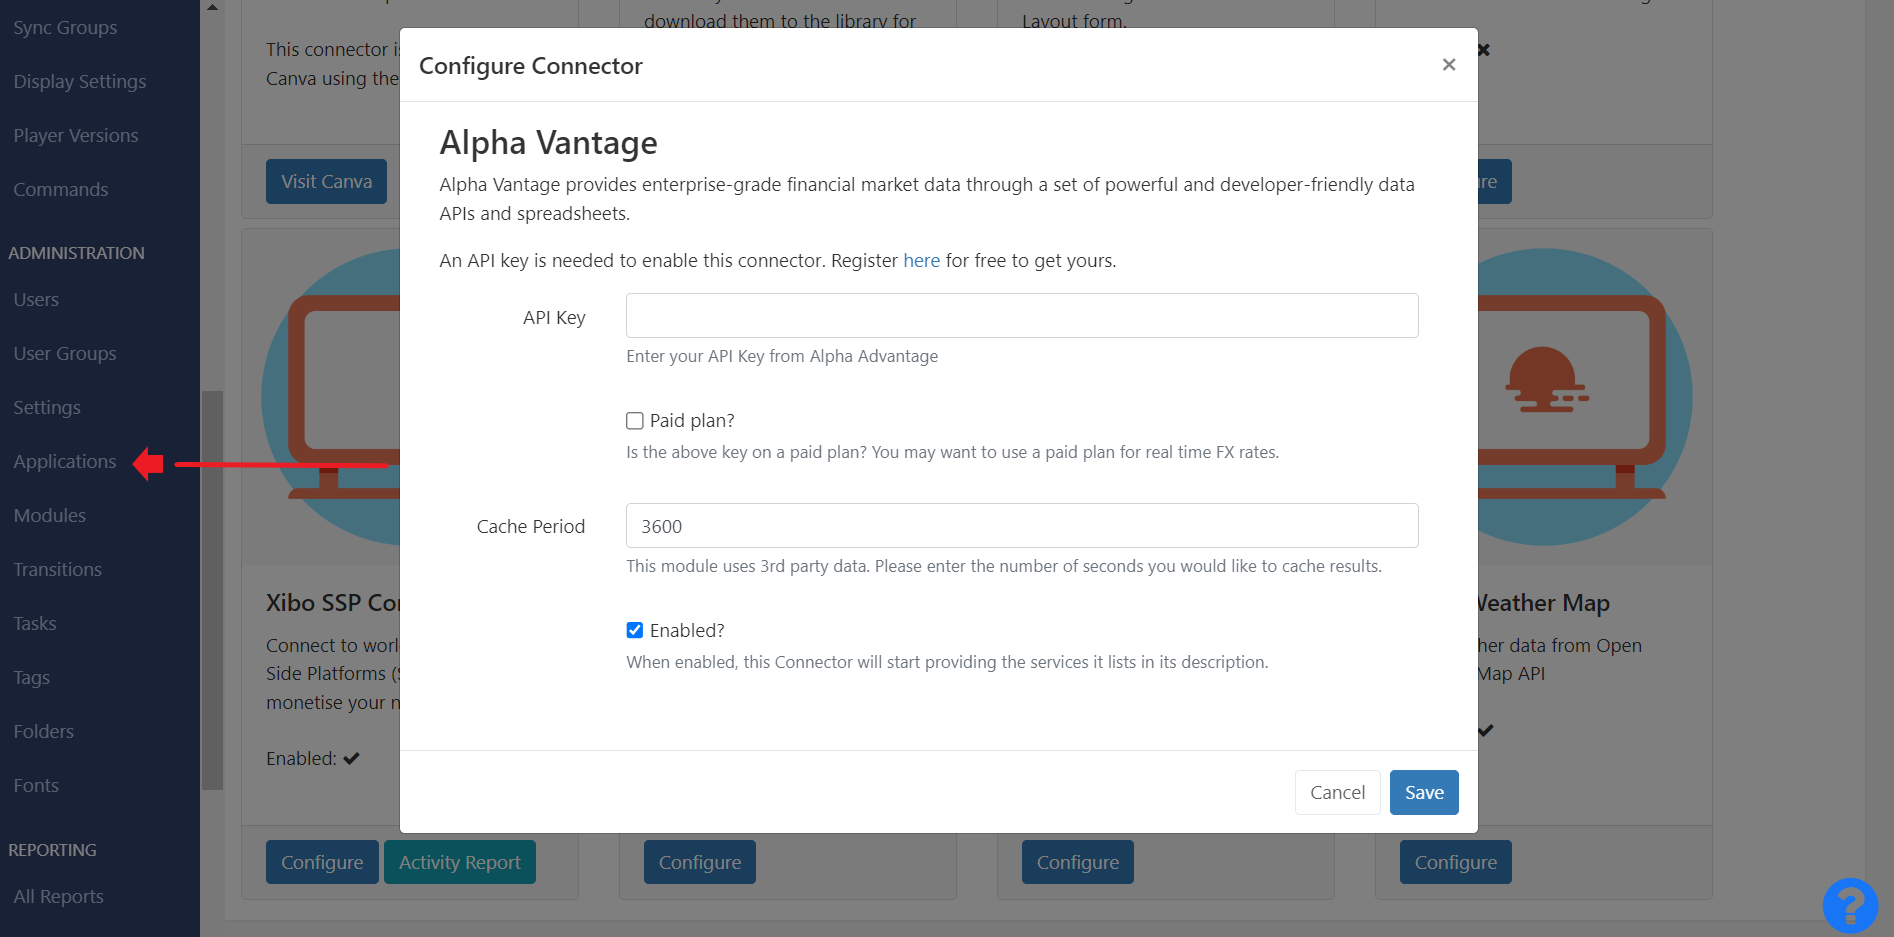
Modules and Connectors
Modules are still managed from the Modules page of the Administration section of the CMS to control visibility, but required API Keys for third party services have been moved to the Connectors section of the CMS.
Fonts
The management of Fonts is considered an Administrator action and so these have been removed from the Media Library and now have their own stand alone section in the CMS for easier Font Management.
Scheduling
A new Grid View for Schedules has been added for easier management of Events in a list format:
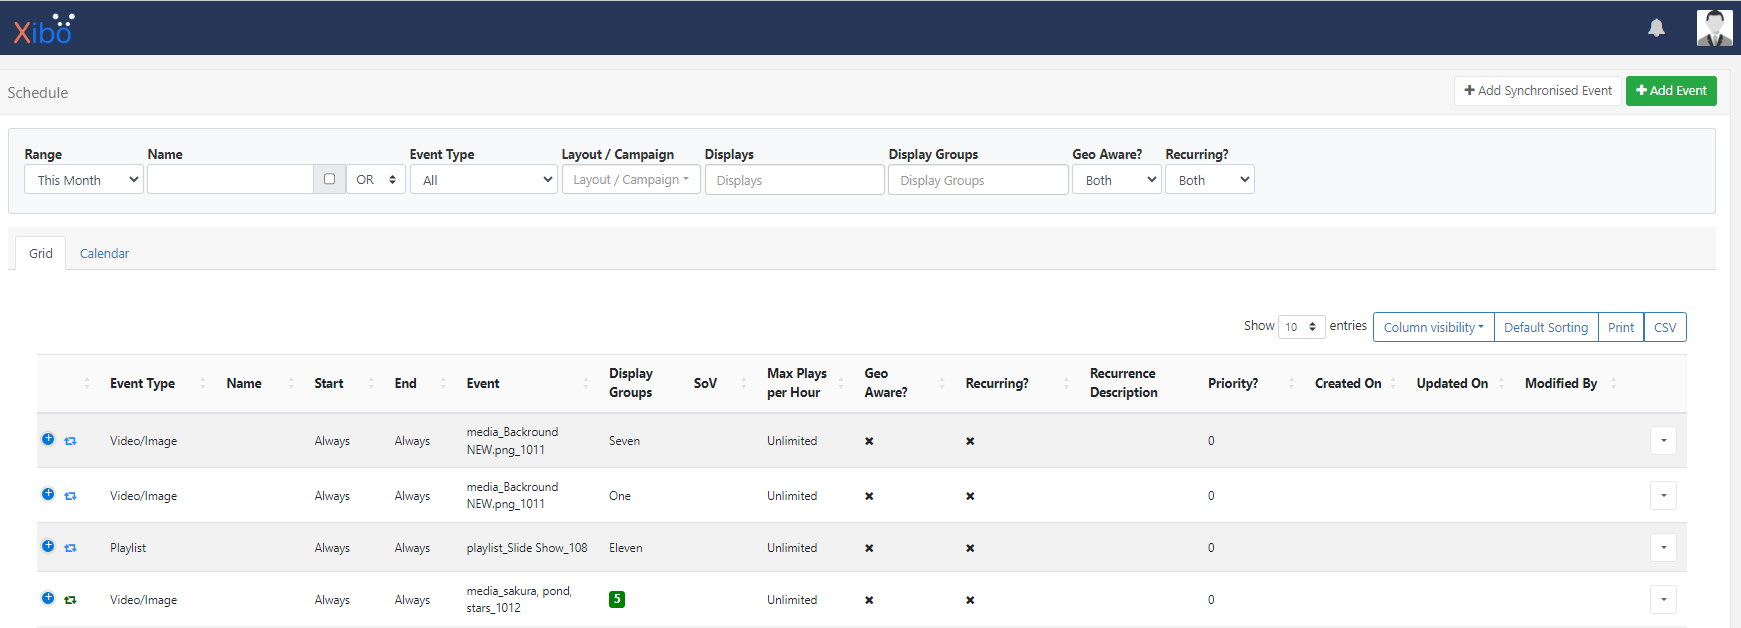
V4 also includes Media Scheduling which allows for Image/Video files as well as Playlists to be directly scheduled to Displays without the need to create and add to a Layout.
Workflow in v3: Add Layout > Add Full Size Region > Add Content > Publish > Schedule >Create Event details.
NEW v4 Workflow: Select Schedule from the row menu of the item > Create Event details.
Things to Note:
-
If you are using a version earlier than v3, system and object Permissions are now handled using the concepts of Features and Sharing.
-
With the introduction of Folders in v3, sharing multiple user objects with multiple Users has been made easier to manage and maintain.
-
Onboarding Users has been made easier from v3 with the introduction of the Onboarding Wizard
-
Displays can be connected to a CMS using an Authentication Code from v2.
Our latest documentation can be viewed here