Updated February 2020
Playlists are a very versatile way to display media items when added to Layouts. With Pad, Fill and Repeat functionality along with Spots and Playlist Ordering there are many ways you can choose how to play your Playlists.
A common question from users is “How can I show media from one playlist at ‘specified’ intervals with media from another playlist?” So the idea being that you can tell Xibo I want ‘Media X’ to play after a certain amount of ‘Media’ has played from another Playlist.
This guide will take you through a configuration that can help you achieve this.
Create Playlists
First we need to create 2 Playlists, one that will contain media images that are to be used as part of a promotional campaign and the other Playlist will contain ‘general’ images that are to be shown.
Go to Playlists from the main menu and click on Add Playlist and name it. (I have called this Playlist ‘Promotion’).
If you are using a version earlier than 2.3, once you have added the Playlist use the drop down row menu for the newly added Playlist and select Timeline.

Add the Image Widget and either upload the image files you wish to use or if you have already uploaded to your CMS Library then click on View Library to select your image files. (You could of course just add from your CMS Library using the Library Search tool)!
My Promotions Playlist has a total of 5 media images assigned as shown below:

Now create the second Playlist with ‘general’ images following the steps taken above.
My General Playlist has a total of 7 media images assigned as shown below:

Create Layout
Now we can create the Layout which will display the Playlists using the Sub-Playlist Widget.
Select Layouts form the main menu and click to Add Layout and give it a name.
Use the full sized Region, which is added to new Layouts by default and click on Widgets on the bottom tool bar.
Use the arrows to find the Sub-Playlist Widget and add it to the Region. You can do this by clicking on the Widget and then clicking in the empty Region or by drag and drop. Once added we need to select the Playlists to include using the Edit Sub-Playlist form.

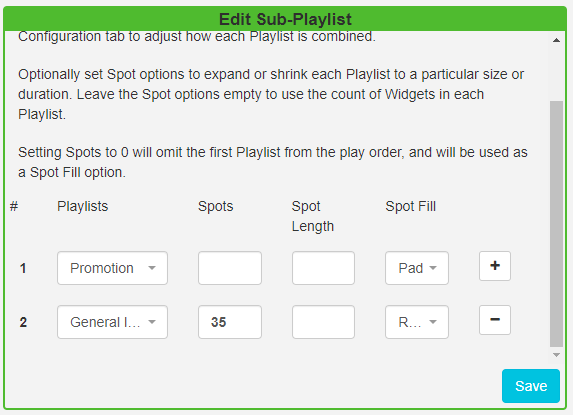
Use the drop down menu for the Playlists field and select the ‘Promotions’ Playlist.
Leave the Spots and Spot Length fields empty but set the Spot Fill field to Pad.
These settings will tell Xibo that Widgets taken from this list will be included to fill any remaining Spots from the other Playlist.
Click on the plus icon to create a new row, and select the ‘General’ Playlist.
I want to show 1 image from the Promotional Playlist after each ‘loop’ of the media on the General Playlist (a loop would be 1 play of all the 7 assigned Widgets).
To achieve this we need to multiply the number of Widgets in the ‘Promotional’ Playlist (5) with the total number of Widgets in the ‘General’ Playlist (7) to give the number of Spots that need to be entered for this Playlist (35), so that the General Playlist will play a total of 5 times.
Leave the Spot length empty as before, so that we use the duration of the Widgets, and set the Spot Fill to Repeat so that the Widgets on this Playlist will be repeated for the amount of Spots specified.
Click on the Configuration tab and select the following:
- Playlist Ordering - Auto (to tell Xibo to play Widgets from each Playlist evenly)
- Remaining Widgets - Add (any remaining Widgets after ordering has been applied will be added to the end)
- Save

The Preview for this Region will now update and show the total number of Widgets and total duration.
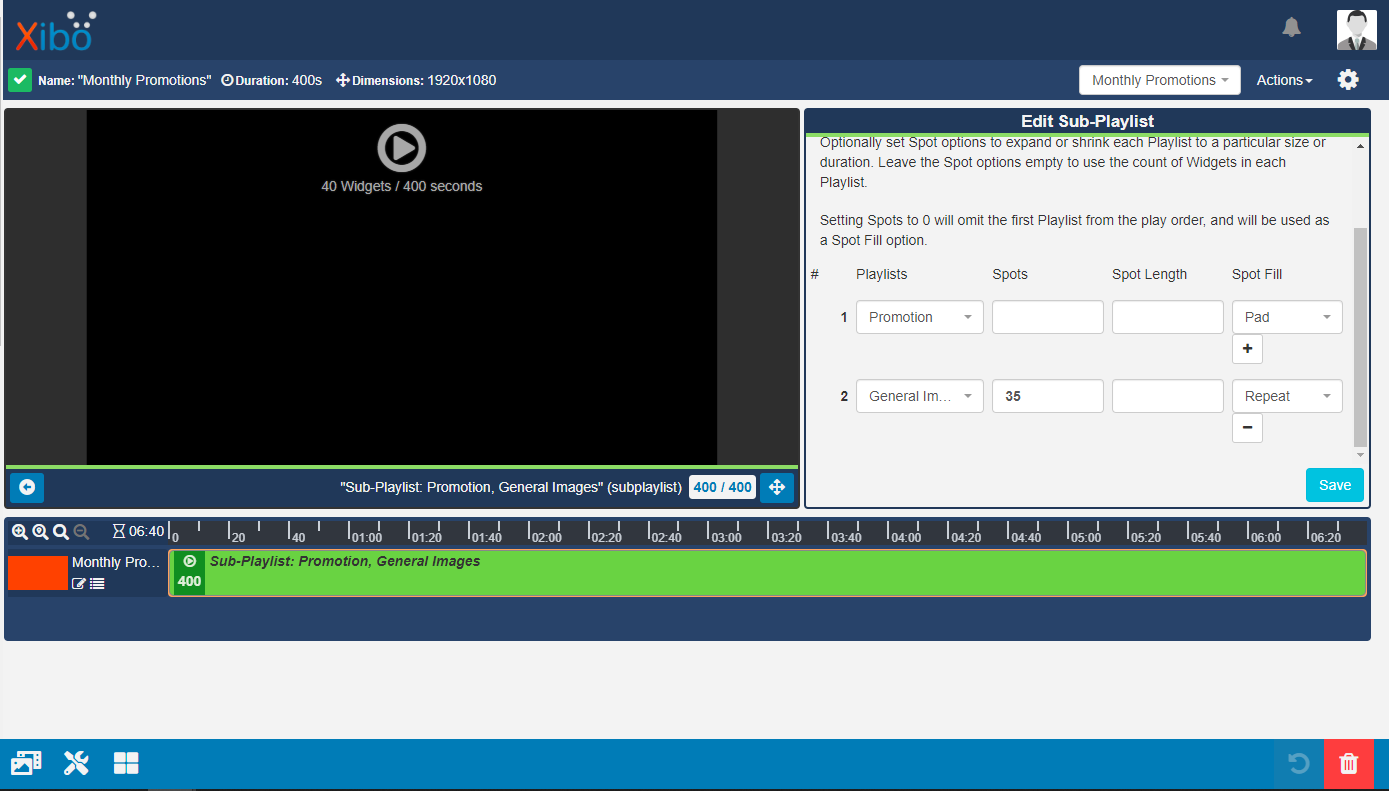
40 Widgets (5 from the first Playlist and 35 Spots specified for the second) 400 seconds (40 Widgets using the default duration of 10 seconds per image).
Click the arrow to return to the Layout view.
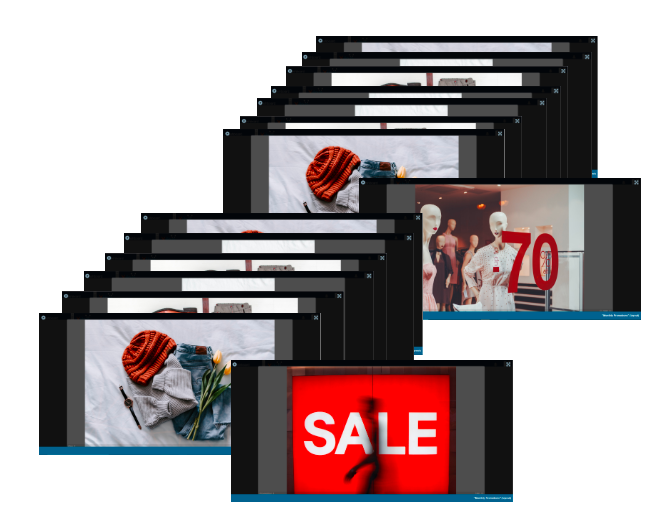
Before hitting Play you have the option to scroll through the Widgets using the arrow so that you can see quickly how they are ordered to Play. You could also toggle to full screen to view this.
The Preview will show that your Media will play in the following order:
Promotion 1, Gen 1, Gen 2, Gen 3, Gen 4, Gen 5, Gen 6, Gen 7
Promotion 2, Gen 1, Gen 2, Gen, 3 Gen 4, Gen 5, Gen 6, Gen 7
Promotion 3, Gen 1, Gen 2, Gen, 3 Gen 4, Gen 5, Gen 6, Gen 7
Promotion 4, Gen 1, Gen 2, Gen, 3 Gen 4, Gen 5, Gen 6, Gen 7
Promotion 5, Gen 1, Gen 2, Gen, 3 Gen 4, Gen 5, Gen 6, Gen 7
You could Publish this Layout and Schedule to Always to have this Layout continually play in this order.
One of the benefits of using Playlists is that a user can quickly and easily Replace Images without the need to edit the actual Layout!
Let’s say our Promotion has changed and the images need to be replaced. Simply click on Playlists from the main menu and select Timeline using the drop down menu for the Promotions Playlist. Click on an image you wish to change and click Replace to upload a Replacement file.
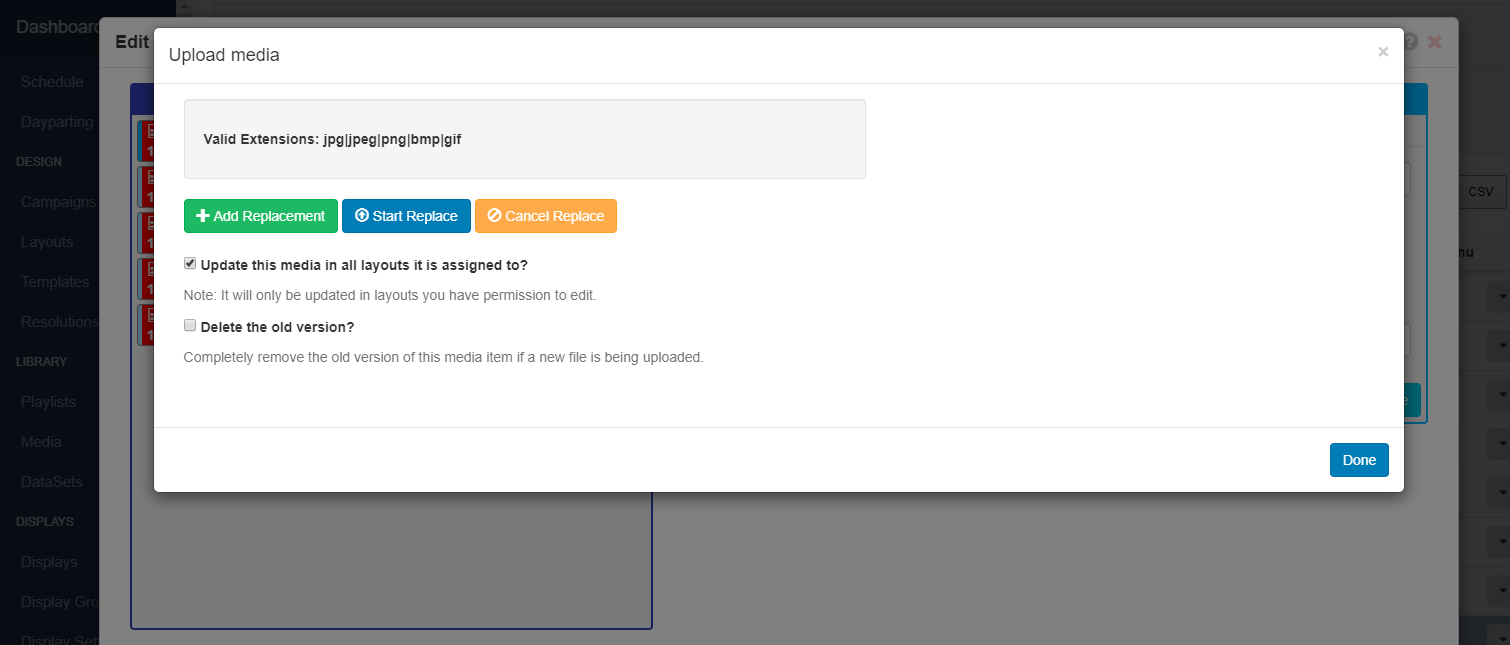
Once successfully uploaded the new images will be displayed in the Published Layout.