Updated April 2026
If you are using a V4 CMS, please note the differences in the Creating a Layout section of this guide!
From v2.3, utilise the Playlist Dashboard and Playlist Manager / Playlist Dashboard User Group to give a restricted view of the CMS to only allow Users to Upload and Remove media to Playlist Spots that they have been given access to manage.
This guide will take administrators through the following steps:
- Creating a User using the onboarding wizard in a v3 CMS
- Creating a User Manually in a v3 CMS
- Creating a User using a v2.3.x CMS
- Creating a Playlist
- Creating a Layout
The user will be able to add and replace media content only without the need for access to the Playlist or Layout.
Create a User using the onboarding wizard in v3 CMS
- Click on Users under the Administration section of the CMS main menu and click the Add User button.
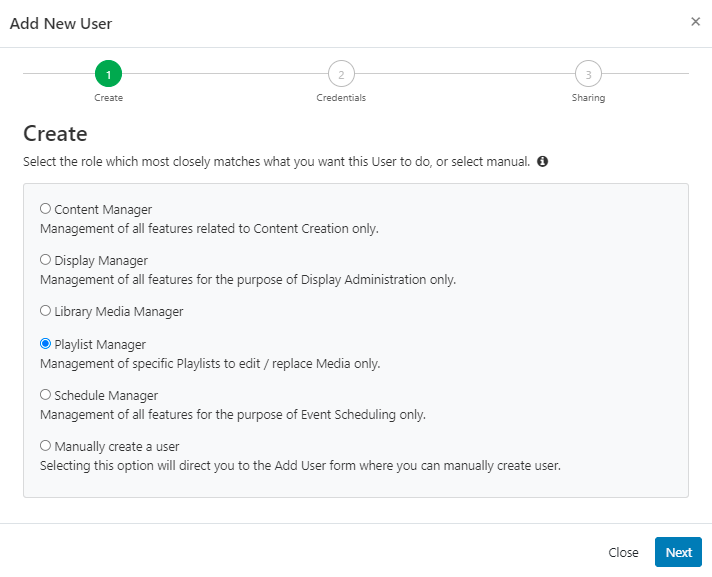
- Using the onboarding wizard, select Playlist Manager from the list of preconfigured User Groups.
- Click Next to proceed through the wizard.
- Create a User Name to be used for the login name.
- Create a Password which the user will use to complete login.
- Include the Email address for this user.
- Click Next.
- We won’t use Folders on this occasion so click to Save.
Proceed to the Create a Playlist section to continue.
Please note: Pre-configured User Groups are available for new v3 installations and for users who upgrade to v3 who have not previously utilised User Groups in earlier versions. If you have already created User Groups in an earlier version, then follow the following steps to manually create a User below.
Create a User manually in a v3 CMS
Click on Users under the Administration section of the CMS main menu and click the Add User button.
Select the last option to Manually create a user and click Next
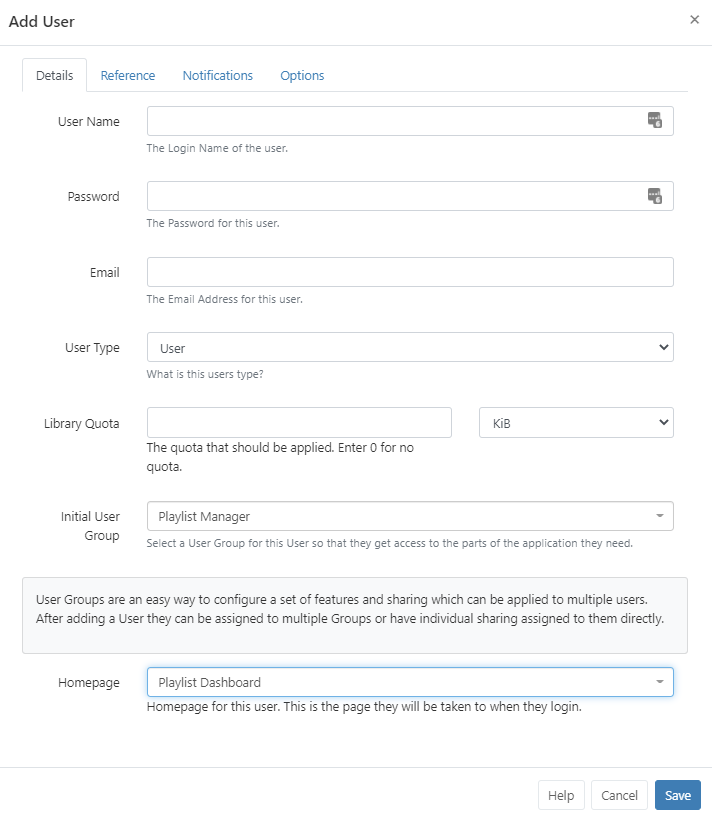
- Create a User Name to be used for the login name.
- Create a Password which the user will use to complete login.
- Include the Email address for this user.
- Leave the User Type as User.
- Leave the Library Quota blank for this example.
- Use the drop down for Initial User Group and select Playlist Manager.
- From the Homepage drop down, select Playlist Dashboard.
- Click to Save.
Proceed to the Create a Playlist section to continue.
Create a User using a v2.3.x CMS
Click on Users under the Administration section of the CMS main menu and click the Add User button.
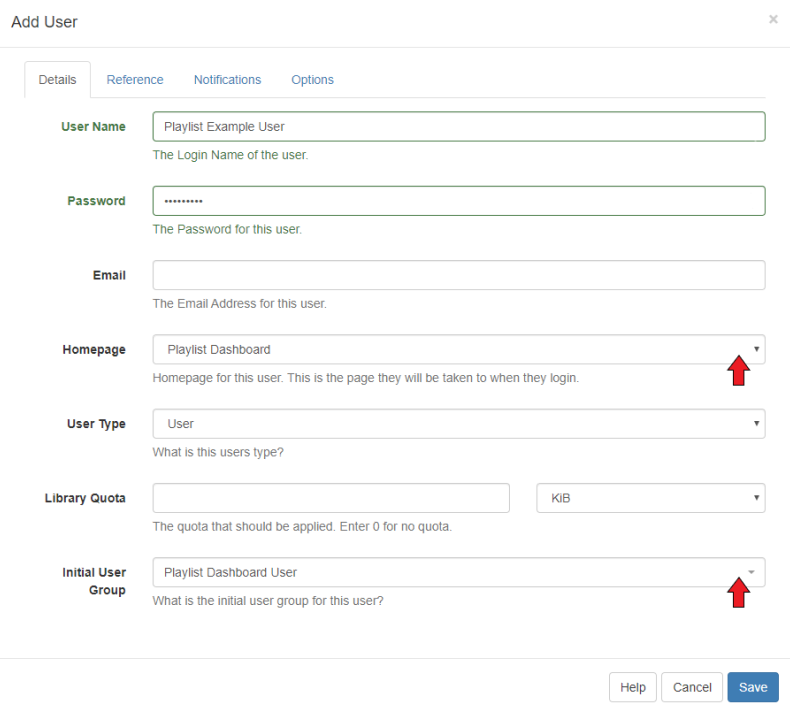
- Create a User Name to be used for the login name.
- Create a Password which the user will use to complete login.
- Include the Email address for this user.
- From the Homepage drop down, select Playlist Dashboard.
- Leave the User Type as User.
- Leave the Library Quota blank for this example.
- Use the drop down for the Initial User Group and select Playlist Dashboard User.
- Click to Save.
Create a Playlist
- Click on Playlists under the Library section of the main CMS menu and click the Add Playlist button.
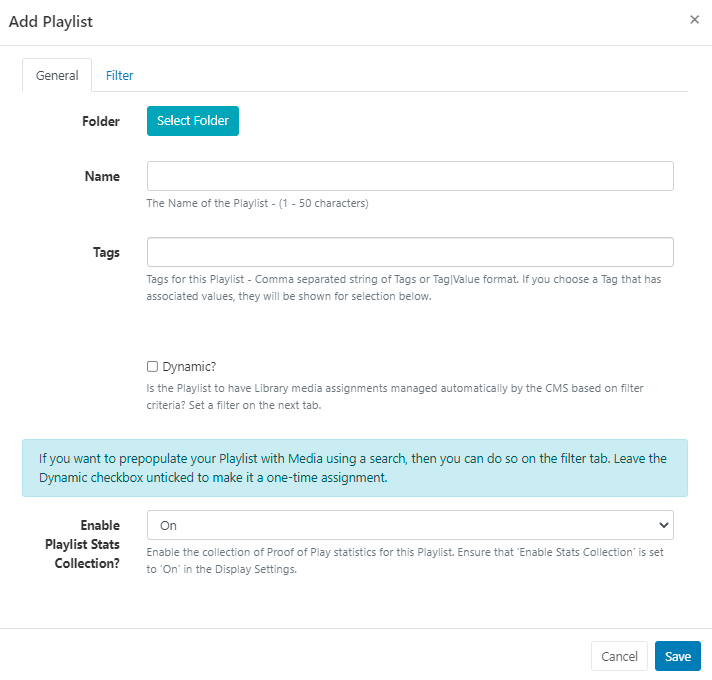
Give the Playlist a Name for easy identification and Save.
Once saved the Playlist Timeline view will open.
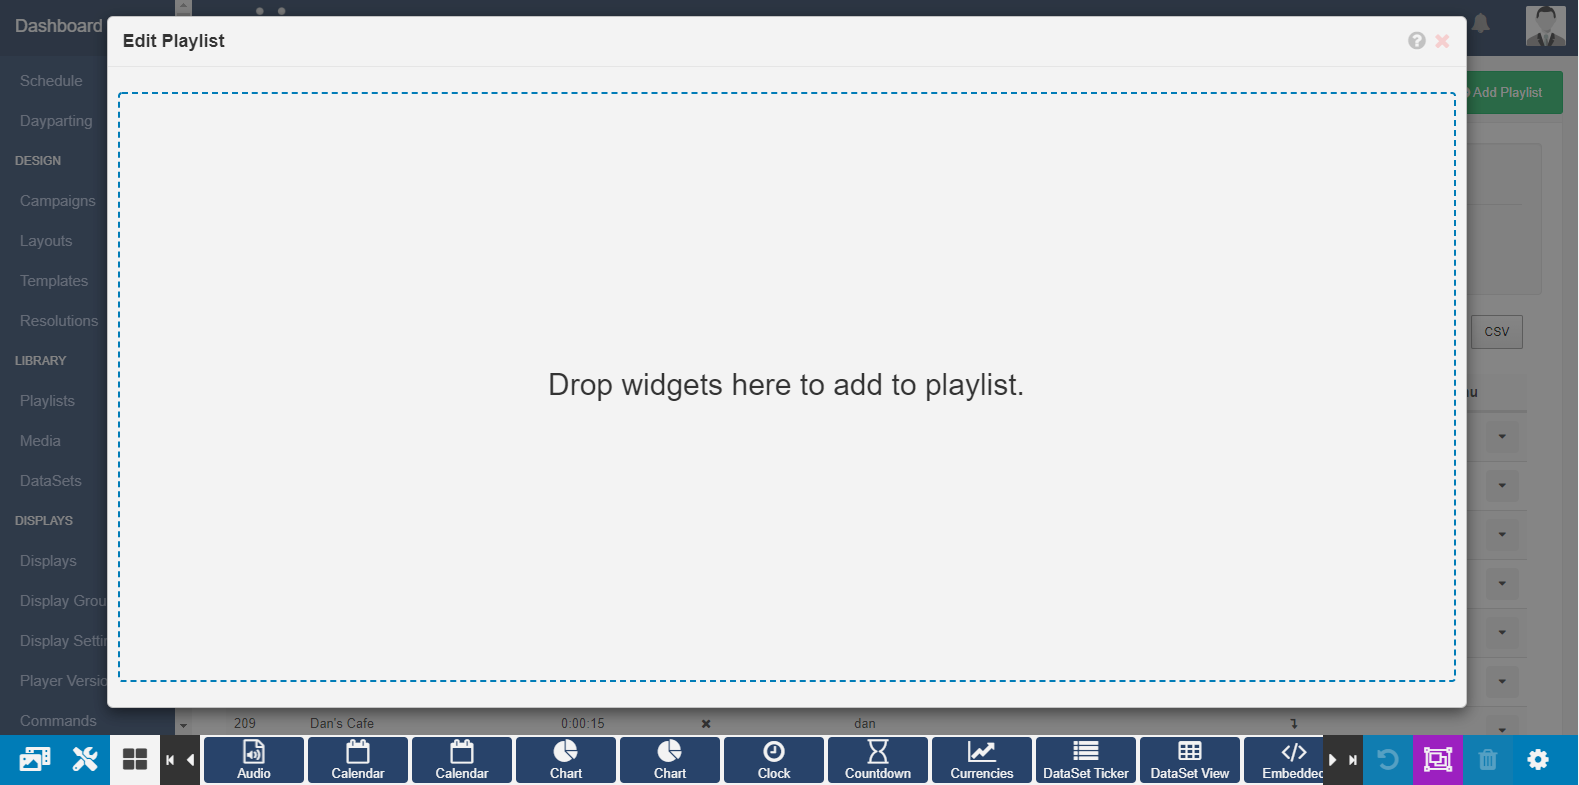
- For this example I am creating an ‘empty’ Playlist for the User to add media to, so click the X to close the Playlist Timeline.
You could choose to populate this Playlist with Widgets/ Library Search media which would then show as ‘locked content’ to the User. Media cannot be added or replaced to these ‘locked Spots’.
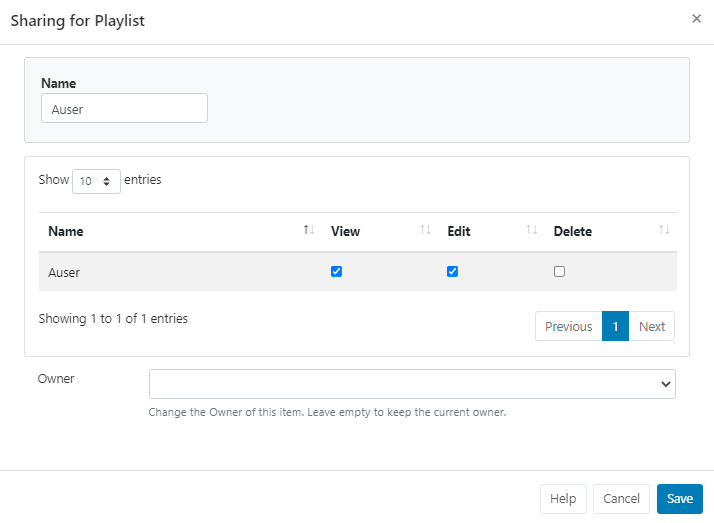
From the Playlist grid, use the row menu for the newly added Playlist and select Share (v3 CMS users) or Permissions (v2.3.x CMS Users)
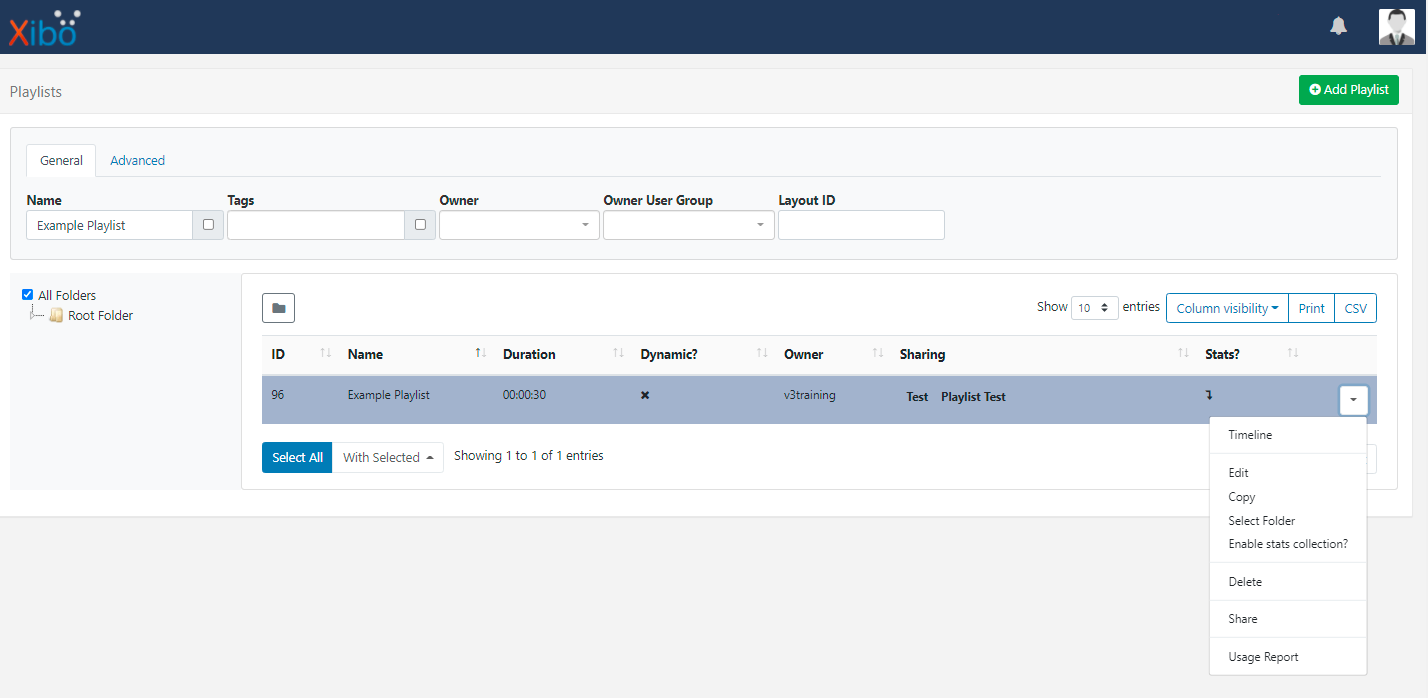
Find the User or User Group that needs to access this Playlist, and tick in the View and Edit boxes and Save.
For Users of a v3 CMS, create Folders with the required Share options for Users/User Groups and save Playlists to the Folder so that they inherit the options enabled!
New Users can also be onboarded with access to the necessary Folders right from the start!
This Playlist needs to be included in a Layout by using the Sub-Playlist Widget.
This could be an existing Layout which already has the Sub-Playlist Widget added, but for the purpose of this guide we will create a new Layout which we can add this Playlist to.
Create a Layout
PLEASE NOTE: Users of a v4 CMS will note differences in the creation of Layouts and accessing the Sub-Playlist functionality. And should follow the steps below:
- Click Add Layout to open the Layout Editor
- Drag the Empty Playlist widget to the canvas
- Click the edit icon in the top right of the Playlist widget to open the timeline
- Drag an Empty Playlist widget to the Timeline
- Select the Playlists, Spots, Spot Length and further configuration options from the Properties Panel.
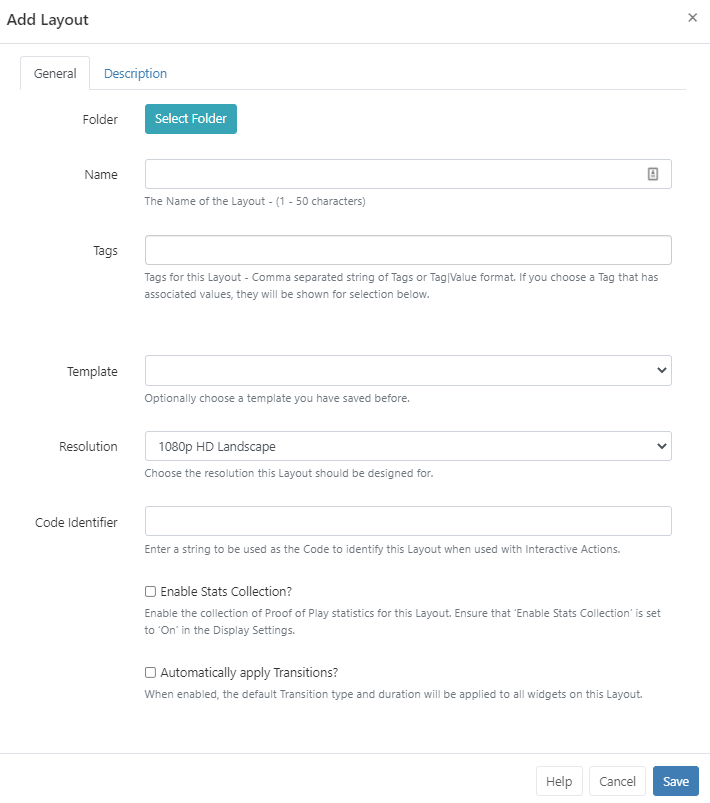
Click on Layouts under the Design section of the main CMS menu. Use the Add Layout button and complete the form.
On saving, the Layout Designer will open, with one full sized empty Region by default.
For the purpose of this guide we will utilise the full sized Region so we do not need to resize or position
-
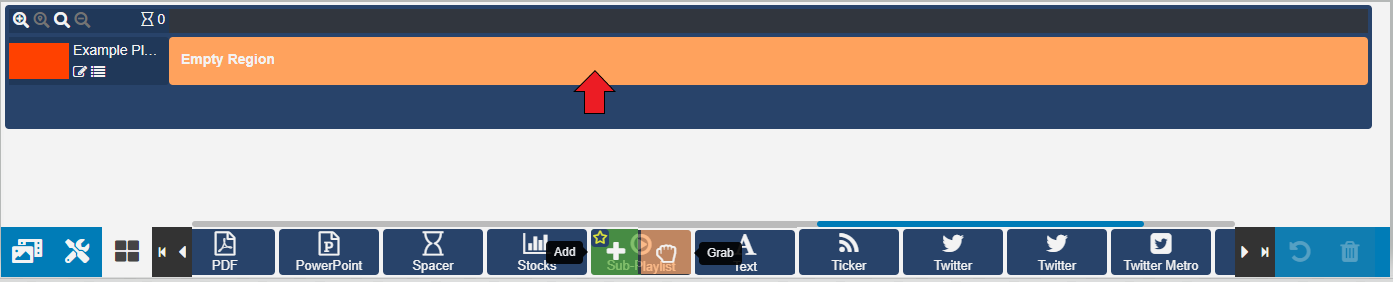
Use the Widgets button on the bottom toolbar and use the arrows to scroll to find the Sub-Playlist Widget.
-
Click or drag to add to the empty Region.
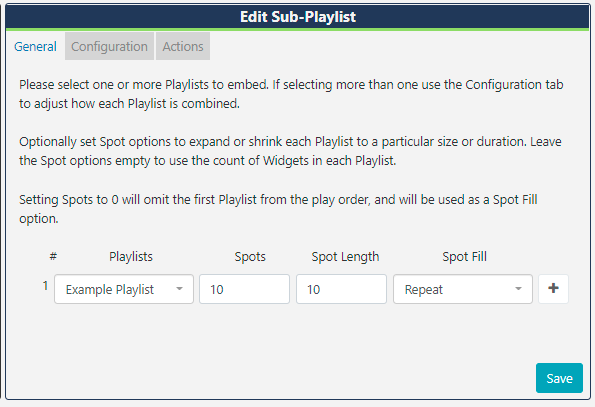
Available configuration options will open for the Widget.
- From the General tab, use the Playlists drop down and select the created Playlist.
- Enter the total amount of Spots to be made available for the User to upload media to.
- Enter a duration in seconds to determine the Spot Length.
- Leave Spot Fill as Repeat
- Save
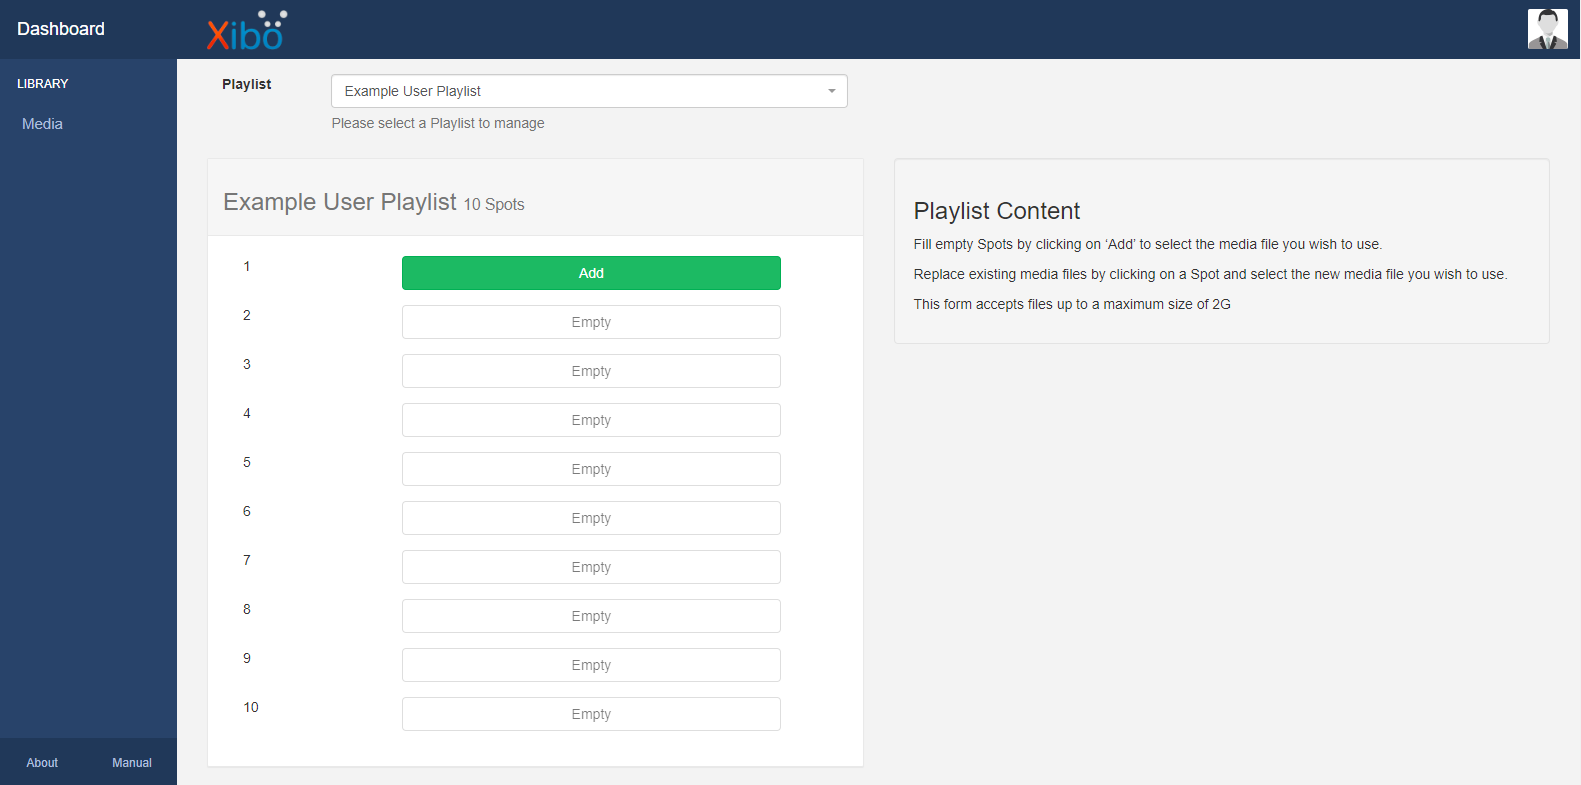
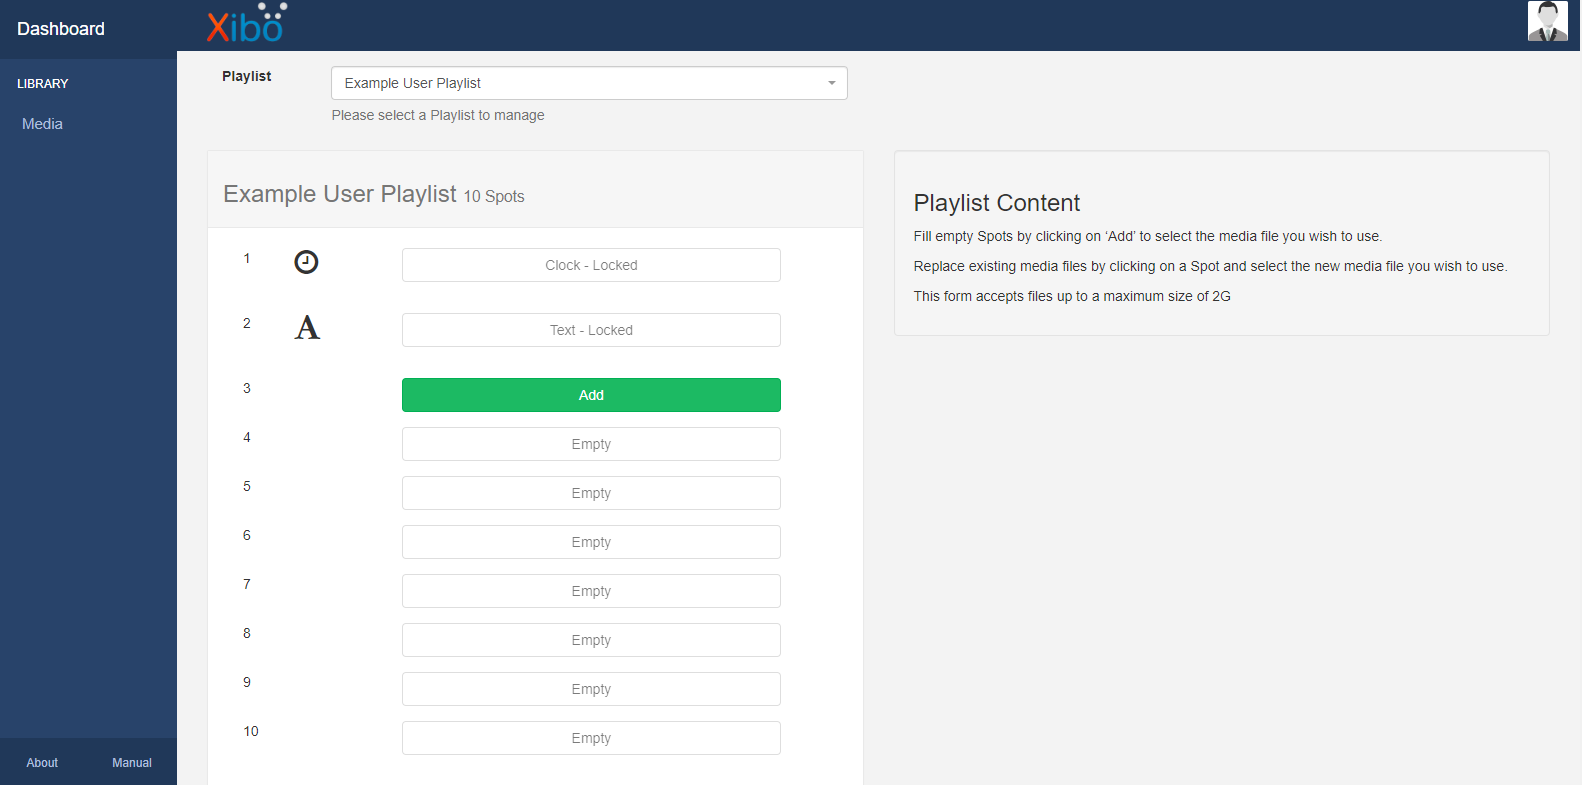
When the User logs in using the Username and Password created for them, they will see the Playlists Dashboard and be able to select only the Playlists that they have been given access to using the drop down menu and upload media to the allocated number of Spots.
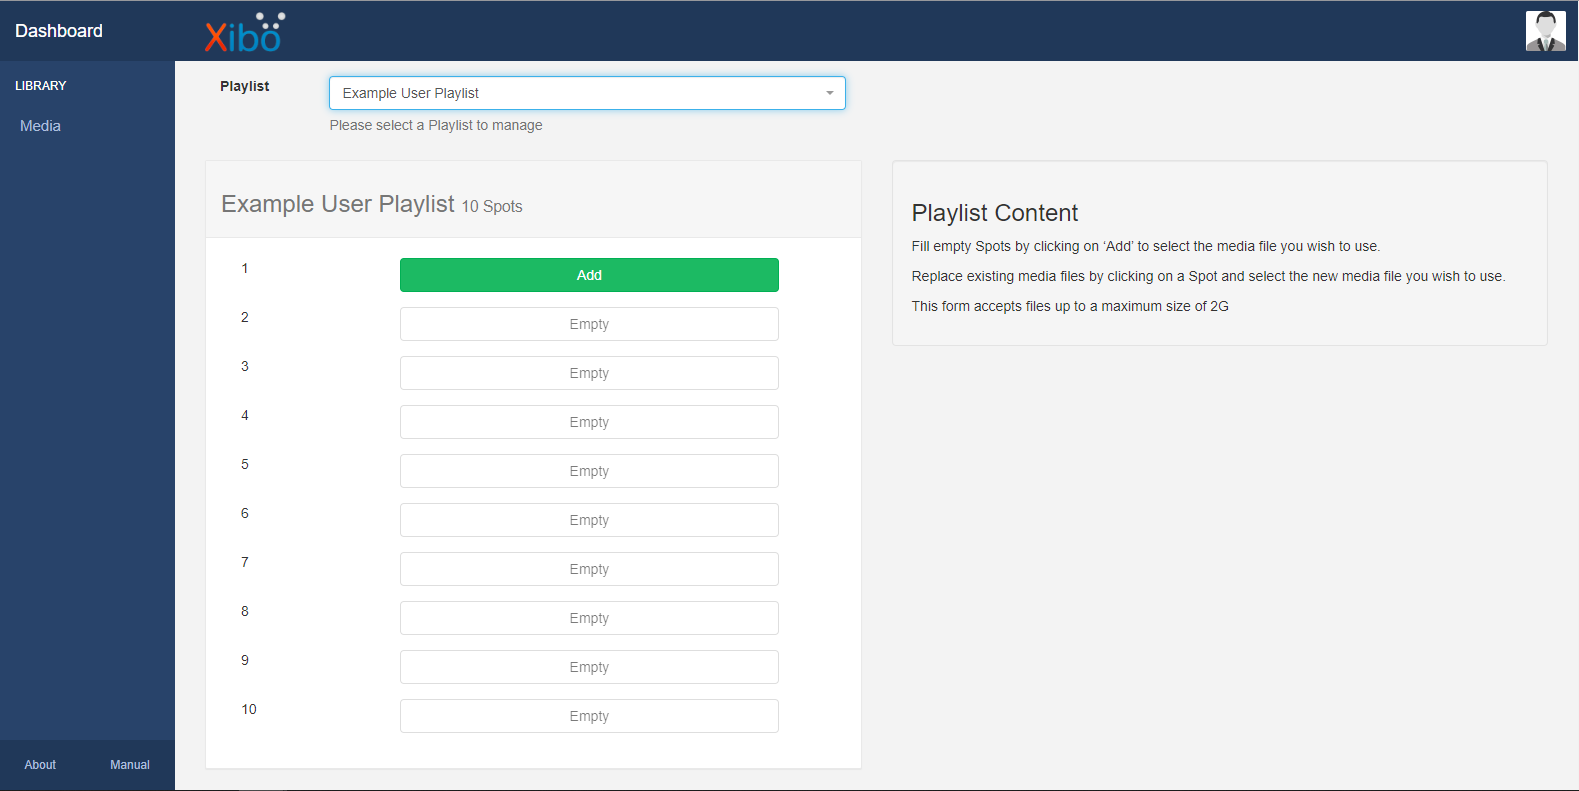
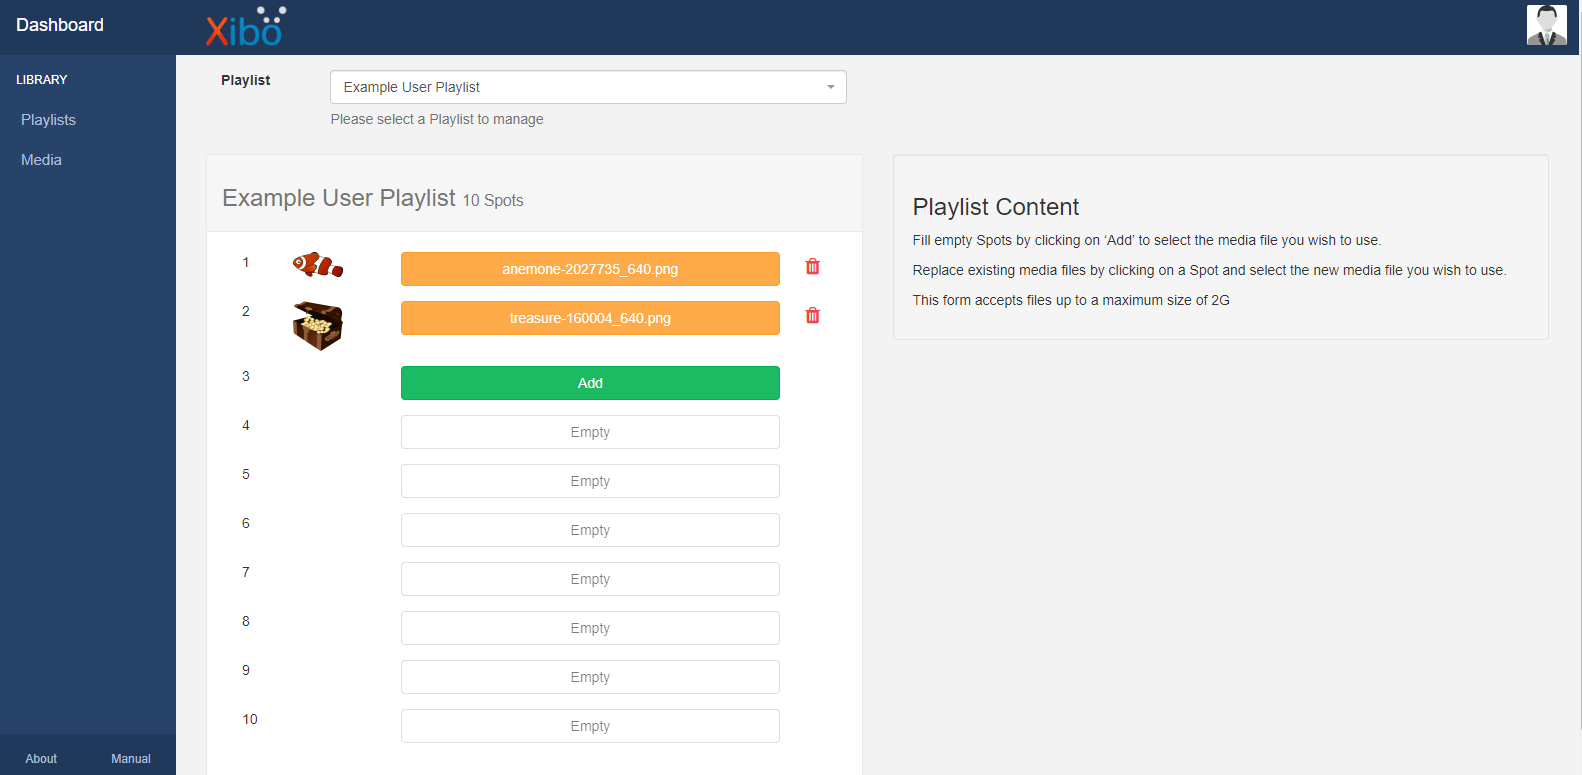
The User can click on Add to select files to upload and Replace by clicking on an existing media file to upload a new file to be shown in its place.

As the Playlist Spot Fill option has been set to ‘Repeat’, if the User did not add media to all of the available Spots, the media files that have been uploaded will repeat until all the available Spots have been filled.
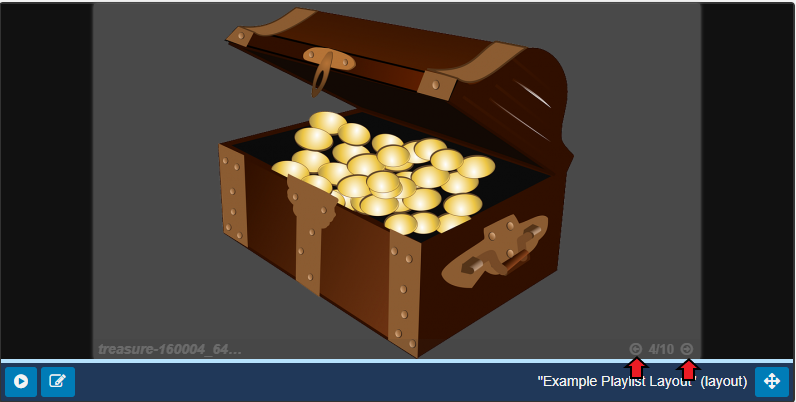
Take a look at the Layout Preview so you can see exactly how this will play before being scheduled. Use the arrows to scroll through how media files will play.
Available configurations are detailed on the Sub-Playlist manual page.
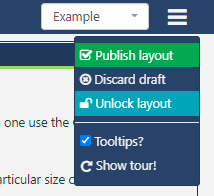
Remember to Publish the Layout!!
Once content has been added to the Playlist the Layout must be Published before it can be scheduled.
Use the Actions menu on the top toolbar of the Layout Designer and select Publish Layout .
If you do not want to Publish straight away untick the Publish Now option and select a date/time that this Layout should be set to Publish.

Once scheduled, any edits made to the Playlist by the User, be it uploading new or replacing existing media files, will be sent to the Player and update the media files in the Layout!
Access to Playlist
‘Playlist Manager / Dashboard’ Users can be modified to give additional access so that they can access Playlists to fully edit the Timeline, include Widgets and Library Search media, access Layout Designer Tools, delete media files, change the ordering etc.
Users of a v3 CMS
- Navigate to the User page and use the row menu for the selected User.
- Select Features
- From the Content tab, expand the Library set of Features
- Scroll down and tick the box next to 'Page which shows all Playlists that have been created which can be used in multiple Layouts’
- Tick the box next to ‘Allow edits including deletion to all created Playlists independently to Layouts’
- Click to Save.
As the Playlist only has View, Edit Share options enabled, the User will not have the option to delete!
Users of a 2.3.x CMS
- Navigate to the User page and use the row menu for the selected User.
- Select Page Security to open the ACL form.
- Scroll down and tick the box for Playlist.
- Click to Save.
The User will now have access to the Playlists Page to view, edit assigned Playlists.
Playlists offer many configurations in which to display your media, take a look at another one of our guides to give you an insight into the possibilities: How to show Media at specified intervals using Playlists.