This guide will talk you through how to create a setup that allows you to send a trigger code from one player to another. To demonstrate this I will create a layout that contains an interactive click action button, which will send a trigger code to another player.
Please note that version 3 CMS and players are required for interactive actions.
Step 1: Configure your players to receive trigger commands.
First you will need to make sure that the players you intend to use are configured so that they can use interactive actions and receive the trigger code.
- Go to the
Displaysmenu in your CMS. - Click the button at the end of the first display you want to use for this test and choose
Editfrom the menu. - When the Edit Display window opens, go to the
Profile Settingstab and make sure the option namedEmbedded Web Server Allowis set to True. You should also make a note of theEmbedded Web Server Portas you will need this for step 2.

- Save to confirm.
- Complete the same steps for the other display you will use for this test.
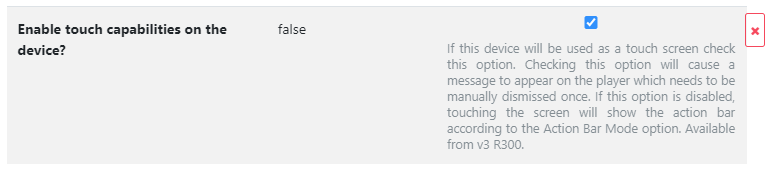
If you are using Android players you will also need to set
Enable Touch Capabilitiesto True if you intend to click the button from an Android player.
Step 2: Create the command for sending the trigger code.
This part requires some prior knowledge about the machine that will receive the trigger code. When the button is pressed in the click action layout, it will send a HTTP command to the display that is displaying the layout with the trigger code. Therefore you will need to know the IP address for the machine that will receive the trigger code, and the port number for the Embedded Web Server being used by that player. We can see in step 1 this is set to 9696. I am creating this example setup across a local network so I am using the local IP for my machine that will receive the command. I have also decided to use the trigger code TEST for this command.
-
Go to the Commands menu in your CMS.
-
Create a new command and give it a name that makes it clear what it is used for.
-
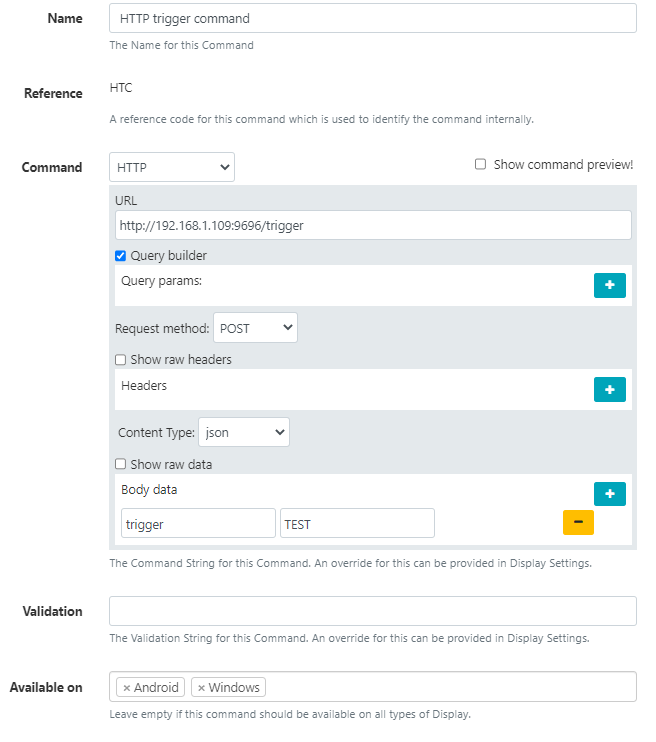
Set up your command as I have done in the screenshot below. The changes you will need to make are:
- The IP address in the URL field will need to be the IP of the machine you are using to receive the trigger code.
- The port number at the end of that URL must match the port for your Embedded Web Server Port (see step 1).
- The body data field that says
TESTmust be set the trigger code you will use in the layout that reacts to the button.
- Save to confirm.
Step 3: Create the layouts that will send and receive the trigger code.
Now that the players are configured to receive trigger codes, touch capabilities have been enabled and your command has been created, you can create the layouts that will send and receive the trigger action.
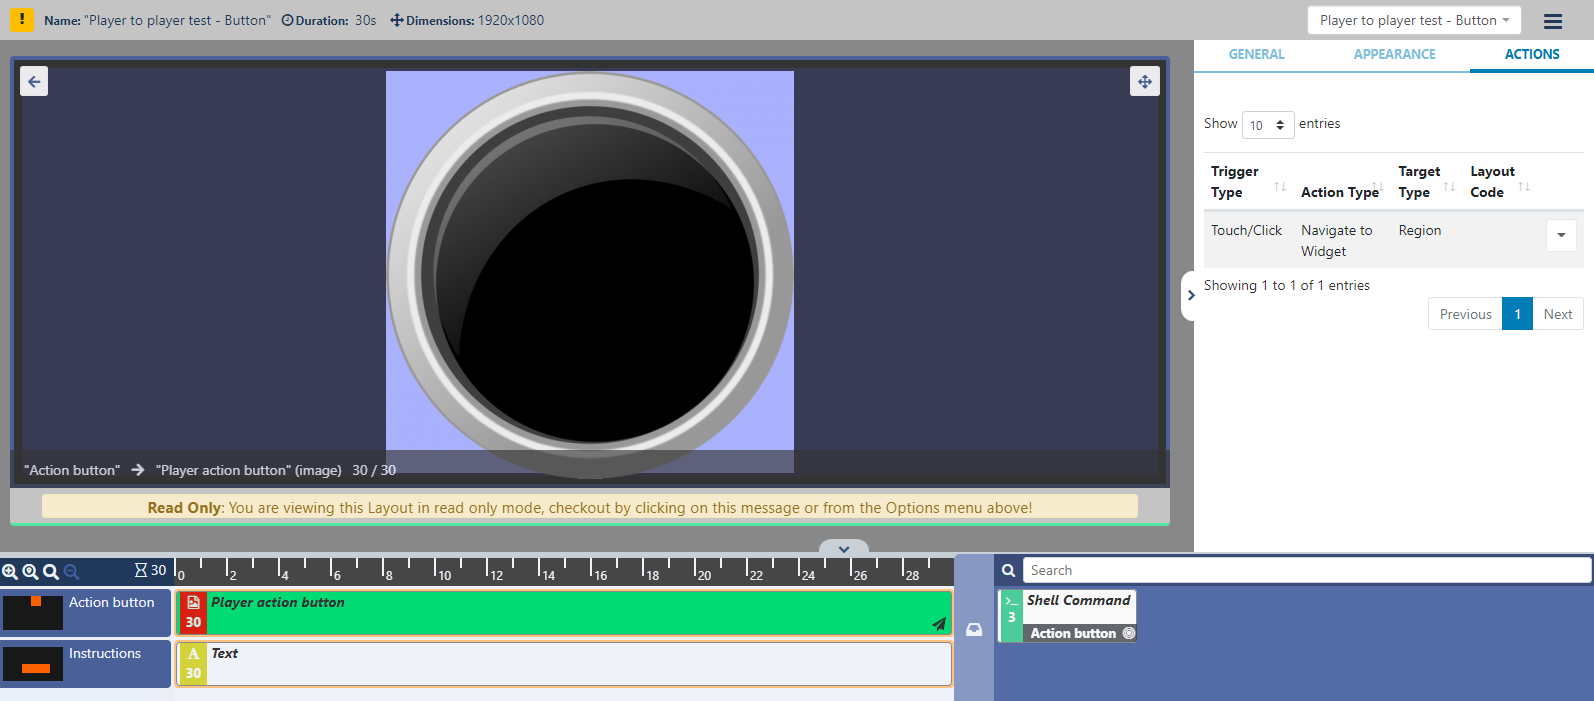
My click action layout has a region that contains an image of a button (you can use whatever you want). That widget has a Touch/Click action configured to navigate to the Shell Command widget I have added to the interactive drawer:
The Shell Command widget in the interactive drawer is set to use the command I created in step 2:
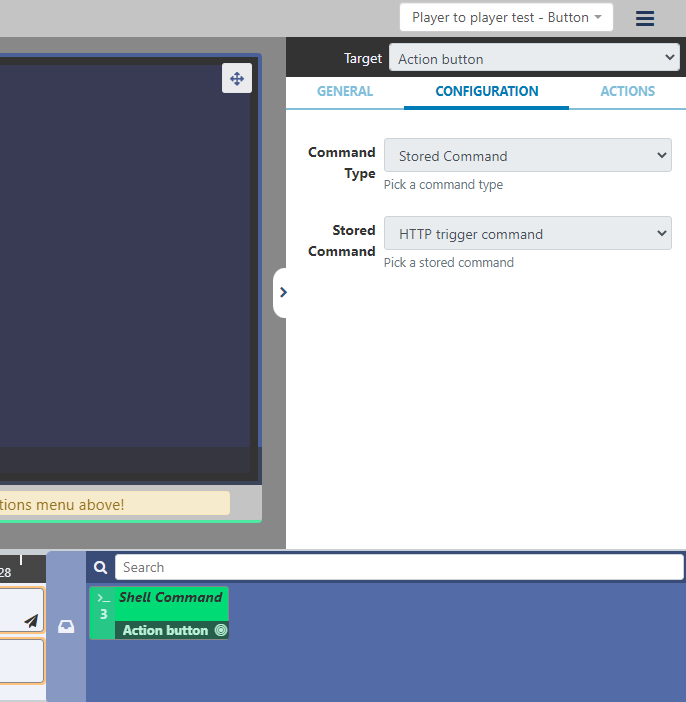
This means the button will run the Shell command widget, which will send the HTTP trigger command.
My receiving layout has a simple text region as a placeholder while it waits to receive the trigger code. There is also a text widget in the interactive drawer, which will be displayed when the trigger code is received.
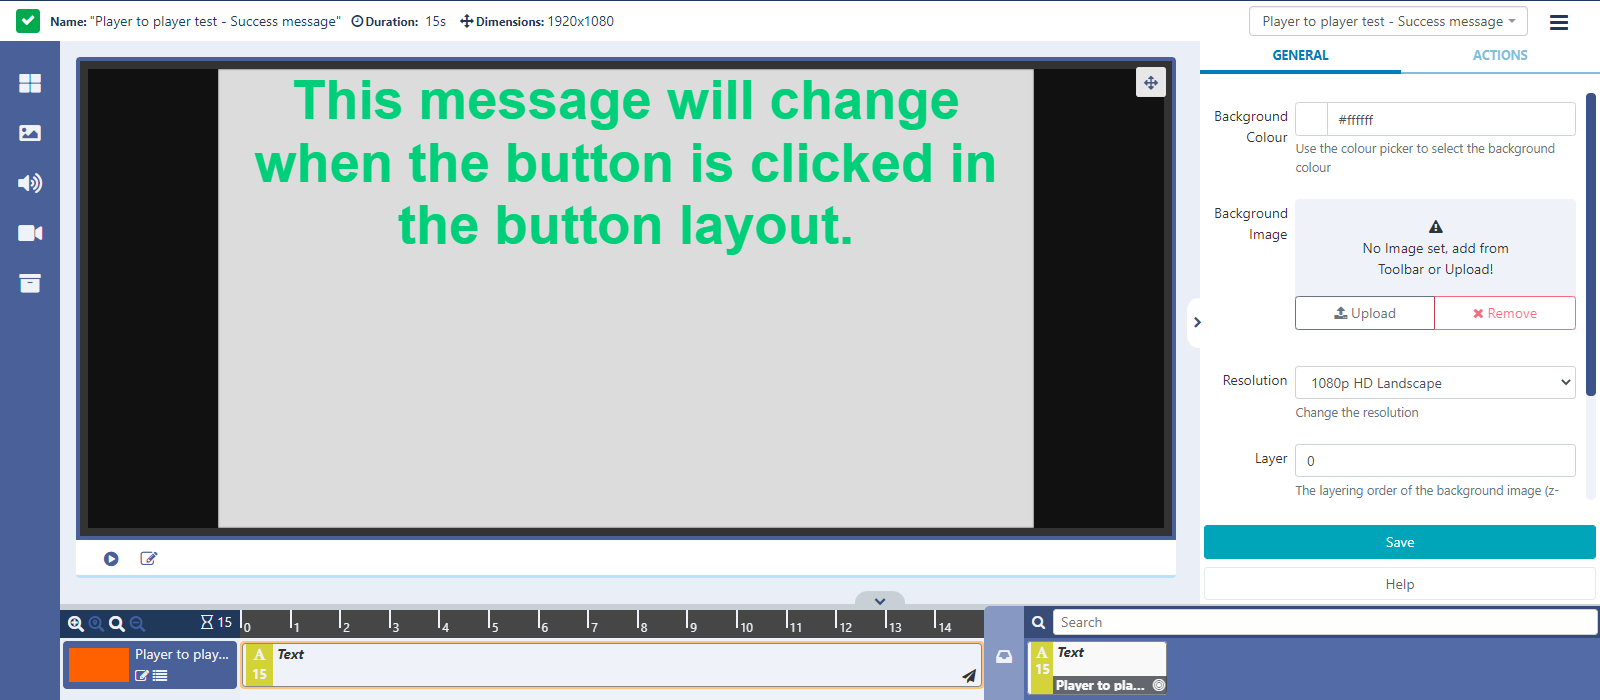
I have created a Web Hook Action set on the placeholder text widget in the only region in my layout and set it with the trigger code TEST. You can also see I have set that action to navigate to the widget in the interactive drawer and display it.
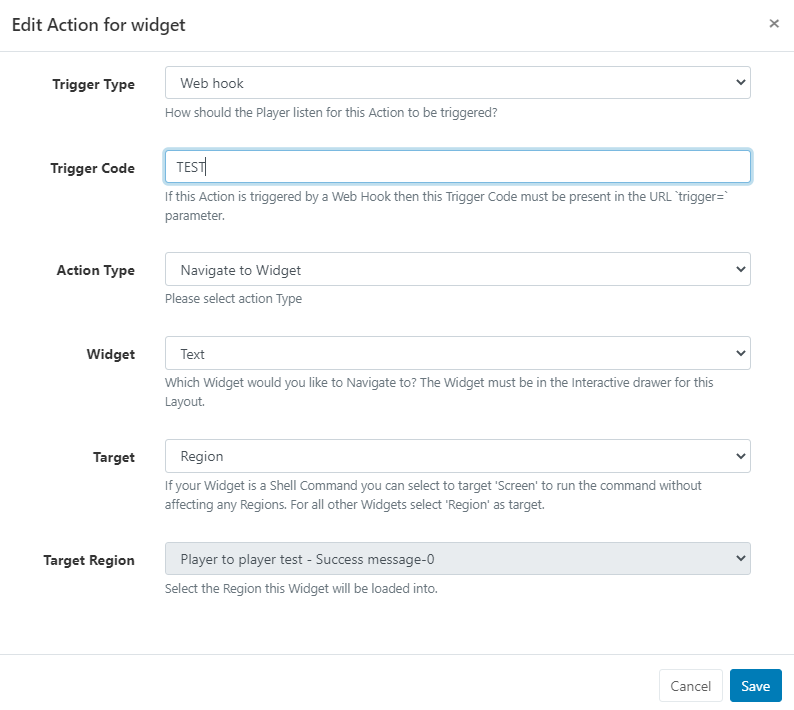
When the trigger code TEST is received by clicking the button, it will make the Web Hook Trigger run the Text widget in the interactive drawer, which has a message confirming it was successful.
Publish the layouts once completed.
Step 4: Schedule and test.
Now we have set up the displays, command and layouts we can schedule them and test. When both layouts are displaying I click the button, which sends the command to the IP for the player running the receiving layout, which then shows the text widget containing the success message.