This guide is applicable for users of a v3.1 and later CMS
Please note: The Calendar module is a new module for v3.1
The Calendar module which can be found in earlier versions has been renamed Agenda from v3.1
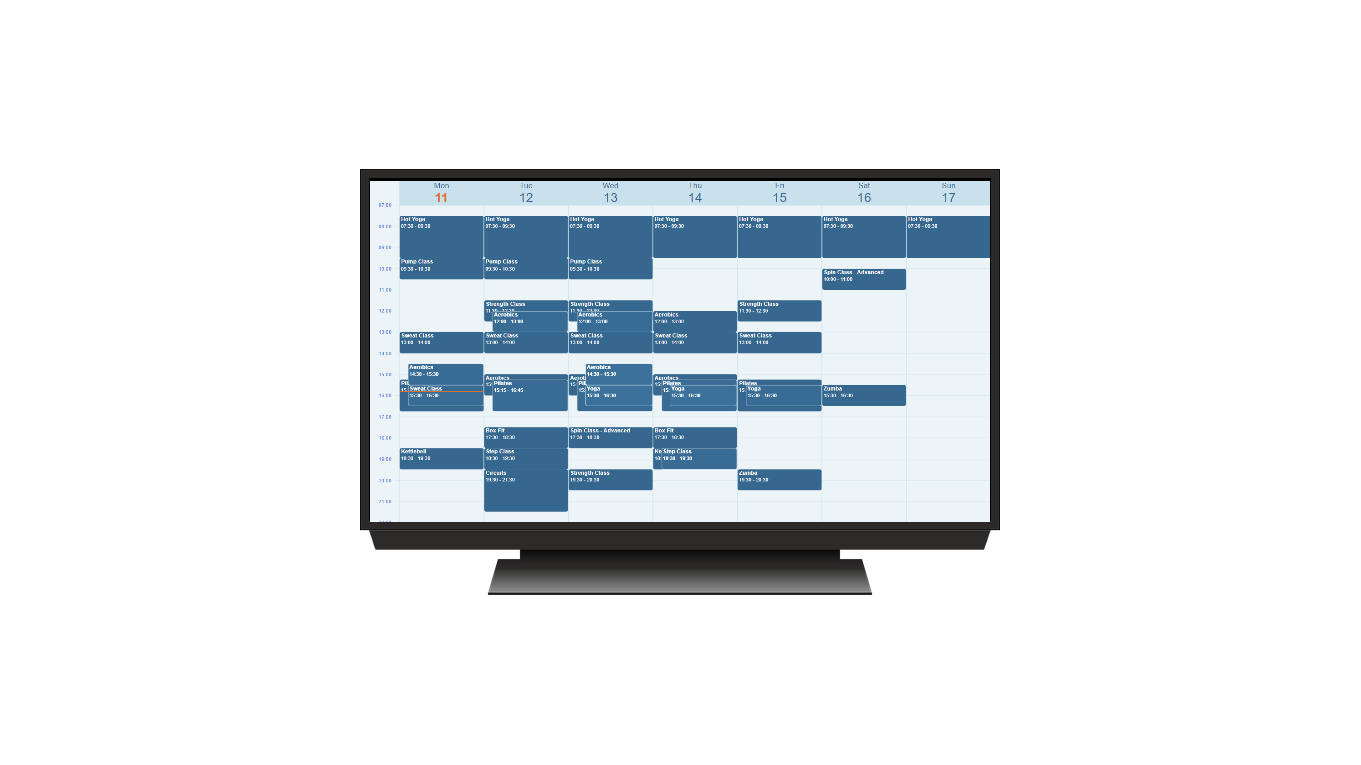
The Calendar Module has been designed to pull in data from an iCAL feed to display event information in a Schedule, Daily, Weekly or Monthly Calendar format.
This step by step guide will take you through the process of creating a Weekly calendar view to schedule to displays:
For further information on how to view your Google Calendar in applications please take a look at the following link: Get your calendar (view only)
Ensure that the ICS feed URL is available to the CMS. If the feed loads in a browser without authentication then the feed should display in the CMS without issue.
Add Layout
Click on Layouts under the Design section of the CMS main menu:
- Use the Add Layout button.
- I am going to select the Full Screen template for this example, click Next
- Give the Layout a Name
- Select the Resolution to use form the drop down menu.
- Save.
Remember, you can select an alternate template to use, but as this Widget could contain a lot of information it is worth keeping in mind the overall design so as to not lose the focus of your audience!
On saving, the Layout Designer will open.
- Open the toolbar and select Layout Designer Widgets
- From the list select Calendar
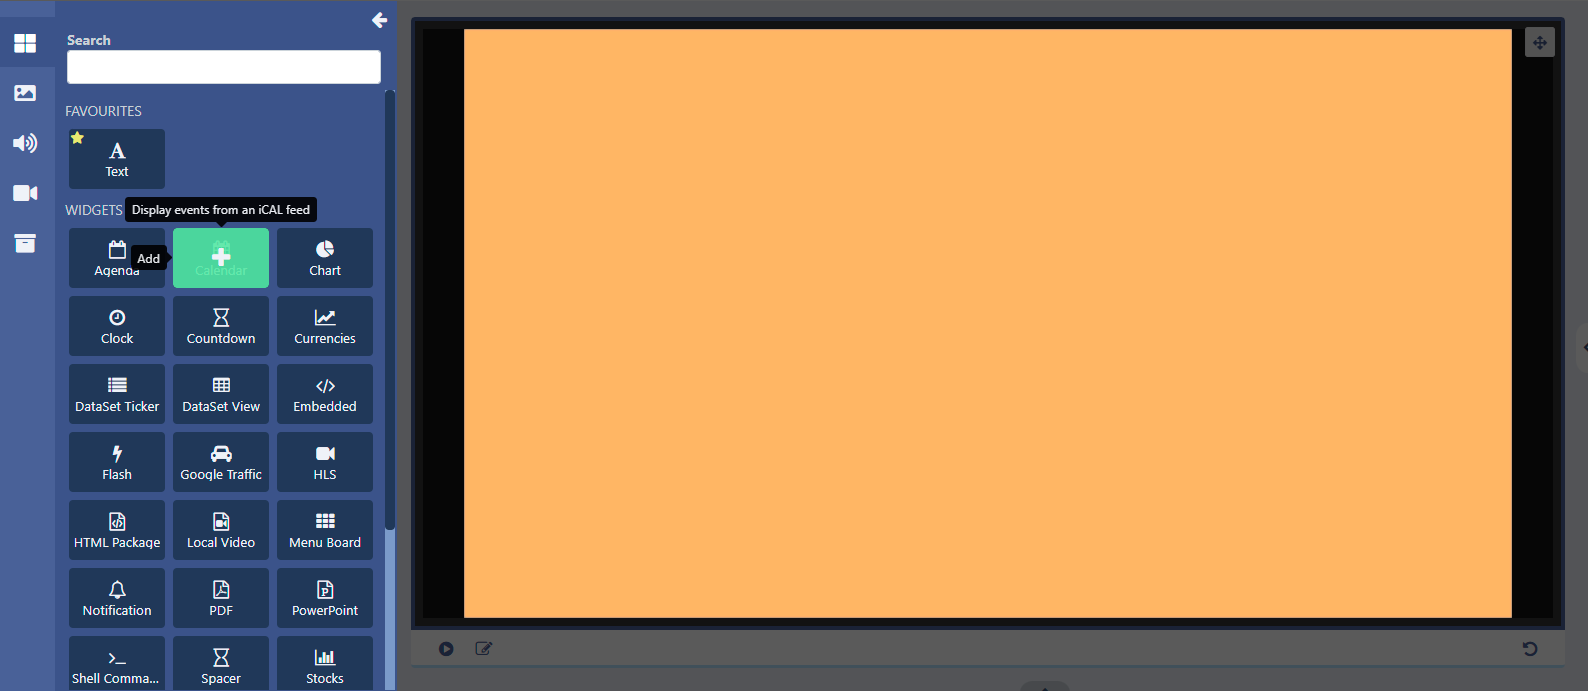
- Click to add or grab to drag and drop to the empty Region
Once added the properties panel will open with configuration options:
- Give the Widget an optional Name
I want to override the default duration for this Widget and provide a duration in seconds:
- Tick the Set a duration box to override and I am going to enter 1800 seconds (30 minutes)
Click on the Configuration tab:
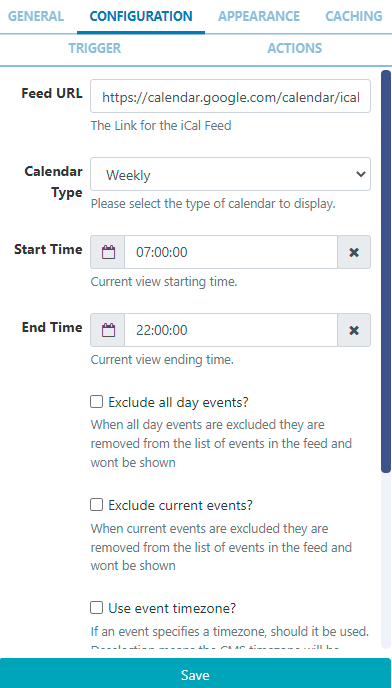
- Provide the URL for the iCAL feed to use.
- Use the drop down and select Weekly for Calendar Type
- Click on the calendar icon and set Start and End Times to create a viewing window for events in the calendar. I shall set to Start from 7 am to 10 pm to suit my ‘gym’ opening hours.
For this example I can leave the rest of the available options unticked.
If your calendar has all day events you could use the checkbox to remove these from the feed!
Next go to the Appearance tab:
- I can leave the Time Format as the default HH:mm to apply to the event timings.
- I will enable the ‘Show now marker’ so the current time will be highlighted on the calendar view.
- Text scale will leave as 1.
- Select Medium for the Week name length.
- I want each row in the grid to represent an hour so can leave Grid step as 60 (minutes).
- Select Light for the Theme to use the lighter colour scheme for the calendar view.

If we now hit the Save button at the bottom of the properties panel, we can see how the calendar will look:
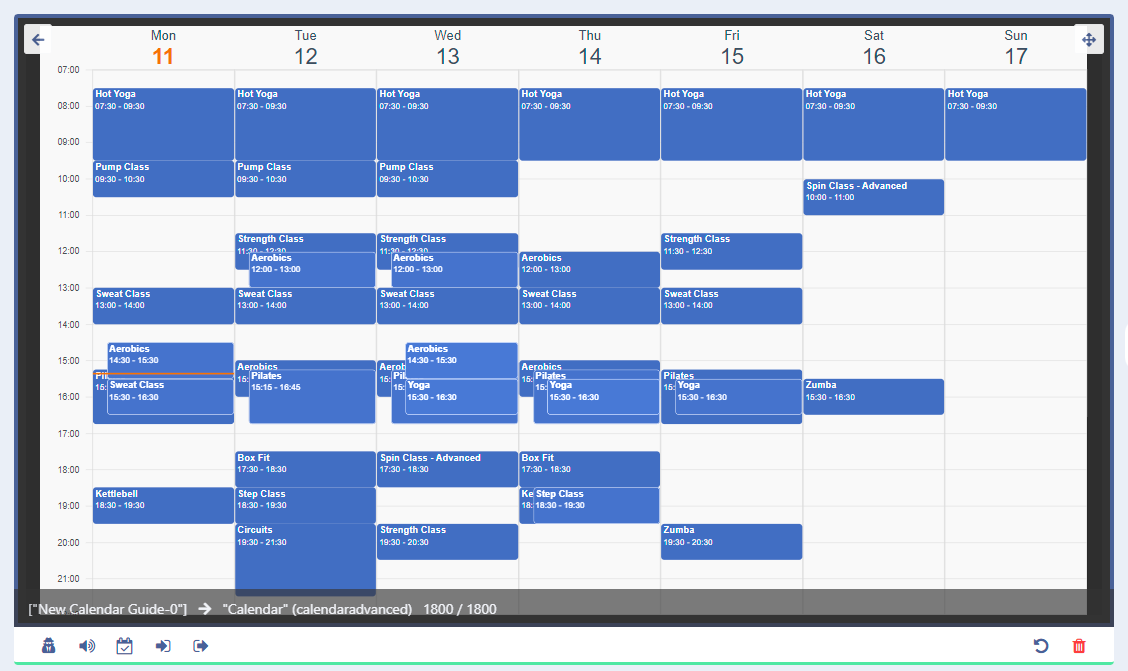
Use the button in the top right hand corner of the viewer to toggle to a full screen!
Toggle off from full screen and return to the Appearance tab so that we can make some changes to the existing colour template:
- Tick in the Override colour template box.
If we now scroll down the properties panel, you can see all the elements of the calendar which can have your own chosen colours:

Save and preview as you go.
- Use the Caching tab and provide an Update Interval (in minutes) as high as possible.I have set this to 60 which will mean that the Widget will check for new entries in the iCAL feed every hour
Click the back arrow in the top left of the viewer and play a full Preview of the Layout.
If everything is showing as intended use the menu to set the Layout to Publish, ready to be scheduled to Displays.

Next why not try selecting a different Calendar Type and configuring to see what best suits your use case!
Take a look at our Agenda Module Guide which gives an another example of how to utilise an iCAL feed to give a customer facing display!