Introduction
Once your Xibo CMS is installed, there’s some additional setup required to enable all functionality and to keep things running smoothly.
This article will list those steps and link out to specialised articles where appropriate.
Prerequisites
You’ll need a Xibo CMS. If you haven’t installed one already, basic instructions for installing a CMS can be found here:
Xibo Manual - Installing the CMS
How to install on Centos 6
Alternatively, if you’d rather not host your own CMS, then do look at Xibo in the Cloud for hosting, Xibo in the Cloud customers benefit from pre-configuration of features and can skip steps as detailed below.
Library Location
Xibo in the Cloud customers can skip directly to Timezone
It is critical that you configure Xibo so that it knows where it’s CMS library directory is, and that the path you give it is fully qualified. Fully qualified means that the path starts at the highest level of the server’s directory system. We also strongly recommend that your library directory is not web servable - ie it is not in the same place as your Xibo installation. If you do put it as a sub directory of the Xibo installation, then you will have issues come upgrade time. You also open yourself to anyone with access to your webserver being able to download your content without authentication.
What people commonly do is simply enter library/ for the location. This will work in some scenarios, but will often cause issues with Players not updating properly. If you’ve just entered library/ then changing the entered path is as simple as adding the path to the library directory that already exists (eg changing library/ for /path/to/xibo/library).
If you are going to move your existing library elsewhere, then you must move the existing library directory (which contains all your uploaded media) to the new location, and then change the library location setting. Xibo will not attempt to move the library for you.
We recommend something like this as the directory structure to use. Clearly this will depend upon your webserver’s configuration.
Version 1.7 CMS and earlier
/path/to/webroot/xibo - CMS files (eg index.php, settings.php, xmds.php)
/path/to/library - CMS library
eg
/var/www/html/xibo
                  - index.php
                  - xmds.php

/var/www/library
You would then configure the library path to be /var/www/library/. Ensure that the user the webserver is running as has permission to write to that directory. So for an Ubuntu server, you might run a command like
chown -R www-data.www-data /var/www/library
If you’re using a Windows server, then a fully qualified path starts with a drive letter. So if your CMS library is located at C:\Xibo-Library then you should enter C:\Xibo-Library. The CMS may add a trailing / character for you. That’s normal.
1.8 CMS and later
If you’re using a Docker based installation of 1.8, then this has already been configured correctly for you so you can skip straight to the next section.
/path/to/install - CMS files
/path/to/install/web - web root
/path/to/install/library
eg
/var/www/xibo
/var/www/xibo/web - this should be your webserver's web root
/var/www/xibo/library
You would then configure the library path to be /var/www/xibo/library/. Ensure that the user the webserver is running as has permission to write to that directory. So for an Ubuntu server, you might run a command like
chown -R www-data.www-data /var/www/xibo/library
If you’re using a Windows server, then a fully qualified path starts with a drive letter. So if your CMS library is located at C:\Xibo-Library then you should enter C:\Xibo-Library. The CMS may add a trailing / character for you. That’s normal.
Time and timezone
NTP
Xibo in the Cloud customers can skip directly to Timezone
It’s really important that the time is correct on your CMS, and that the CMS timezone setting is set correctly for the timezone you’re working in.
You might want to consider setting up your Operating System to sync time automatically from the Internet so that the time is always correct.
ntp.org provide free access to time servers you can use to syncronise your CMS clock. Instructions for configuring access to their servers are provided here pool.ntp.org: How do I setup NTP to use the pool?
Timezone
So now your clock is correct (and will remain so automatically), we need to let the CMS know what timezone it should be using. The installer attempts to make an intelligent guess from the timezone that your OS has been setup to use, but it’s not always able to make the best choice.
Log in to your CMS and go to the Settings page, and then the Regional tab:
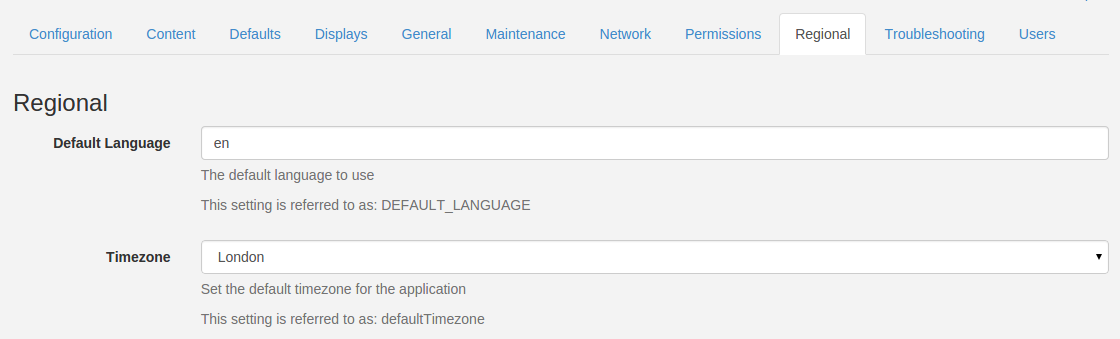
Select the nearest major city in your timezone. Click Save at the bottom of the page.
Large File Uploads
Xibo in the Cloud customers can skip this section completely
Your users will almost certainly want to start uploading images and video to the Xibo CMS. In order for that to happen, PHP and your webserver must be configured correctly to support large file uploads.
Detailed instructions are in the FAQ here:
How do I upload files bigger than 2MB / How can I increase the upload size limit?
CMS Maintenance and Email Alerts
The Xibo CMS is only ever running when a user is actively interacting with the system, or a Player is connecting to update its content. At other times, Xibo isn’t running at all. That means in order to carry out certain background routines (eg clearing out old records) or to alert you if one of your Players stops connecting as expected, we need a regular “wakeup” to run Xibo to allow those things to happen. Let’s configure the maintenance.php script to be run on your CMS.
maintenance.php
Xibo in the Cloud customers can skip directly to Email Alerts
The maintenance.php script should be run on your CMS from the Windows Task Scheduler, or from cron every few minutes. You should also configure your CMS to send email via a mail server so that email alerts can be sent. If you don’t intend to send email alerts then you can skip that section, but be sure to turn off Email Alerts on the CMS Settings page with the Enable Email Alerts? (MAINTENANCE_EMAIL_ALERTS) setting to Off.
Follow the instructions here in the Xibo Manual to setup PHP and your maintenance script scheduled task.
Email Alerts
Now the CMS is being regularly woken up, we can optionally configure email alerts to be sent when Players stop connecting properly, and when they come back online after a period of downtime.
Firstly head to the Settings page of the CMS and move to the Maintenance tab. You’ll see some settings referring to the sending of emails. Xibo in the Cloud customers note that some of these are pre-populated for you but are available for you to change, and others are locked for editing
Enabled Email Alerts(MAINTENANCE_EMAIL_ALERTS) is set to On- Enter the email address that should receive email when a display goes offline or comes back online in the
Admin email address(mail_to) field. - Enter the email address alerts from the CMS should come from in the
Sending email address(mail_from) field . - The
Send repeat Display Timeouts(MAINTENANCE_ALWAYS_ALERT) field, if set toOnwill mean for each offline display, you’ll receive an email every time themaintenance.phproutine is run. Most people will want this set toOffwhich means that you’ll be notified only once per downtime period. - The value of
Max Display Timeout(MAINTENANCE_ALERT_TOUT) is the time in minutes after we last see a Player connect to the CMS that we consider it to have gone offline. It can be overridden on a per-display settings profile basis should you need that. Do not set this value lower than your normal Player collection interval. If in doubt, set it higher. The default is 30 minutes. - Save your settings by clicking the Save button at the bottom of the page.
In some cases it’s also useful to alert users if a Player goes offline. If you want to alert all users who have view permissions to a display, then move to the Displays tab and tick the box Maintenance Alerts for Users (MAINTENANCE_ALERTS_FOR_VIEW_USERS) and click Save.
Next we need to decide which Displays we want to receive alerts for.
Go to the Displays page in the CMS. For each display that you want to receive alerts for, edit the display and move to the Maintenance tab:

Make sure Email Alerts is set to Yes. For any display you don’t want to receive email alerts for, set Email Alerts to No. If you aren’t using Display Settings Profiles (see the section below), be sure to tick the Use Global Timeout tick box so that the value we set earlier for the time a display needs to be offline before we’re alerted is used. If you’re using Display Settings Profiles, then if that box is unticked, the display collection interval from the Display Profile is used instead.
And that’s Email Alerts configured. Now if you turn off one of your displays, you should be notified by email. The email will be sent once the global timeout or display profile collection interval has elapsed since the Player last connected, on the subsequent run of the maintenance script. If the global timeout is 10 minutes and your maintenance script is set to run every 5 minutes, then you may not be notified for up to 15 minutes after the Player last connects.
When the Player comes back online, you will be notified instantly via email. Note that multiple recovery emails are sent if the Player in use makes multiple simultaneous calls to the CMS when it starts up.
Log and Statistics Retention
Xibo in the Cloud customers should be aware that these settings are pre-configured and aren’t available to be modified.
The CMS generates log output when it’s running, and also receives log output from the Players connected to it for the purposes of debugging and checking the system’s state. It can also collect proof of play records called Statistics. All these records are held in the database and should be purged periodically to keep the size of the database manageable and to prevent system performance problems. The maintenance script performs that function.
From the Settings page in the CMS, move to the Maintenance tab:
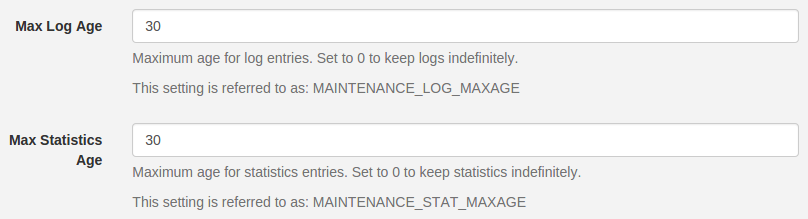
Max Log Age (MAINTENANCE_LOG_MAXAGE)controls how many days logs should be retained in the CMS database before being automatically deleted. A setting of5would keep logs for 5 days and that’s reasonable for most debugging purposes.Max Statistics Age (MAINTENANCE_STAT_MAXAGE)controls how many days proof of play statistics are retained in the CMS database before being automatically deleted. A setting of30would keep statistics for 30 days. If you need to keep them for audit purposes, they can be exported from theStatisticspage in the CMS and archived for later use.
Regional Settings
Xibo has built in support for display of the user interface in alternative languages, and to show dates in alternative formats too (eg DD/MM/YYYY vs MM/DD/YYYY).
All translations are contributed by the community and we are very grateful for peoples efforts to keep the system translations updated and accurate. If you’re interested in improving the translations for a specific language, you can contribute directly via Launchpad Translations:
Launchpad Translations
Edits made there will be automatically included in future Xibo CMS releases.
Language Detection
By default, the CMS will use the language preferences set in your web browser to auto-detect which language to display the CMS interface in. In some instances, for example where only small parts of the CMS have been translated in to a particular language, it may be desirable to disable language detection and enforce a specific language instead.
- From the
Settingspage of the CMS, move to theRegionaltab - Untick the
Detect Language (DETECT_LANGUAGE)tick box
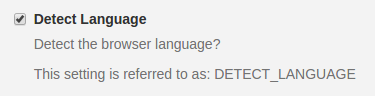
- Select a suitable default language (see below)
- Save your changes
Default Language
If you disable language detection, the CMS will need to know which language file to take it’s translations from.
- From the
Settingspage of the CMS, move to theRegionaltab. - Find the
Default Language (DEFAULT_LANGUAGE)box - The default is
en_GBwhich will give you English (British) translations. You can enter any valid code from the list of languages Xibo is currently translated in to. You can see a list here - Enter the language code, without the trailing .mo. So for example, to select Spanish, enter
es - Save your changes
Regionalised Date Formats
By default the Xibo CMS shows dates in Y-m-d H:i format (eg 2015-03-29 10:00:00)
If you want to use fully regionalised dates, you must have the php5-intl module installed. Xibo in the Cloud does have the php5-intl module installed
- From the
Settingspage of the CMS, move to theRegionaltab and tick theUse international dates? (USE_INTL_DATEFORMAT)box. - Change the
Date format (DATE_FORMAT)field to readYYYY-MM-dd HH:mm:ss - Save your changes
Display Settings Profiles
Display Settings Profiles offer a powerful way of centrally configuring your Player settings from the CMS. When the Players connect to the CMS, they will receive any default or assigned profile you’ve created and reconfigure themselves with those settings automatically.
You’ll find the profiles in the Display Settings page of the CMS. You can create default profiles for each Player type, or individual profiles which can then be applied to one or more Players to override the default settings.
Full details on managing Display Settings Profiles can be found in the manual here:
Display Settings Profiles
Curl SSL Setup (Installing SSL Root Certificates for PHP)
Xibo in the Cloud customers can skip this section
The CMS will need to be able to validate SSL certificates are valid when it talks to third party servers (for integrations such as Twitter, Forecast IO or for RSS feeds consumed over HTTPS links) so it’s important that your PHP installation is setup to allow that.
Please see the FAQ article here for detailed instructions:
Using Tickers, Forecast IO, Twitter and other External Resources that make use of HTTPS connections
Proxy Settings
Xibo in the Cloud customers can skip this section
The CMS will need to be able to contact external servers to pull in RSS feeds from outside your local network, or for integrations such as Twitter. If your network uses a proxy server then you’ll need to tell the Xibo CMS about it so it knows where to look.
From the Settings page of the CMS, move to the Network tab.
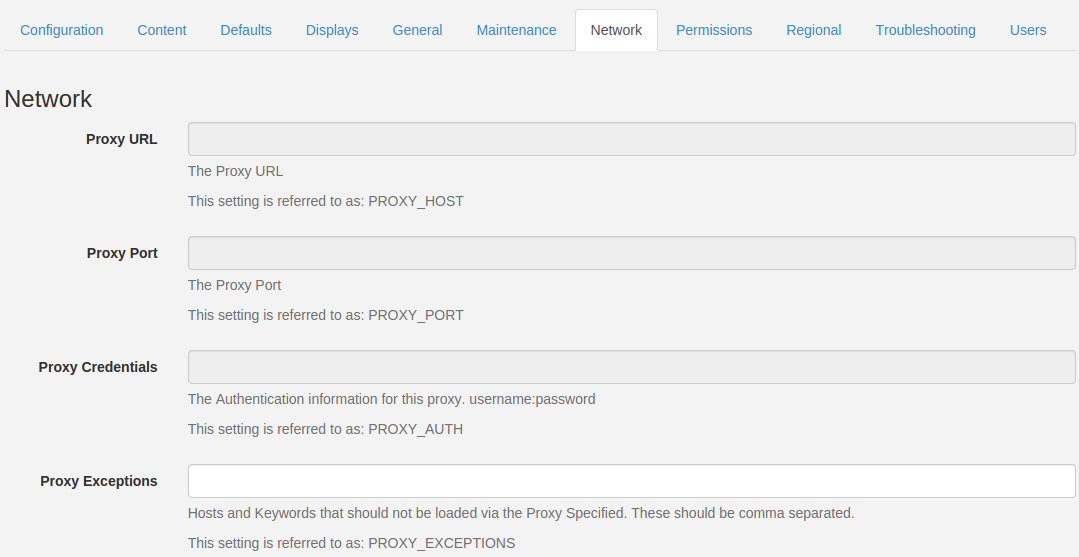
Fill in the proxy server details for your network. Your network administrator will be able to help you if you’re not sure what they are.
Proxy URL (PROXY_HOST)should be the hostname of your proxy server (egproxy.mydomain.comor192.168.1.8)Proxy Port (PROXY_PORT)should be the port number that your proxy server is listening on (eg3128or8080)Proxy Credentials (PROXY_AUTH)should be any username and password required to use the proxy server, in the formatusername:passwordegjdoe:secretPassword. Leave this blank if your proxy does not require authenticated access.Proxy Exceptions (PROXY_EXCEPTIONS)are any host or keyword that should be excluded from being sent to the proxy server. For example if you have an intranet server then you could exclude it by enteringintranet.domain.com. Multiple entries can be included by separating them with commas. Leave this blank if you don’t require any proxy exceptions.
Save your changes at the bottom of the page.
Third Party Integrations
Weather Forecast API Key
Xibo in the Cloud accounts come pre-configured with a Forecast API key so you can start using the Weather module straight away with no additional setup
Since version 1.7, Xibo CMS has the ability to show weather forecasts and current weather conditions thanks to an integration with Forecast.io
Access to the Forecast.io API is protected and users must register for an API key and enter that key in to the Xibo CMS settings. Full details are available in the manual here:
Weather Module
Twitter API Key
Since version 1.7, Xibo CMS has the ability to search Twitter for interesting tweets and show them as part of a layout.
Access to the Twitter API is protected and users must register for an API key and enter that key in to the Xibo CMS settings. The process differs slightly for Xibo in the Cloud customers as detailed below.
Xibo Open Source Users
- Go to https://dev.twitter.com/apps/new and log in, if necessary
- Supply the necessary required fields, accept the terms of service, and solve the CAPTCHA.
- Submit the form
- Make a note of the generated consumer key (API key) and consumer secret (API secret)
- Move to the
Modulespage of the CMS and edit the Twitter module

- Enter your API key and secret.
- Optionally adjust the
Cache Periodvalue to determine how long to cache a results set for each Twitter search. Note that setting low values can cause your access to the Twitter API to be disabled for generating too many requests. - Save your changes
Xibo in the Cloud Customers
The process of connecting to the Twitter API is simplified for Xibo in the Cloud customers.
-
From the
Modulespage of the CMS, find theTwitter Providermodule and click the dropdown arrow at the end of the row to reveal aConnect to Twitterbutton:

-
That will bring up a Login with Twitter button to allow you to authorise the CMS to connect via your Twitter account:
-
Press the Login with Twitter button and follow the on-screen instructions to authorise the CMS.

Backups
Xibo in the Cloud customer’s accounts are backed up daily as part of your service plan
As with any system containing user data, it’s vital to maintain regular backups of your Xibo CMS.
Backups should be carried out at least daily, or more often if you have large volumes of updates to your content or if proof of play statistics are important to you.
To take a backup of your Xibo CMS, there are three things required:
- A database backup (using
mysqldumpor similar tool) - A backup of the CMS library directory
- A copy of the
settings.phpfile from your Xibo installation
Exact details of how to arrange automatic backups on your particular operating system are left as an exercise for you, as it’s such a broad topic and there are many options available.
Here however are some links to utilities that may be of use:
mysqldump - MySQL backup tool
duplicati - Windows/Linux duplicity GUI backup application
duply - Linux duplicity command line backup application
Remember for a backup strategy to be reliable and effective, it must be automatic. Don’t rely on remembering to take periodic backups manually.