This guide will take a User through the creation of a Menu Board, which will be added to a Layout using Menu Board Data Elements and Scheduled to Displays to show at a specific time, using a v4.0.6 CMS.
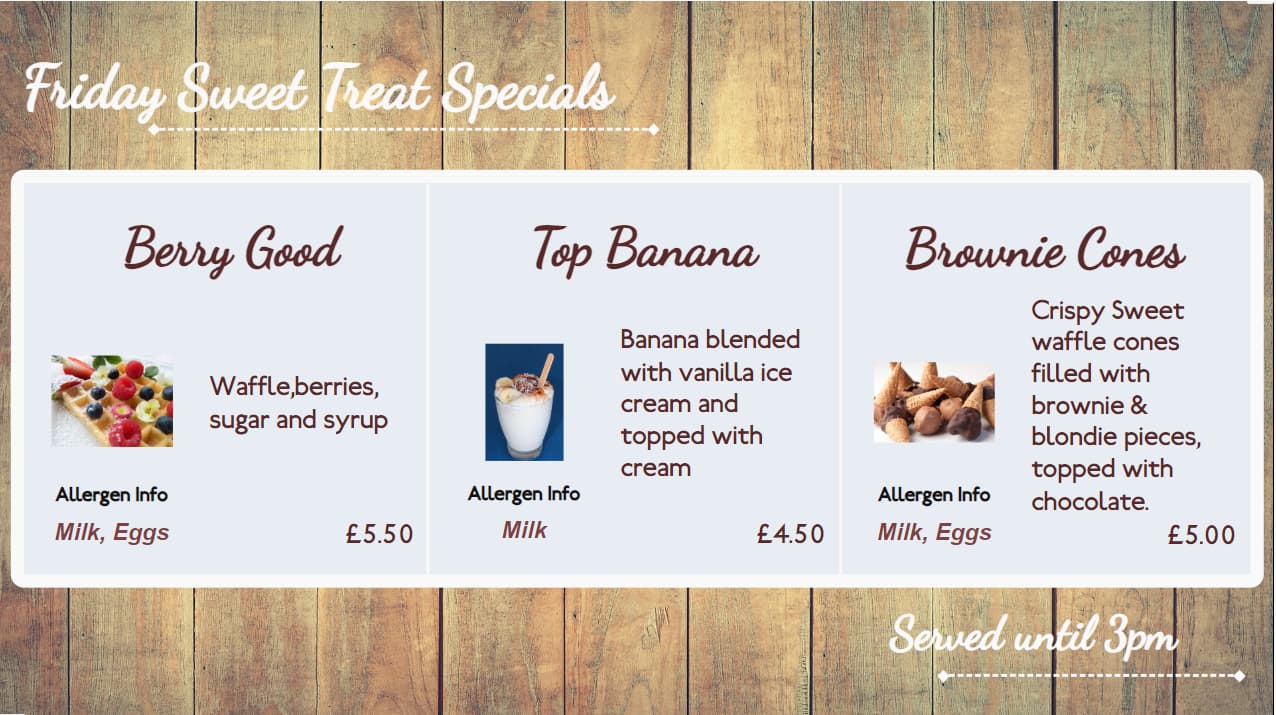
For the purpose of this guide I am going to create a menu of special items to be shown in my fictional dessert shop on Friday afternoons.
Workflow:
- Create Menu Board
- Create Layout
- Publish Layout
- Schedule Layout
First I need to create the data I am going to pull through to Layouts by adding a new Menu Board.
Create Menu Board
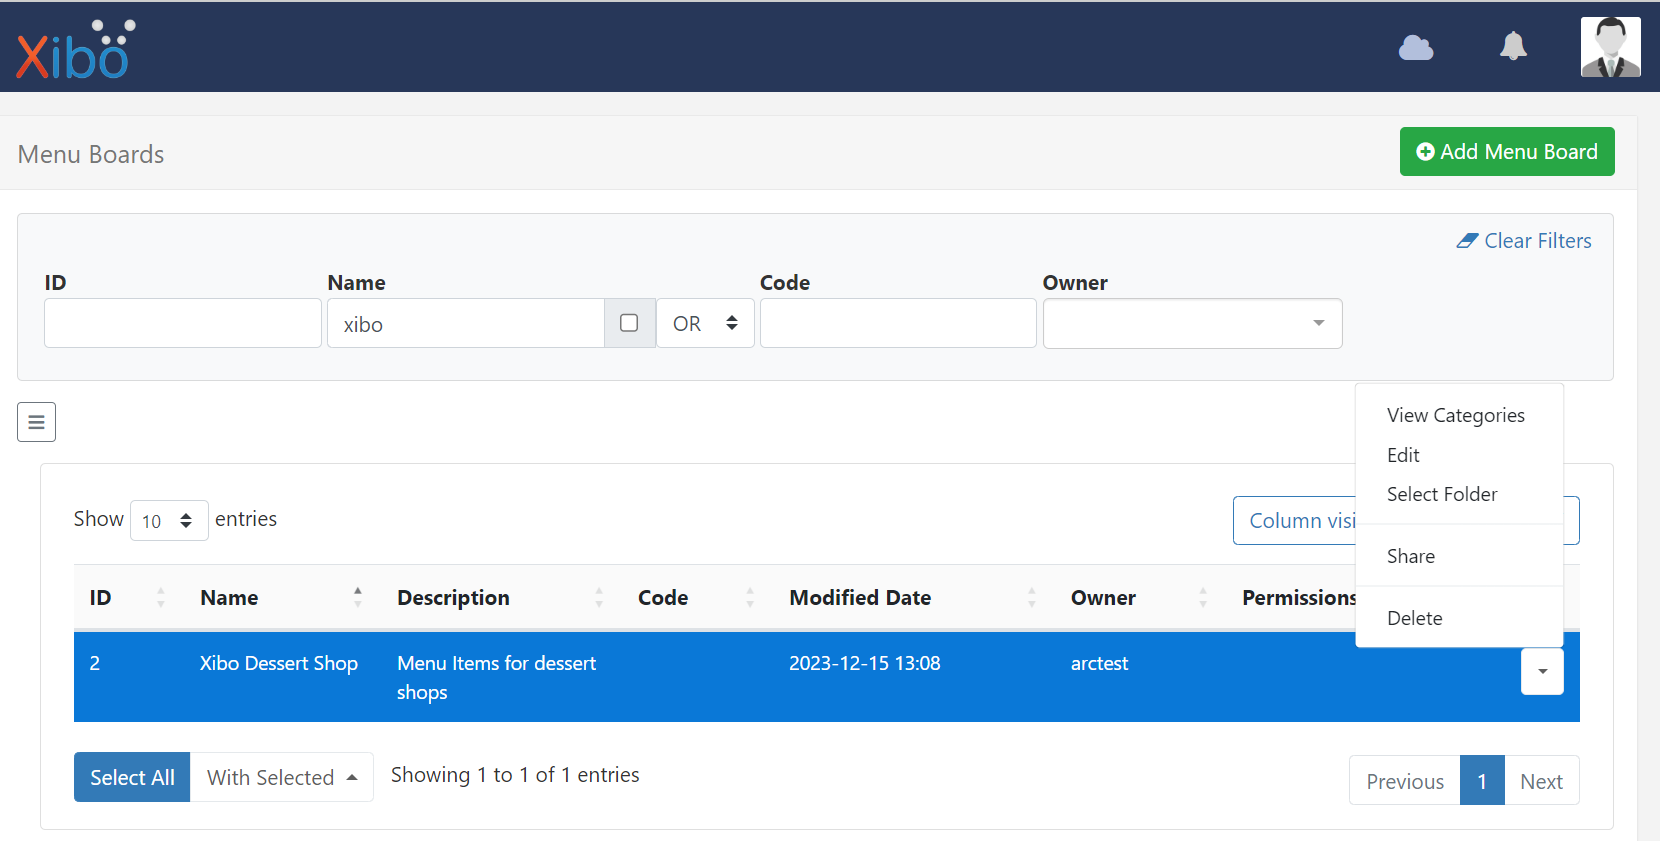
- From the CMS main menu, select Menu Boards under the Library section.
- Click the Add Menu Board button to create a new record.
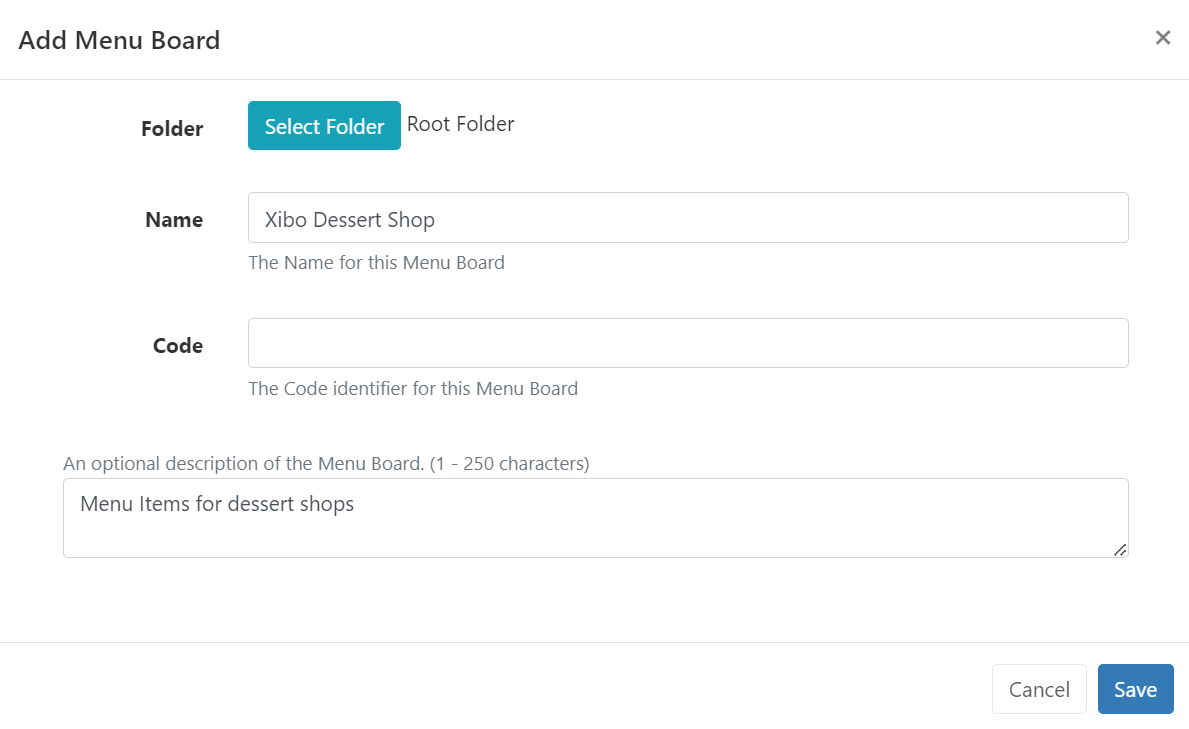
- Give the Menu Board a Name and an optional description.
- Save.
If you intend other Users to manage and maintain this Menu Board it’s a good idea to save to a Folder!
If you are wanting to associate Image/Video files with Categories/Products now would be a good time to upload those to your CMS Library!
Menu Board data consists of Categories and Product items, so first I need to create some Categories.
Adding Categories
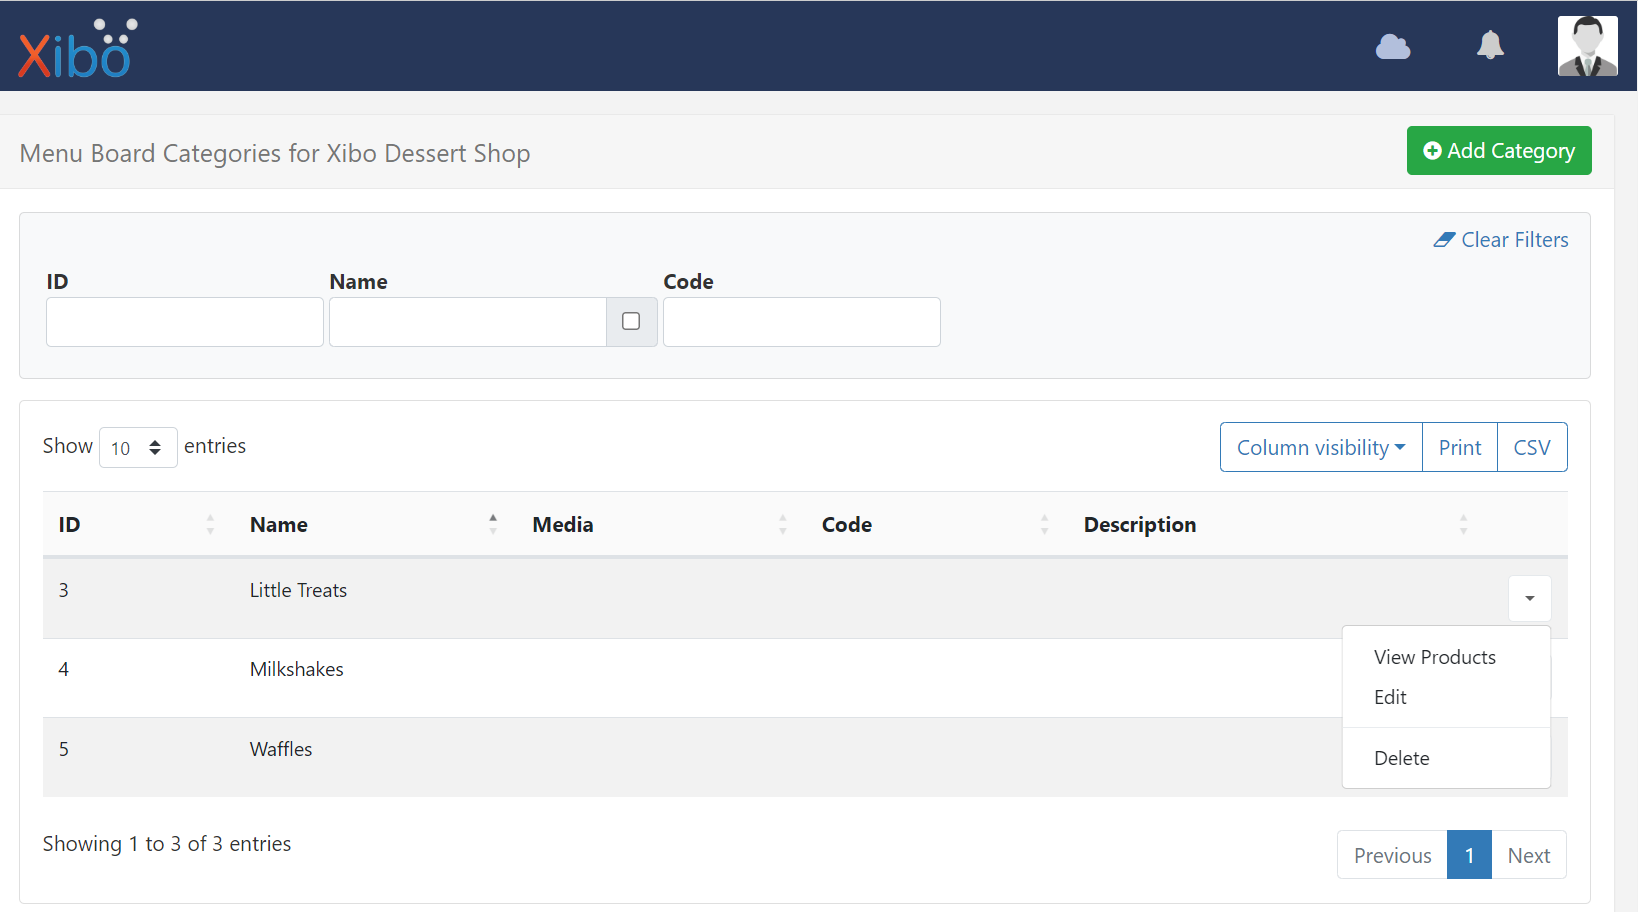
- Using the row menu for the new Menu Board record, click to select View Categories:
- Click the Add Category button and complete the form fields:
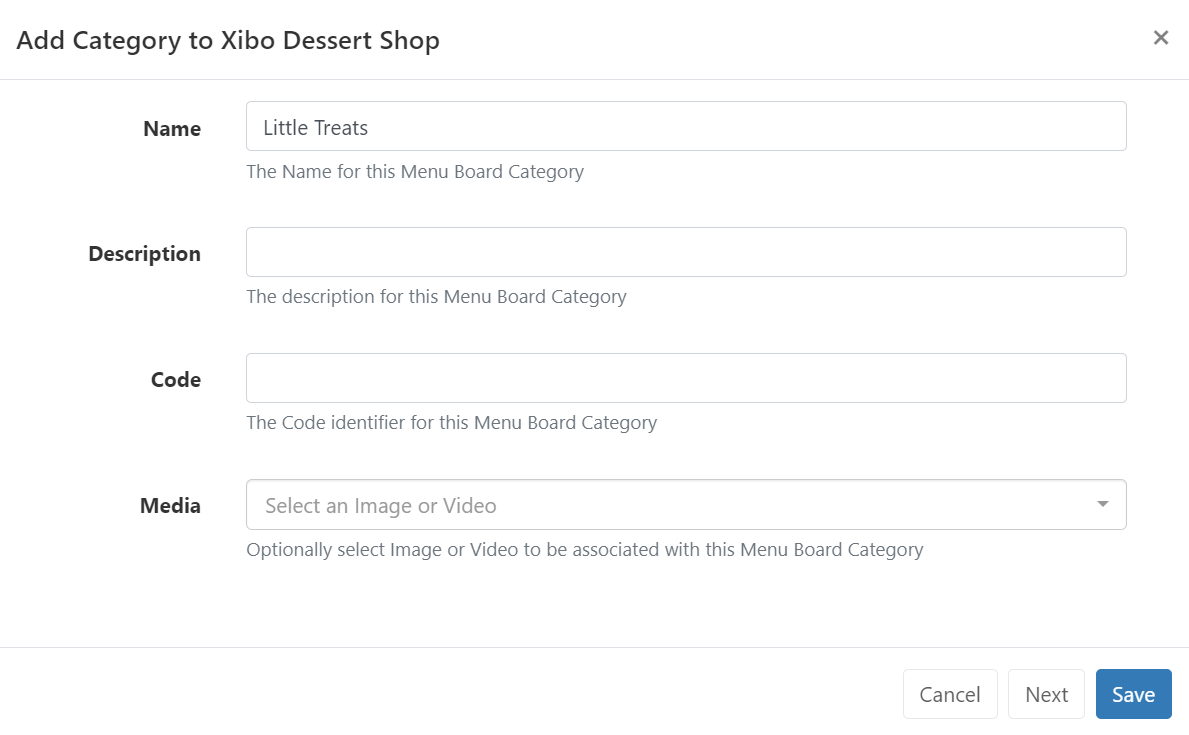
- My first category is going to be called “Little Treats”.
- I don’t want to include a description for my categories or associate any media to it for this example.
- Click Next to create another category.
- This category is going to be named “Milkshakes” and I want a third category, so will use the Next button again and name it “Waffles”.
- Click Save to close the form.
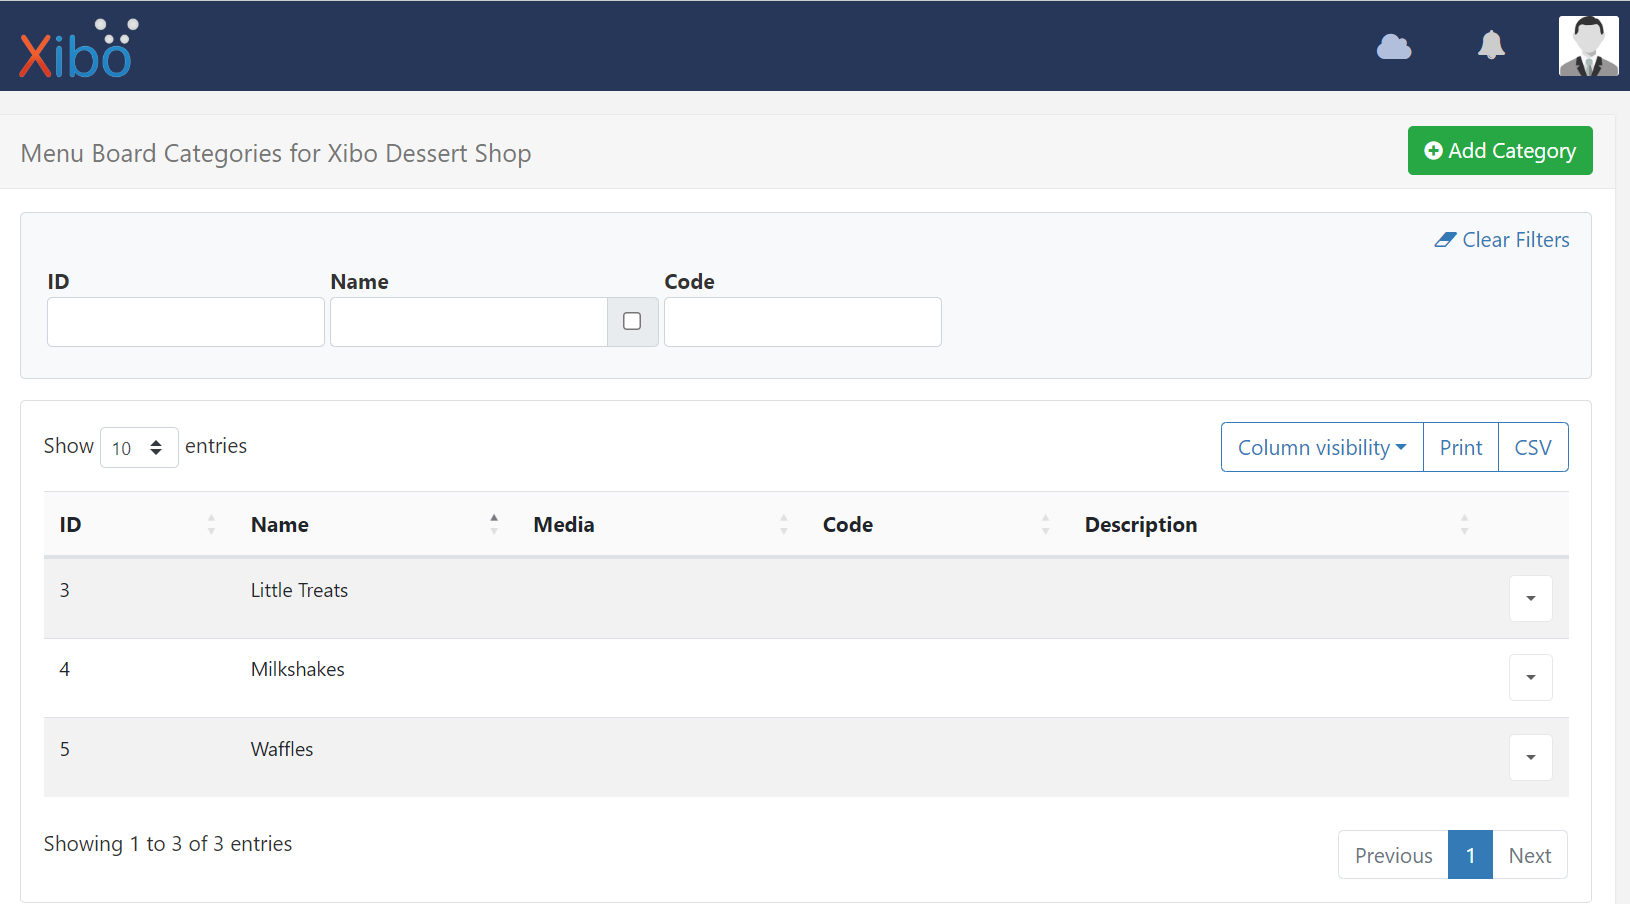
I can now see that my three Categories have been added to the grid:
Next I need to add Product items to each of these Categories.
Adding Products
- Using the row menu for the first category, select View Products:
- Click the Add Product button to open the product form:
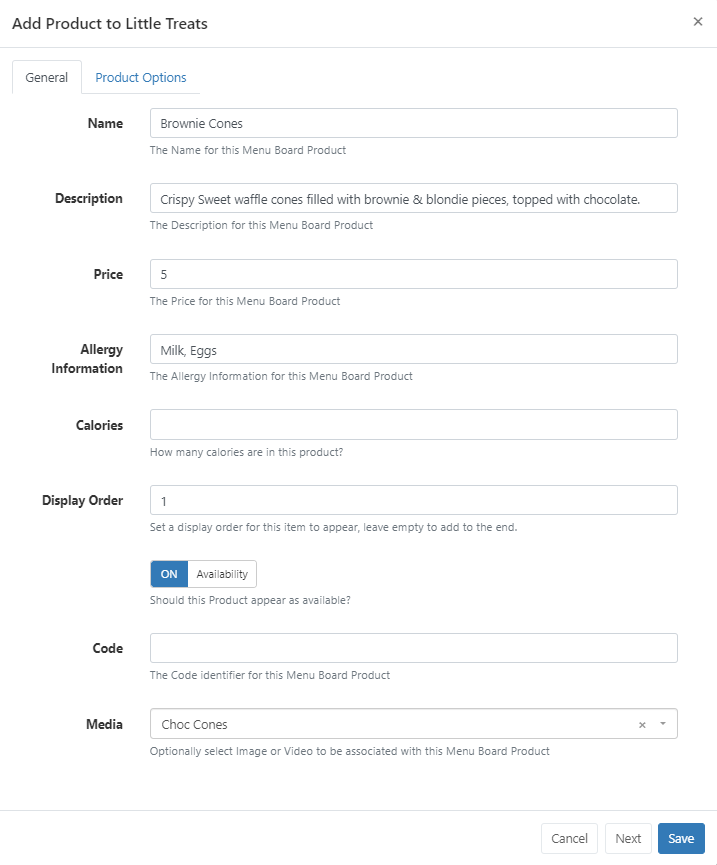
I am now going to create the product information I need to display to customers for my first Category:
I have only included the numerical figure for the price (the desired currency is configured on the Layout itself).
- I want this product to show as Available so have toggled this option ON.
- I have also set an Image file (already uploaded to my Library) for this Category.
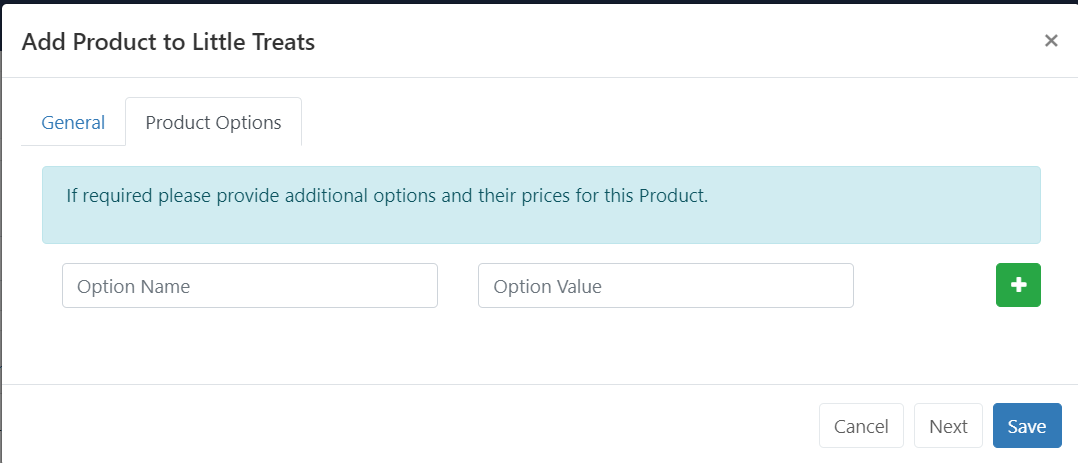
There is a second tab on this form, Product Options which allows for additional Naming and Pricing of a Product. I could have a plant based option for “Brownie Cones” which I could add using this tab!
-
As that is all the information I want for this item, I can click Next to continue to add further product information to this Category.
-
For the purpose of this guide, I have added a further 2 Products and clicked Save.
My Product grid now shows the three Products added for my “Little Treats” Category:
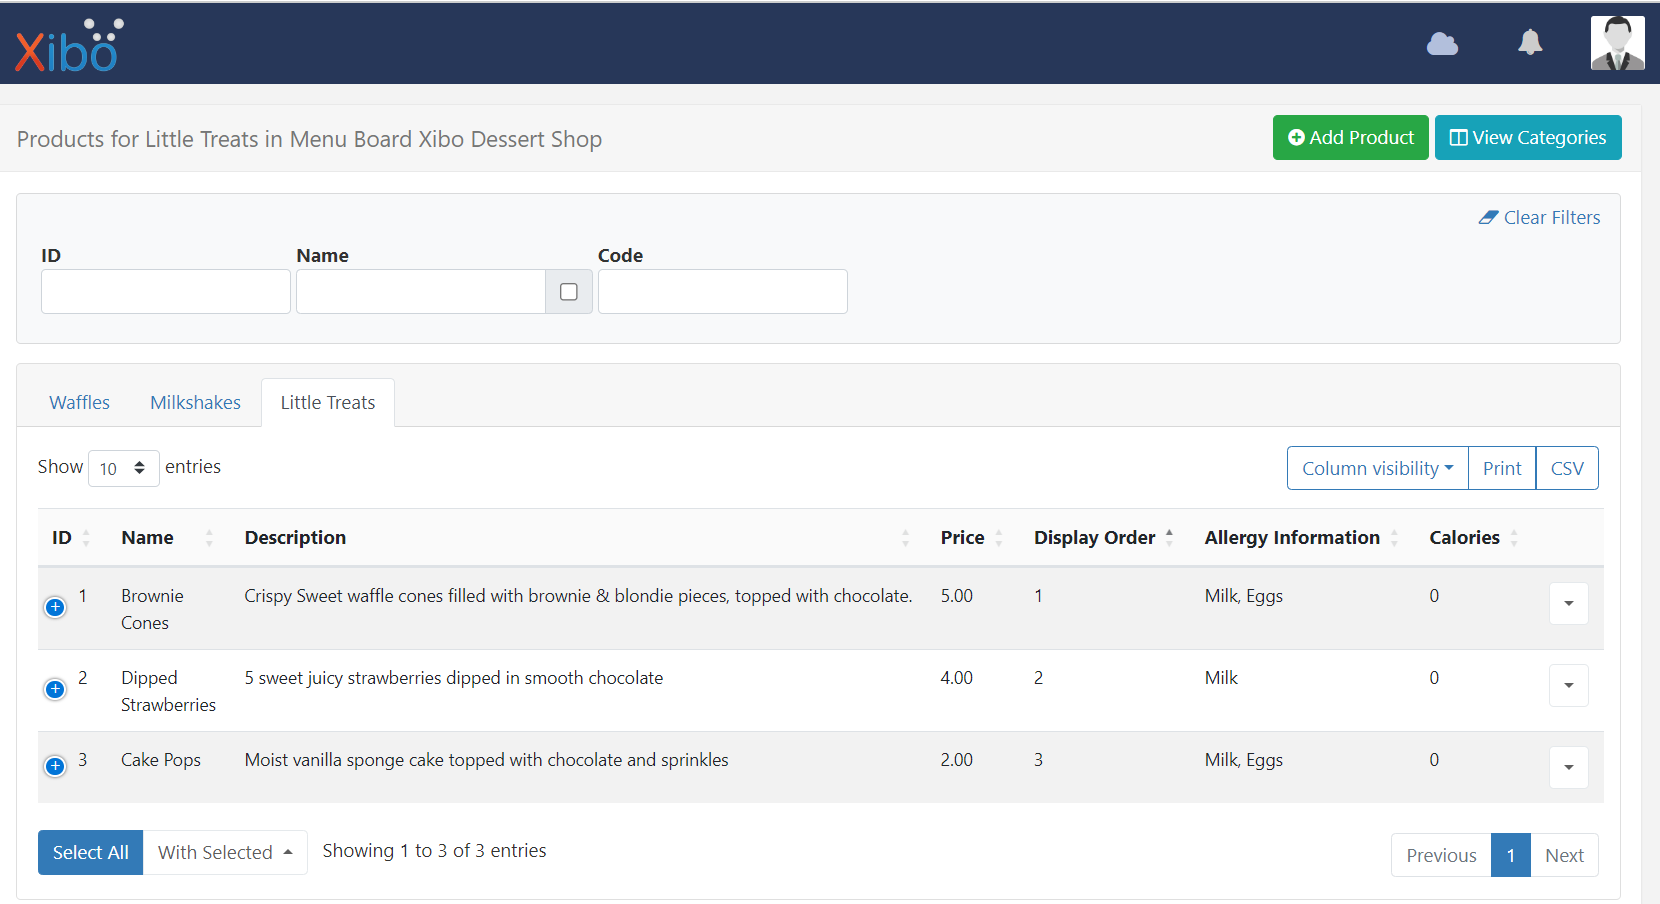
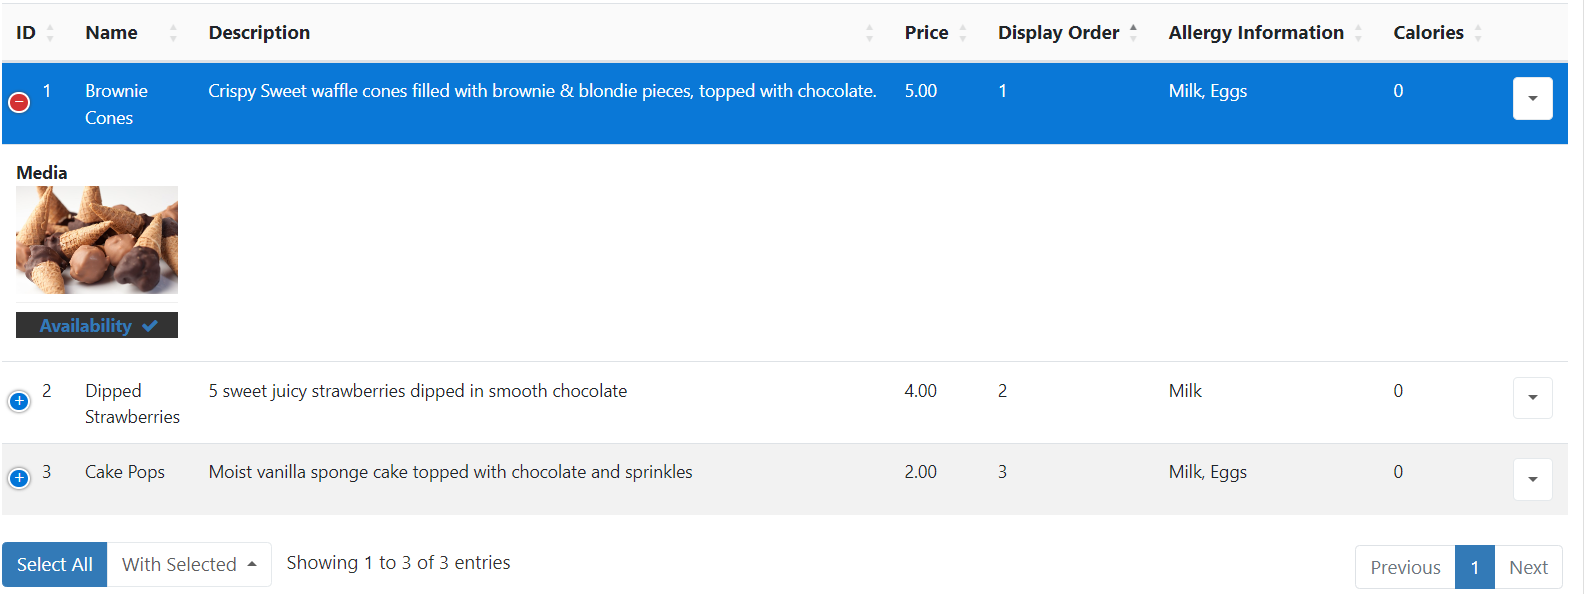
Use the Column Visibility button to toggle on/off the columns you want to be able to easily view in your grid. Use the blue plus button to show the columns which do not fit the page!
I need to now repeat this process for the other 2 Categories, “Waffles” and “Milkshakes”.
- Use the tabs to easily switch between Categories to add Products.
Once all the Product data has been added and saved, I need to create a Layout and add Menu Board Data Elements to pull through the data I want to show.
Create Layout
- Click on Layouts under the Design section of the main CMS menu.
- Use the Add Layout button to create a new Layout:
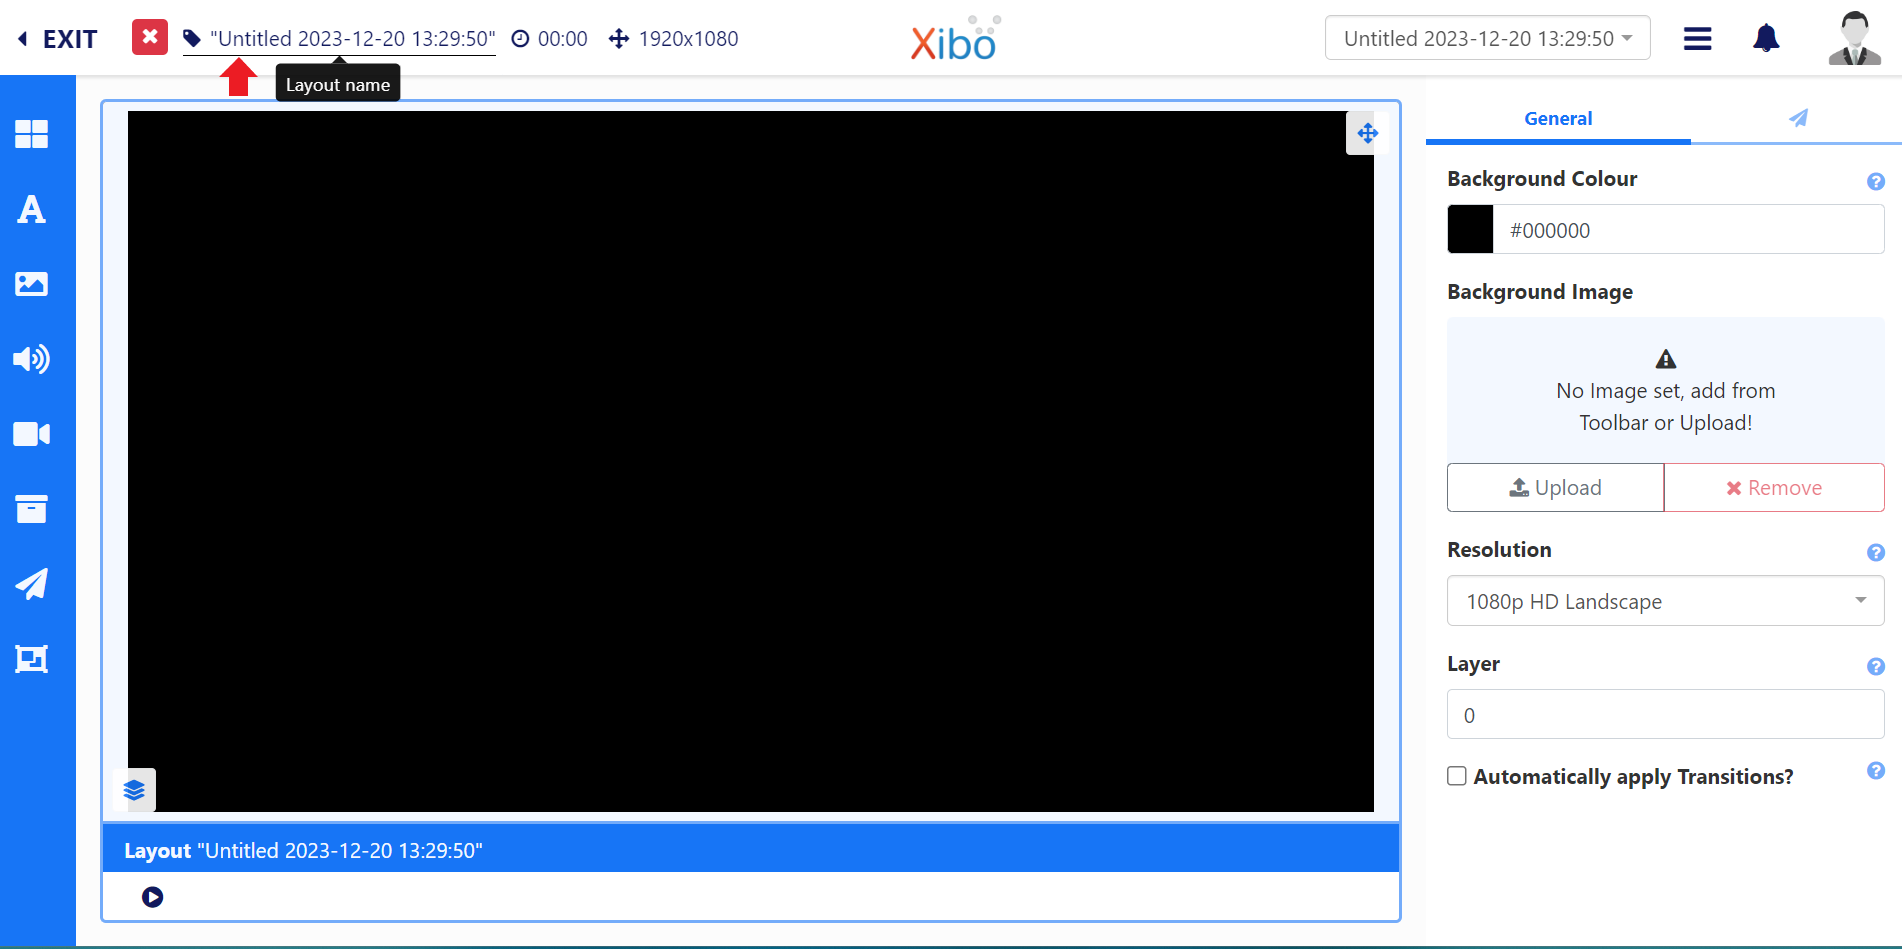
- I am going to first give my Layout a name by clicking on Untitled up the top to open the Edit Layout form:
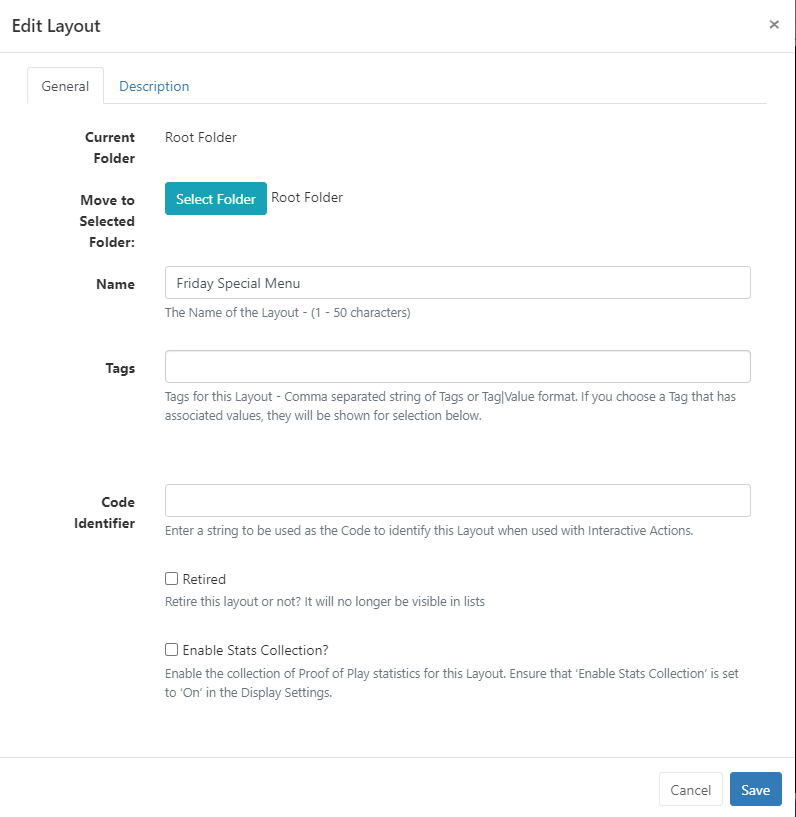
- Click to Save and return to the Layout Editor.
I now want to use an image from my Library to add to this Layout Background.
- From the Toolbar, select the Library image search button:
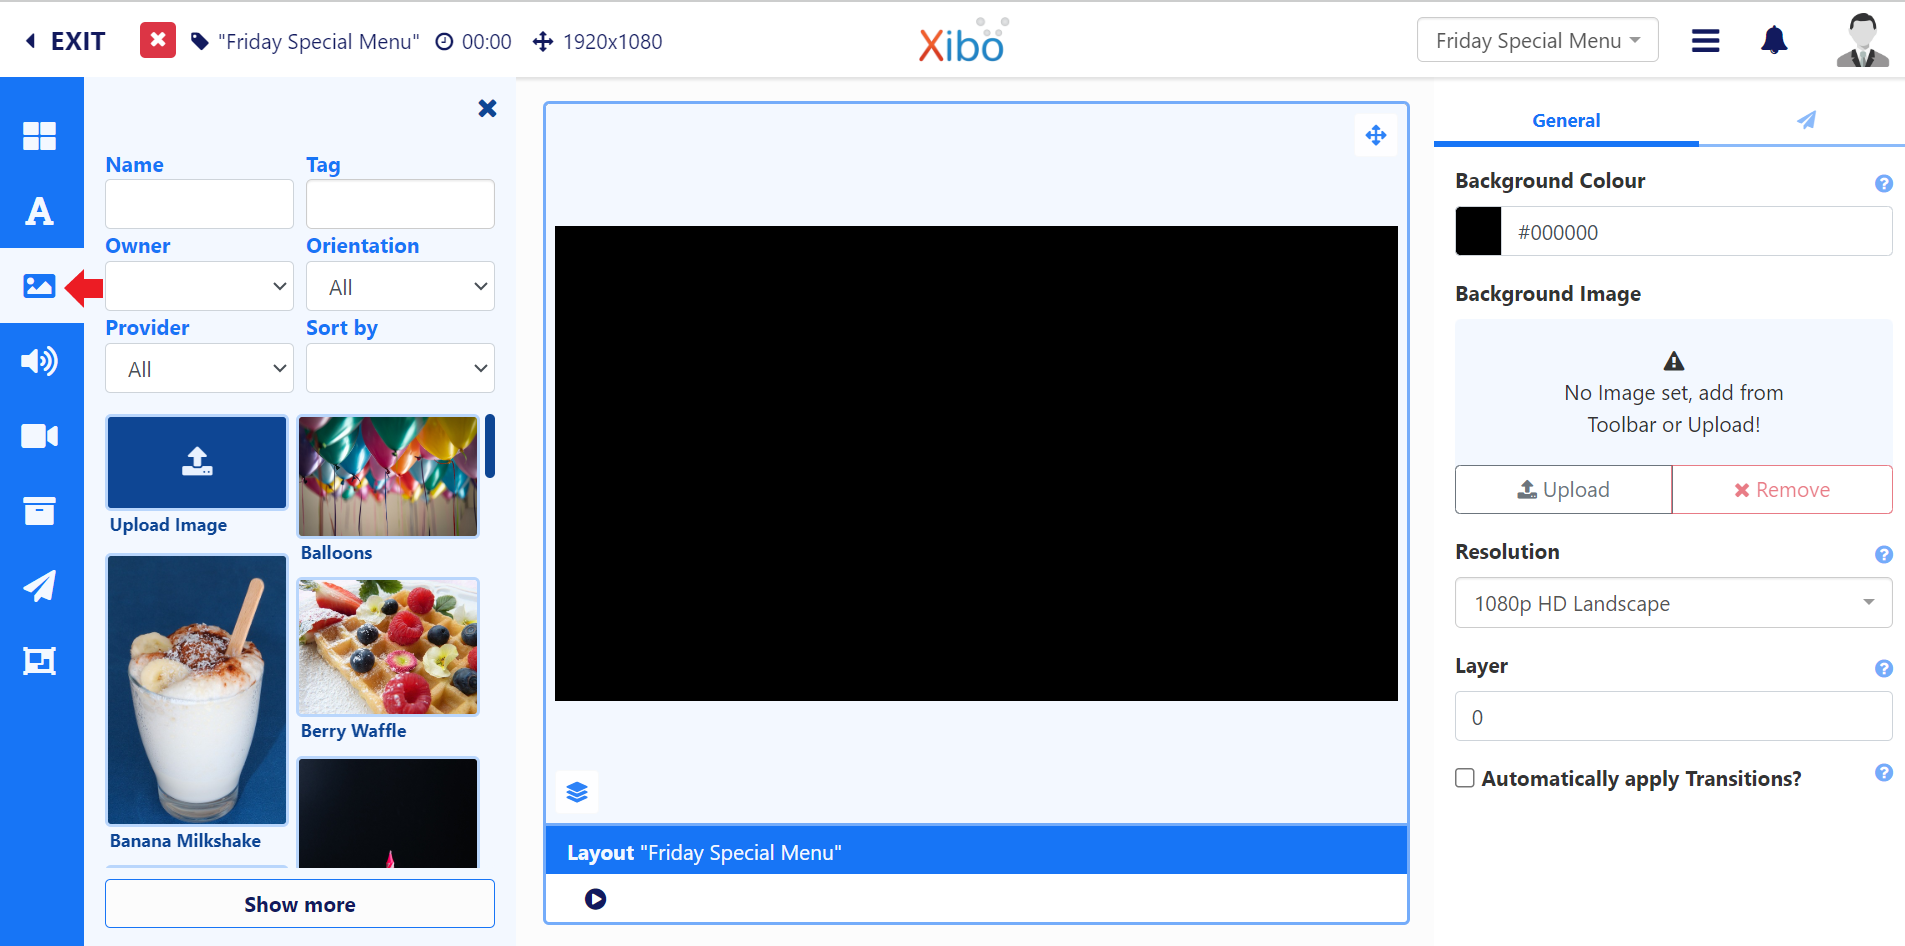
- I will use the available filters to search for the file I want to use and then click to select and drag over to the Background Image area, over on the Properties Panel:

You can also search through numerous stock images with the integration from Pixabay without having to leave the Layout Designer!
- I want my Menu Board to show on my landscape Displays so can leave the Resolution at 1080p HD Landscape.
I can now start adding items to my Layout to build the design. I want to add a shape to my background to define the area where my products will be shown, to make it easier for my audience to view.
Global Elements
- From the Toolbar, click on the second button, A to open.
- Drag the Rectangle to the canvas:
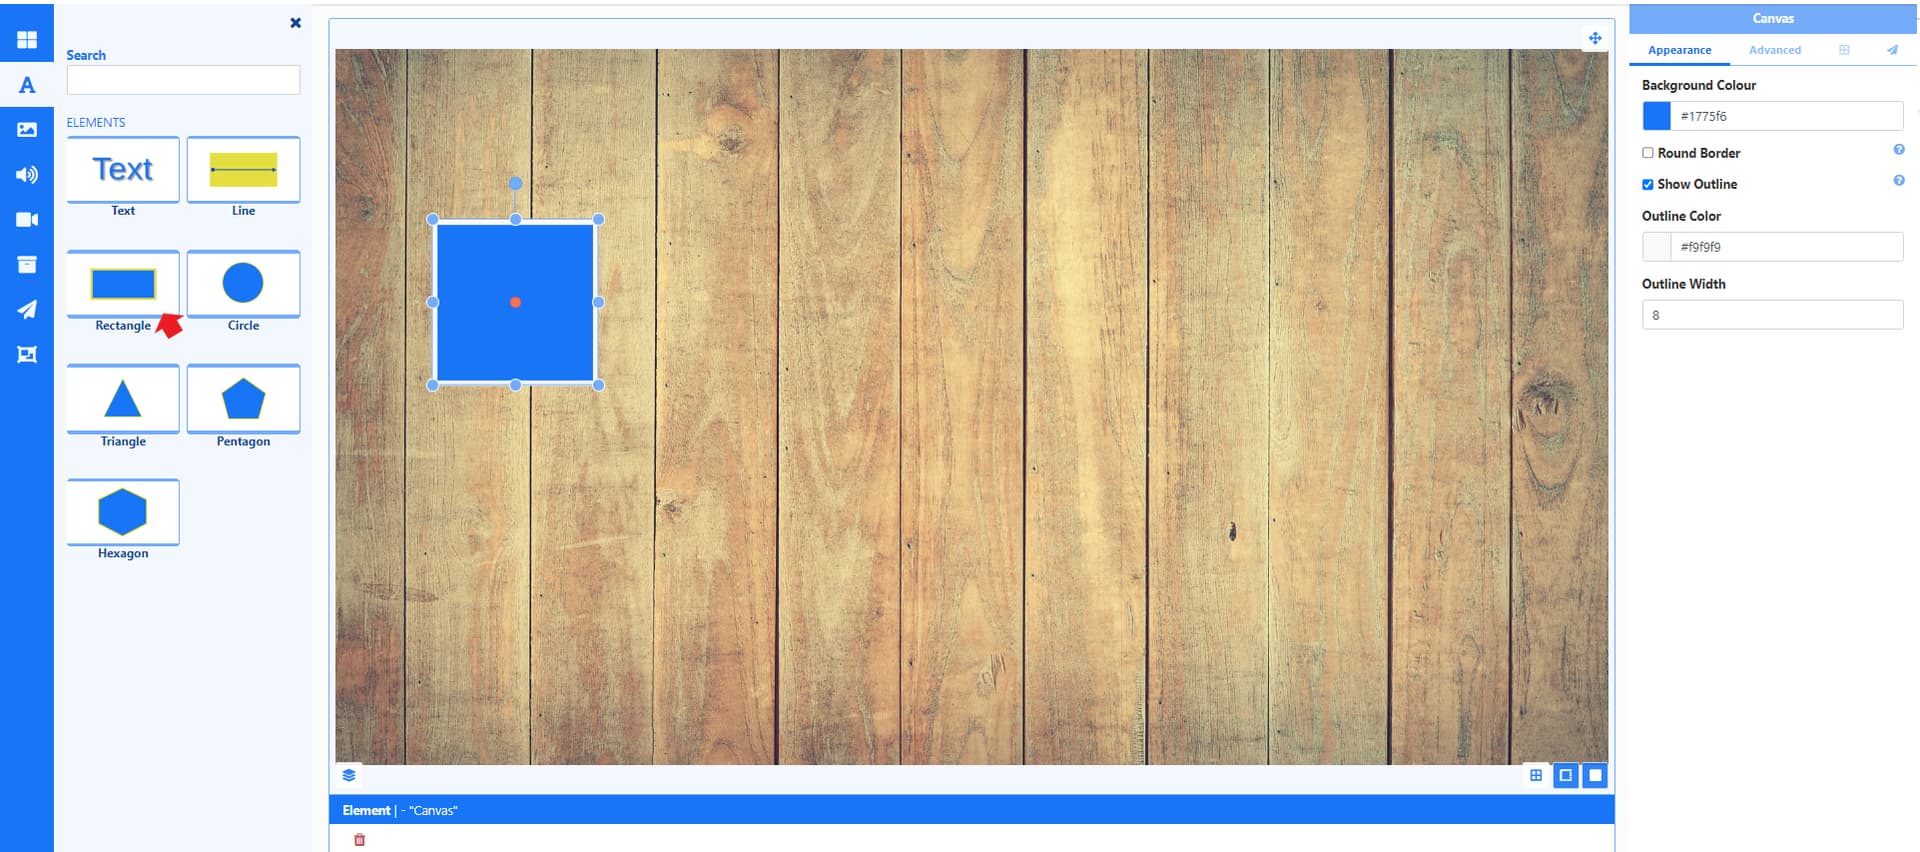
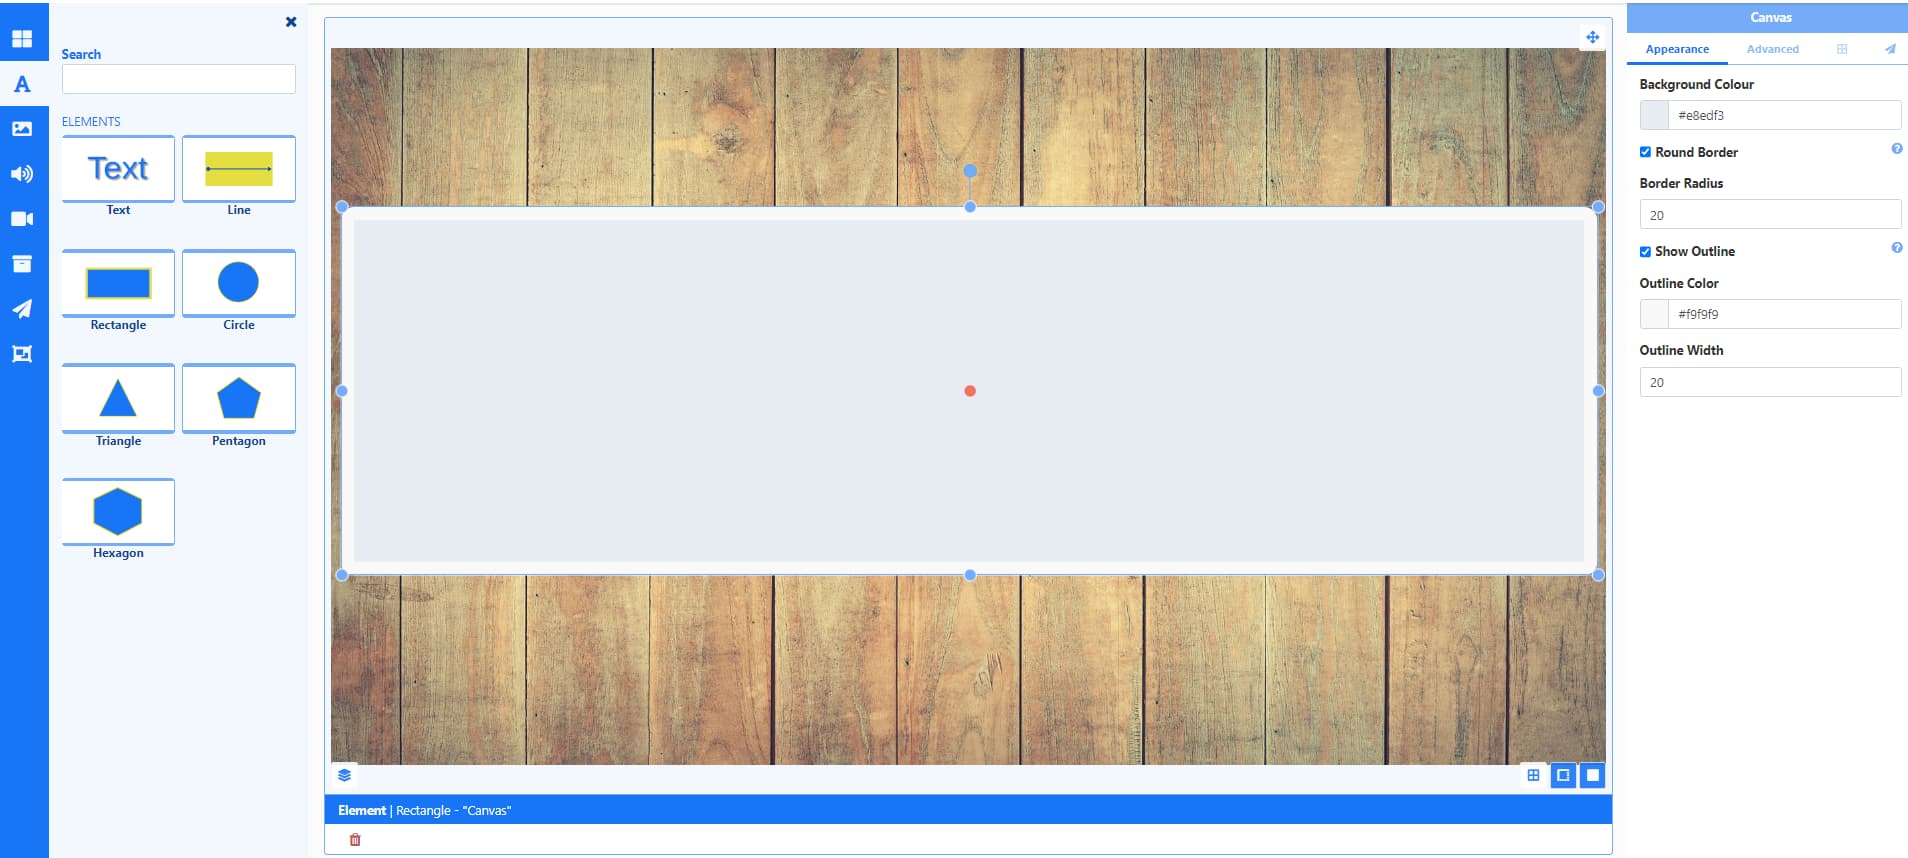
- Position and resize by dragging and use the Appearance tab from the Properties Panel to style:
I can now add some Data Elements for the Widgets I want to use to my Layout.
Data Elements
- From the Toolbar select the top Add Widgets button.
- Scroll down to the Data Widgets and click on Menu Board Products:
Now I need to select which Elements I want to use by dragging them onto the canvas.
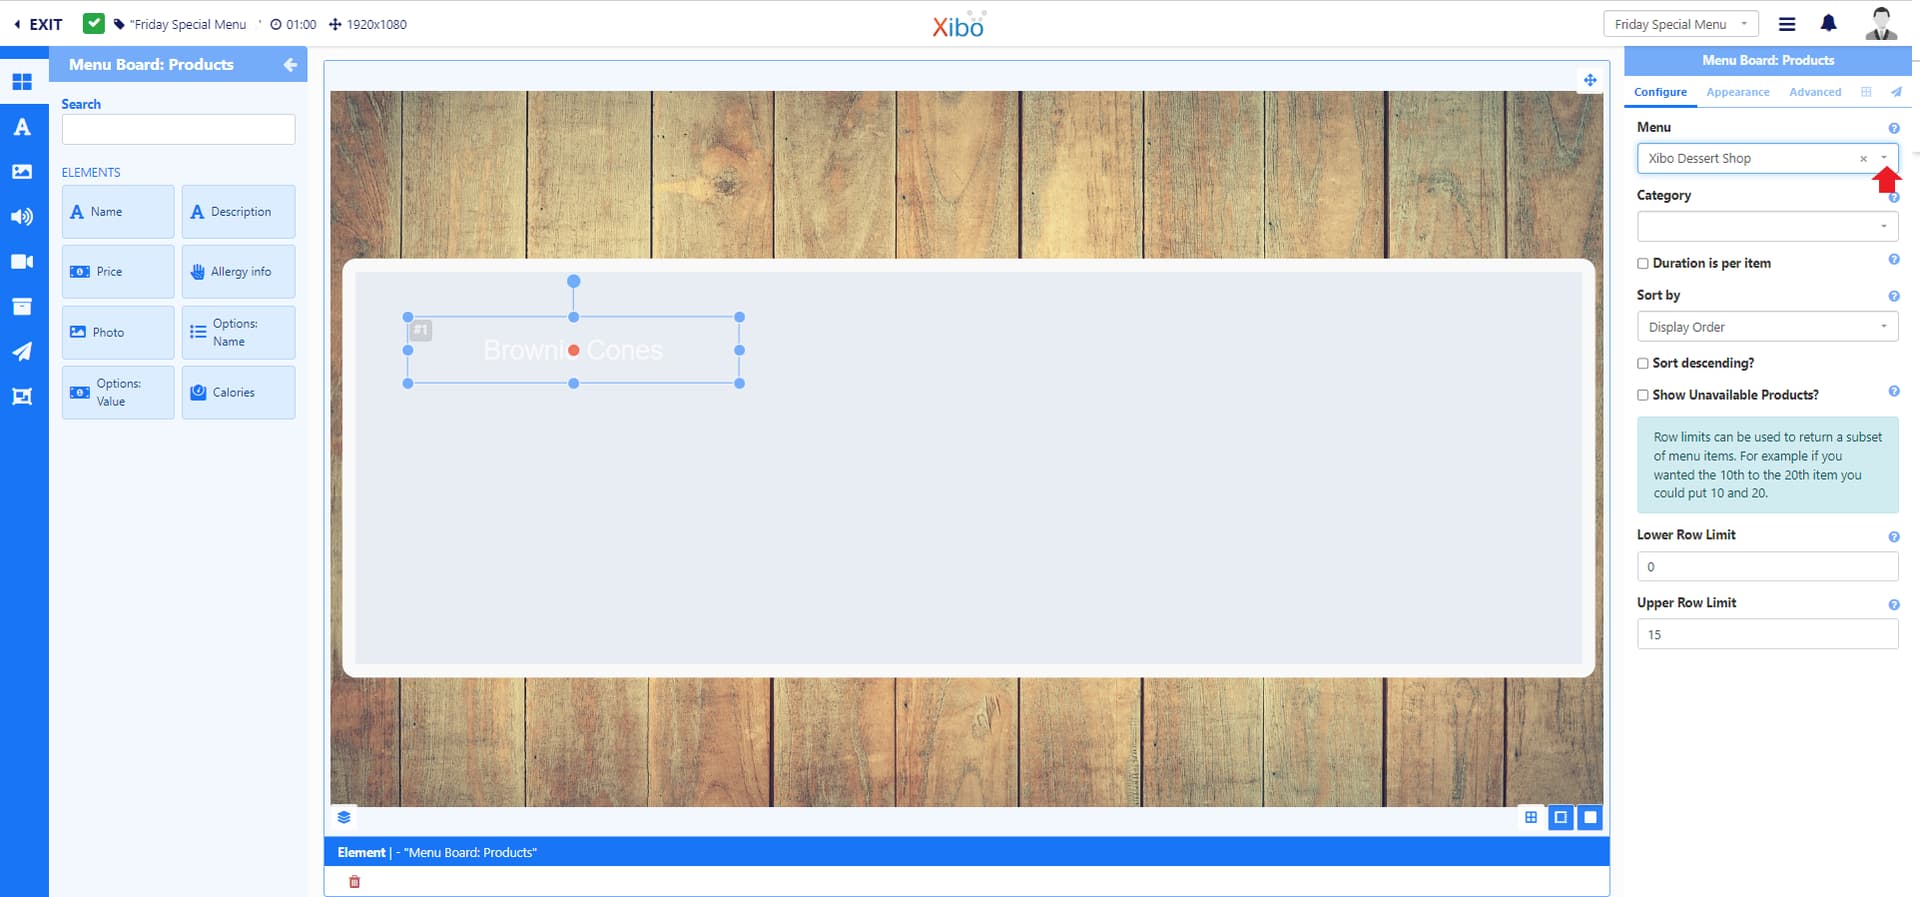
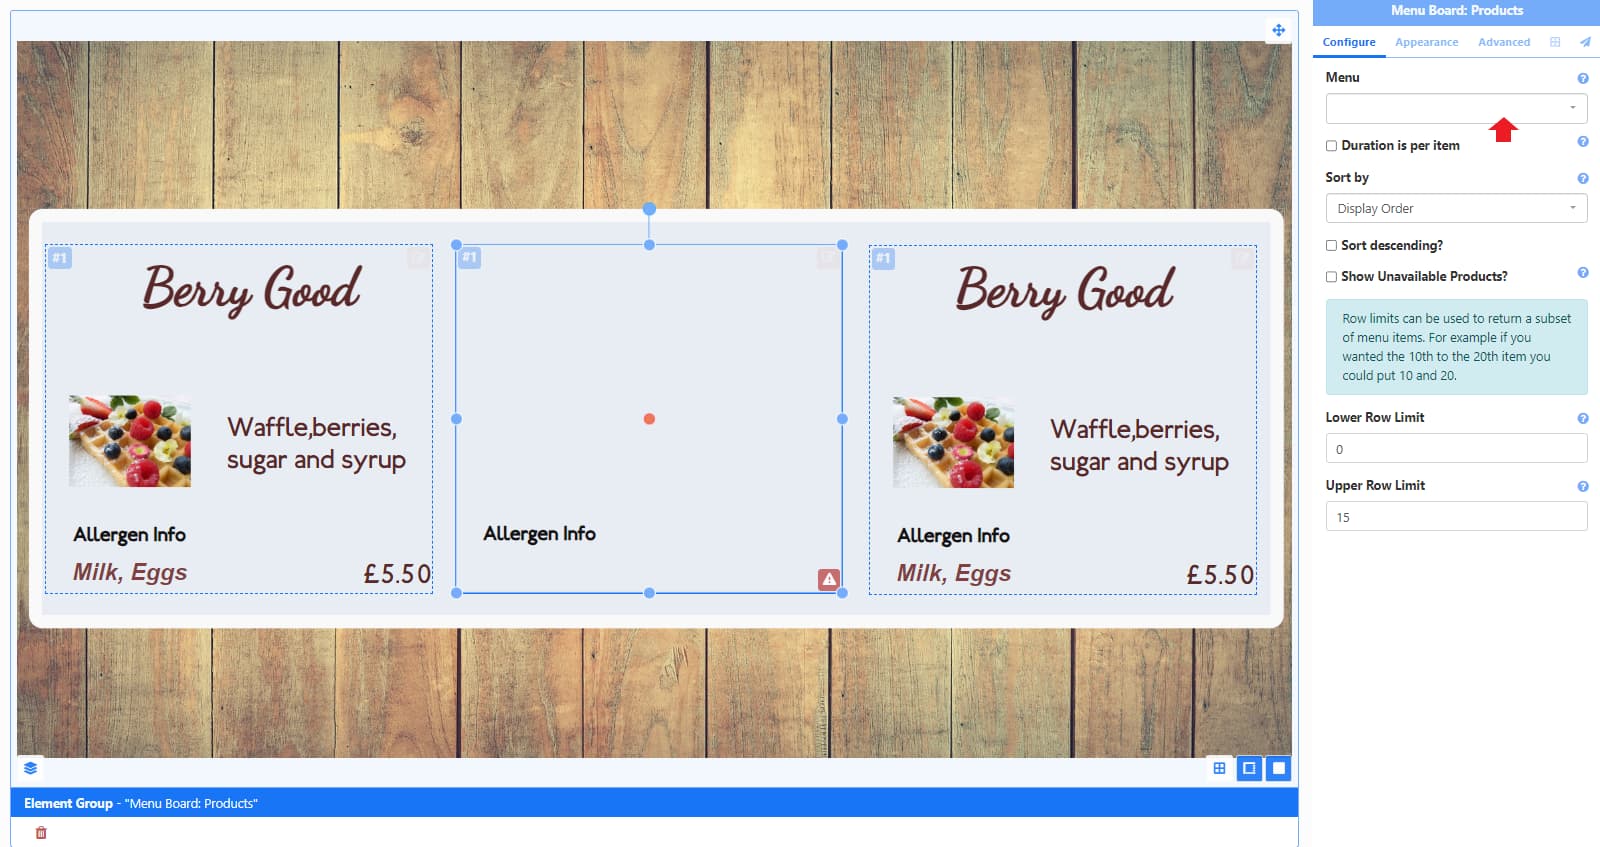
- I will start by adding the Name Element:
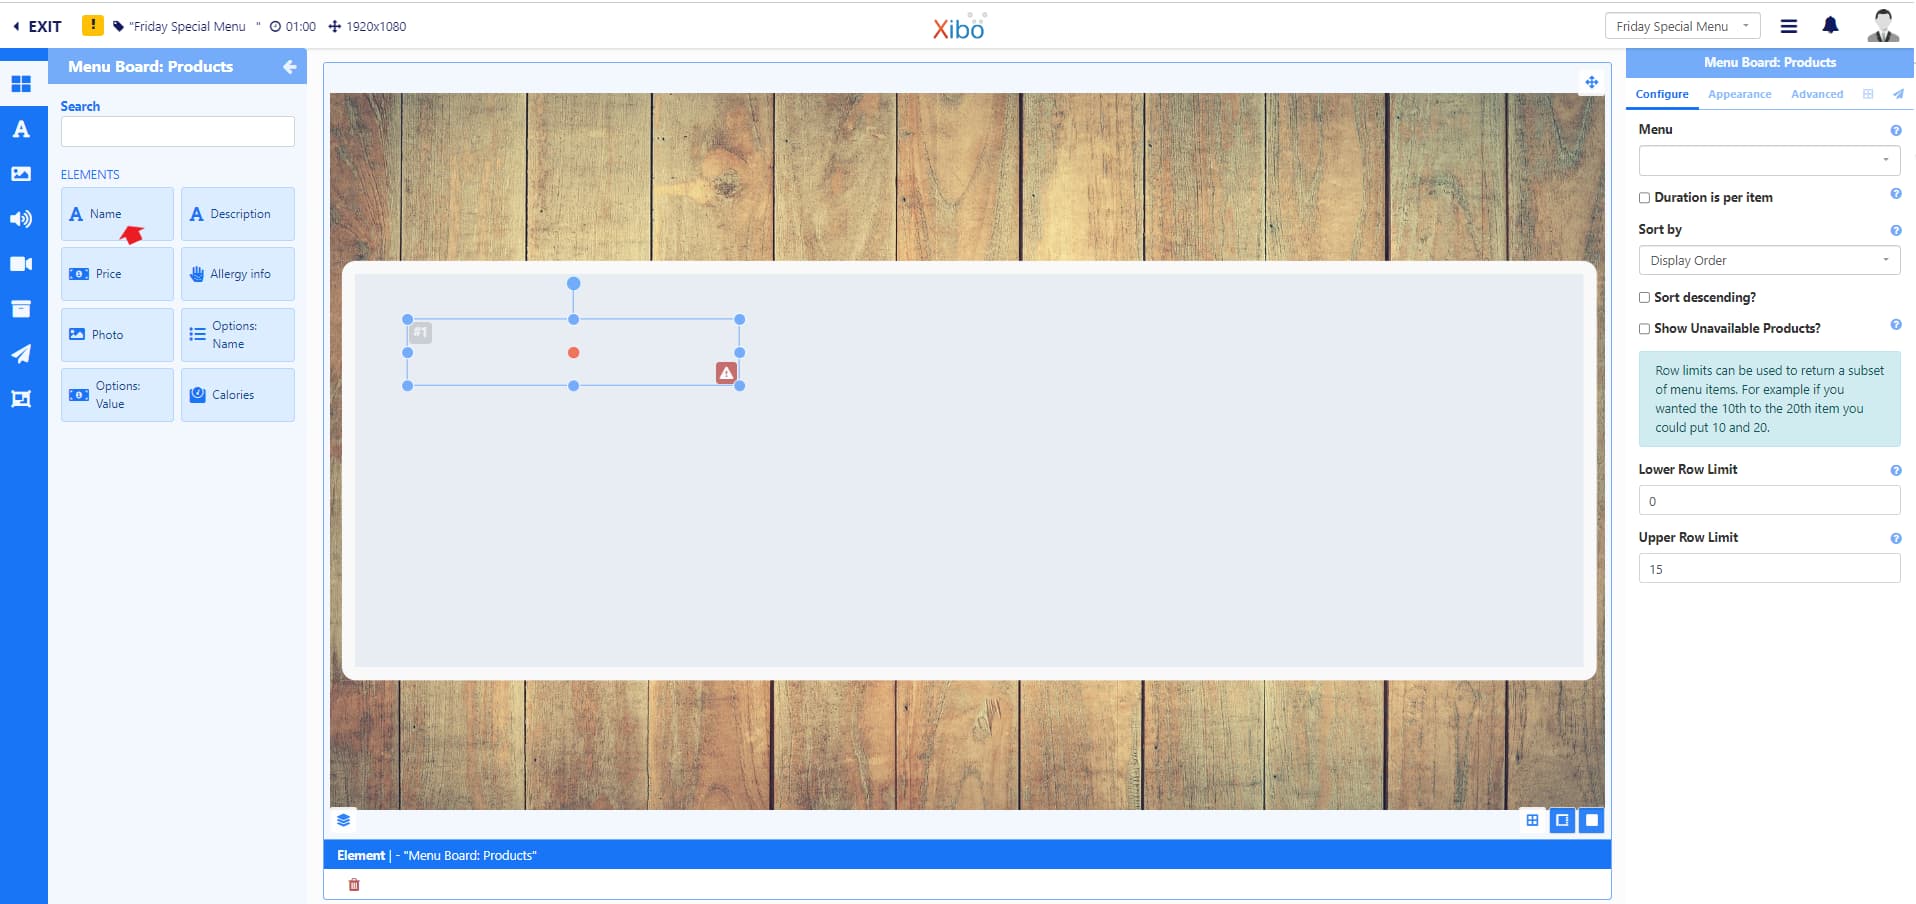
You can see that it is showing a red exclamation mark in the corner of the Element. By hovering my mouse over this warning it gives further details and its telling me that I have not associated any data to this Element so need to set the Menu Board to use.
You can also see there is an exclamation mark showing at the top as the Layout Status. You can hover your mouse over this to also see further information to understand the steps you need to take to resolve.
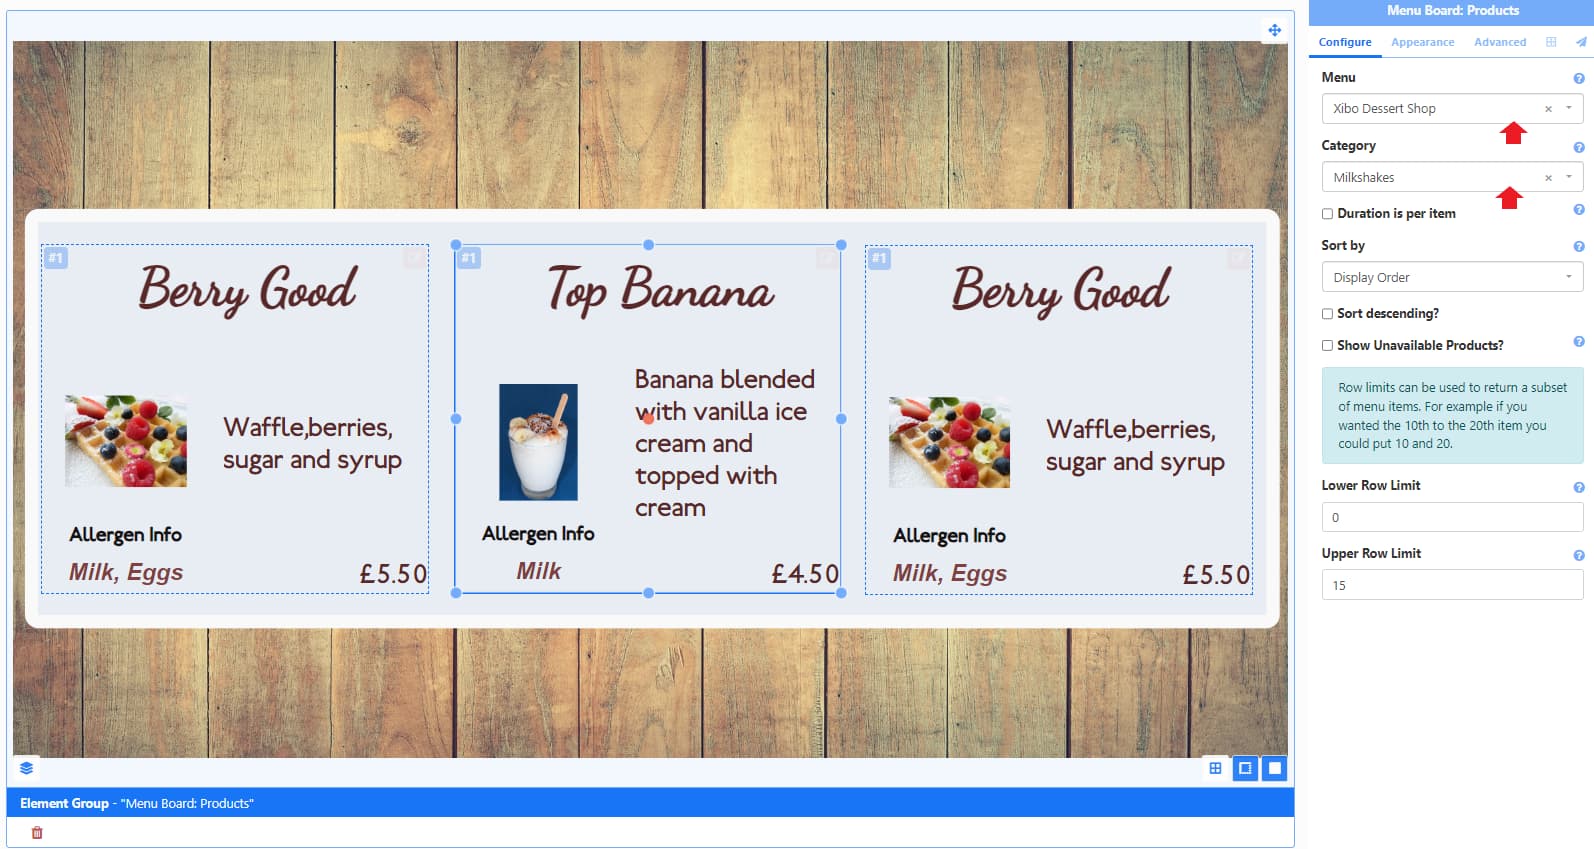
- Use the Menu drop down from the Properties Panel and select the Menu Board to use from the list:
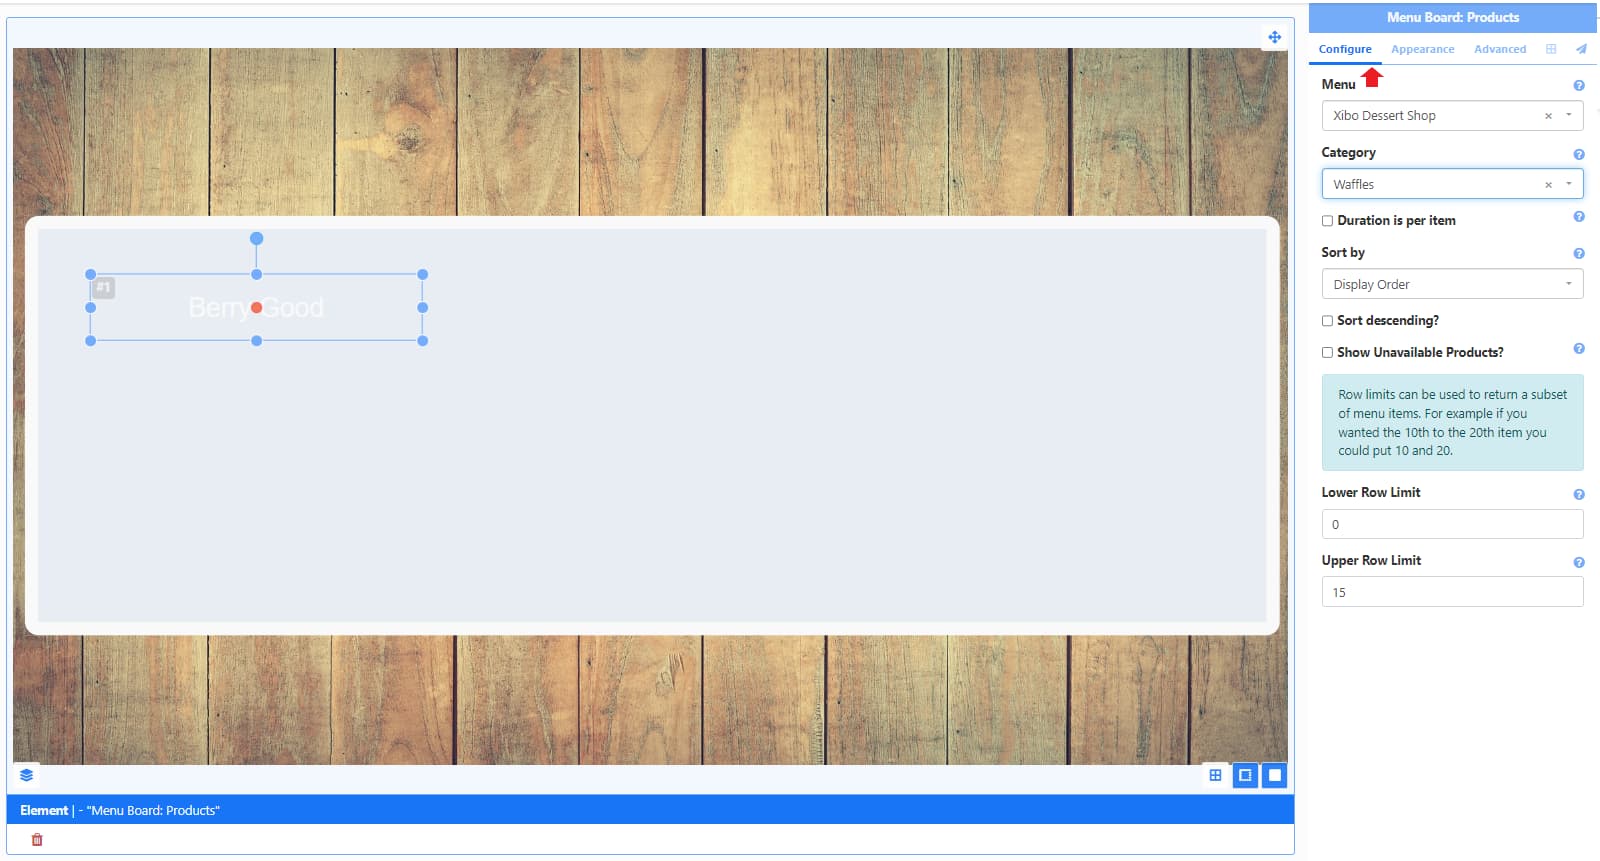
-
From the Category dropdown select the Category to use to pull the list of Products from.
-
Duration will be for the entire Menu so I can leave Duration is per item unticked.
-
And I want to Sort by Display Order:
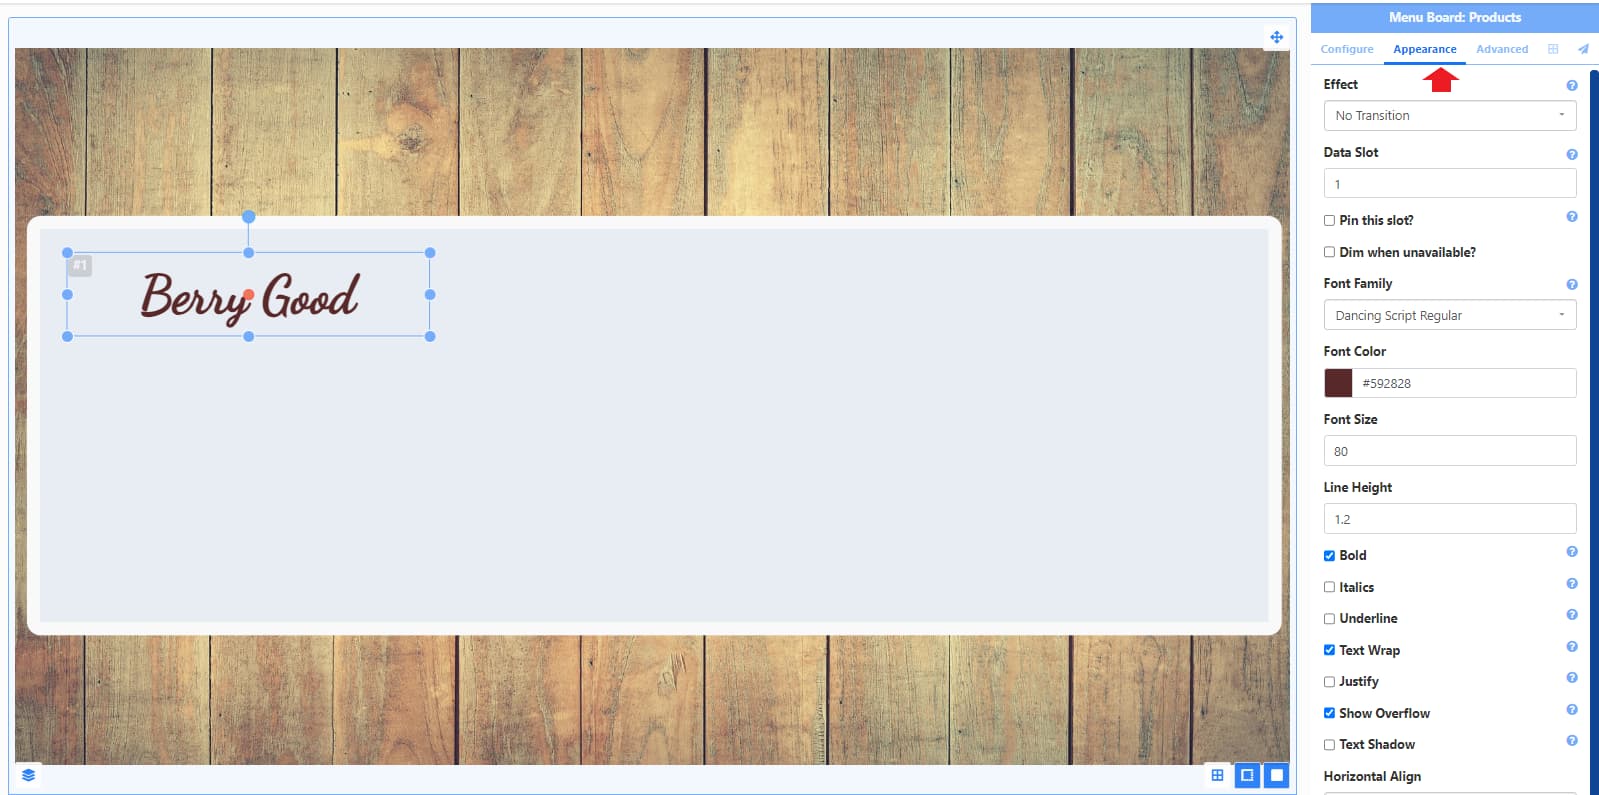
Now I have my Element configured, I can start on how it should look on my Layout.
-
First I want to reposition and re-size the Element. Select and drag to the right position and re-size.
-
From the Appearance tab use the available formatting options to style selecting a font family, colour, size, bold etc:
- Now I want to add the Photo Element to show associated images:
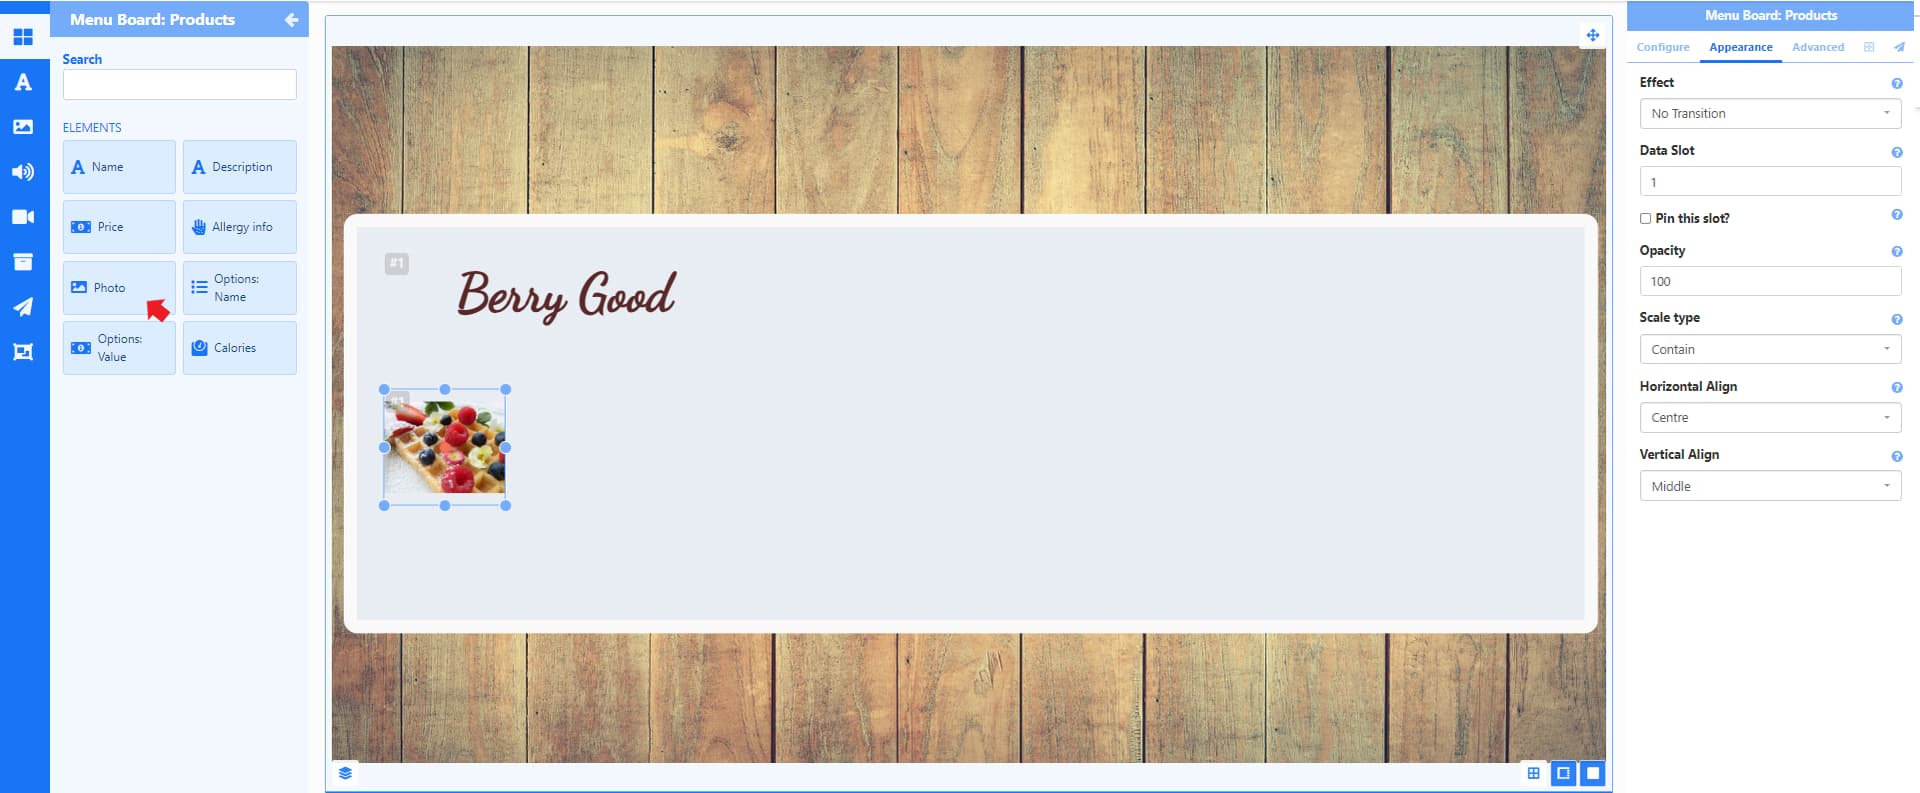
You will notice that adding further elements they will all have the same data source as set in the initial Configuration!
I don’t need to change anything in the Configuration tab (as I want the Elements I add to show Products from the same Menu Board and Category) and can instead set any formatting options required from the Appearance tab.
- I have left the default settings for the selected image as they are suitable for my needs.
I can now continue to add the information I want to use by adding further Elements and using the Appearance tab to format.
Use the Snap to Elements button in the bottom right of the Editor for easier positioning!
My Layout now looks like this after adding a Description, Price and Allergy info:

I want to add a label for my allergy information and can achieve this by using Global Elements.
- From the Toolbar, open Global Elements:
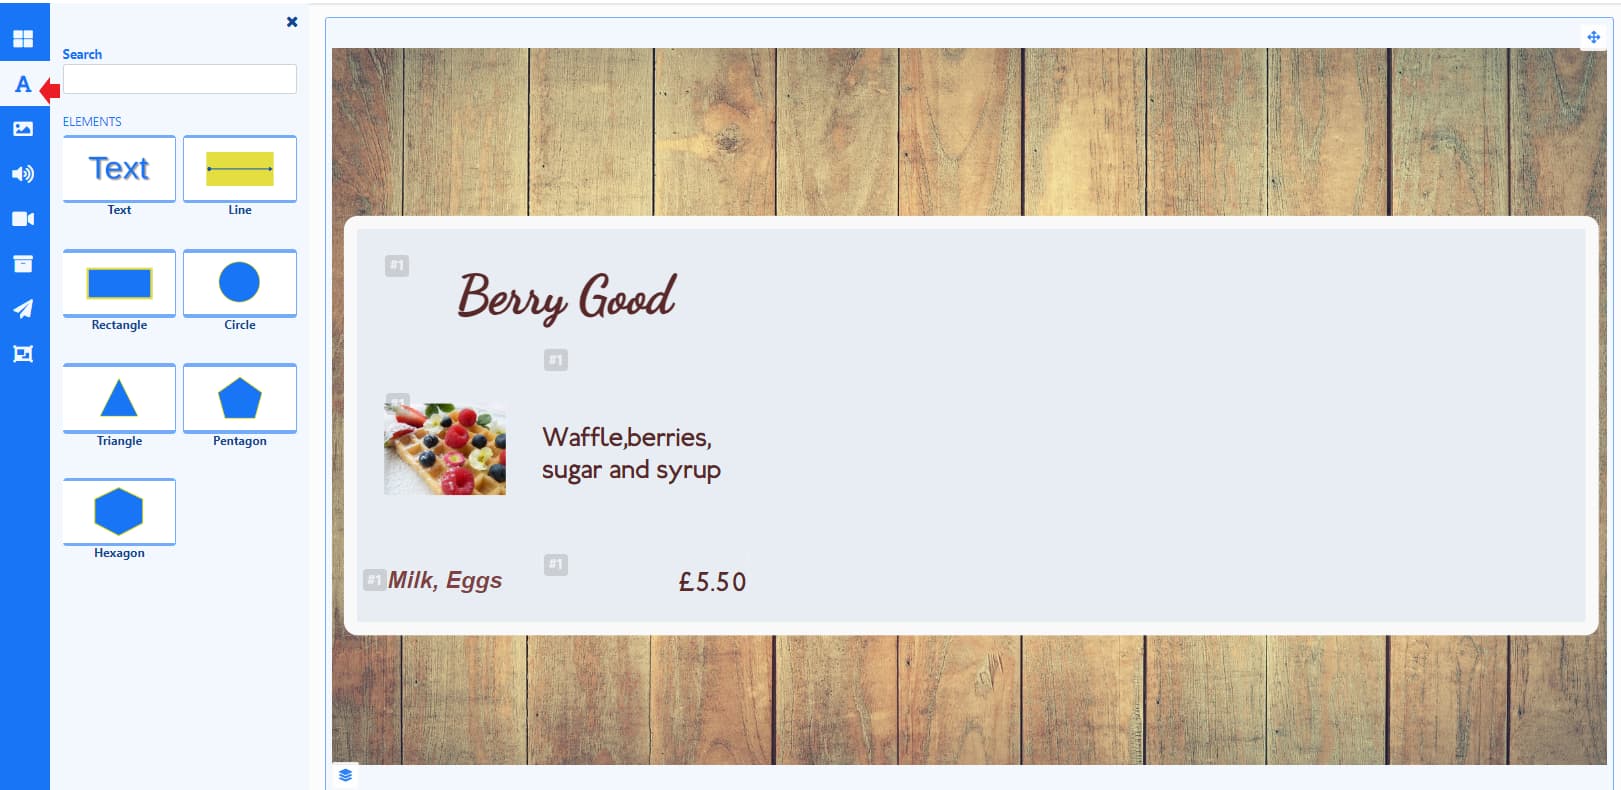
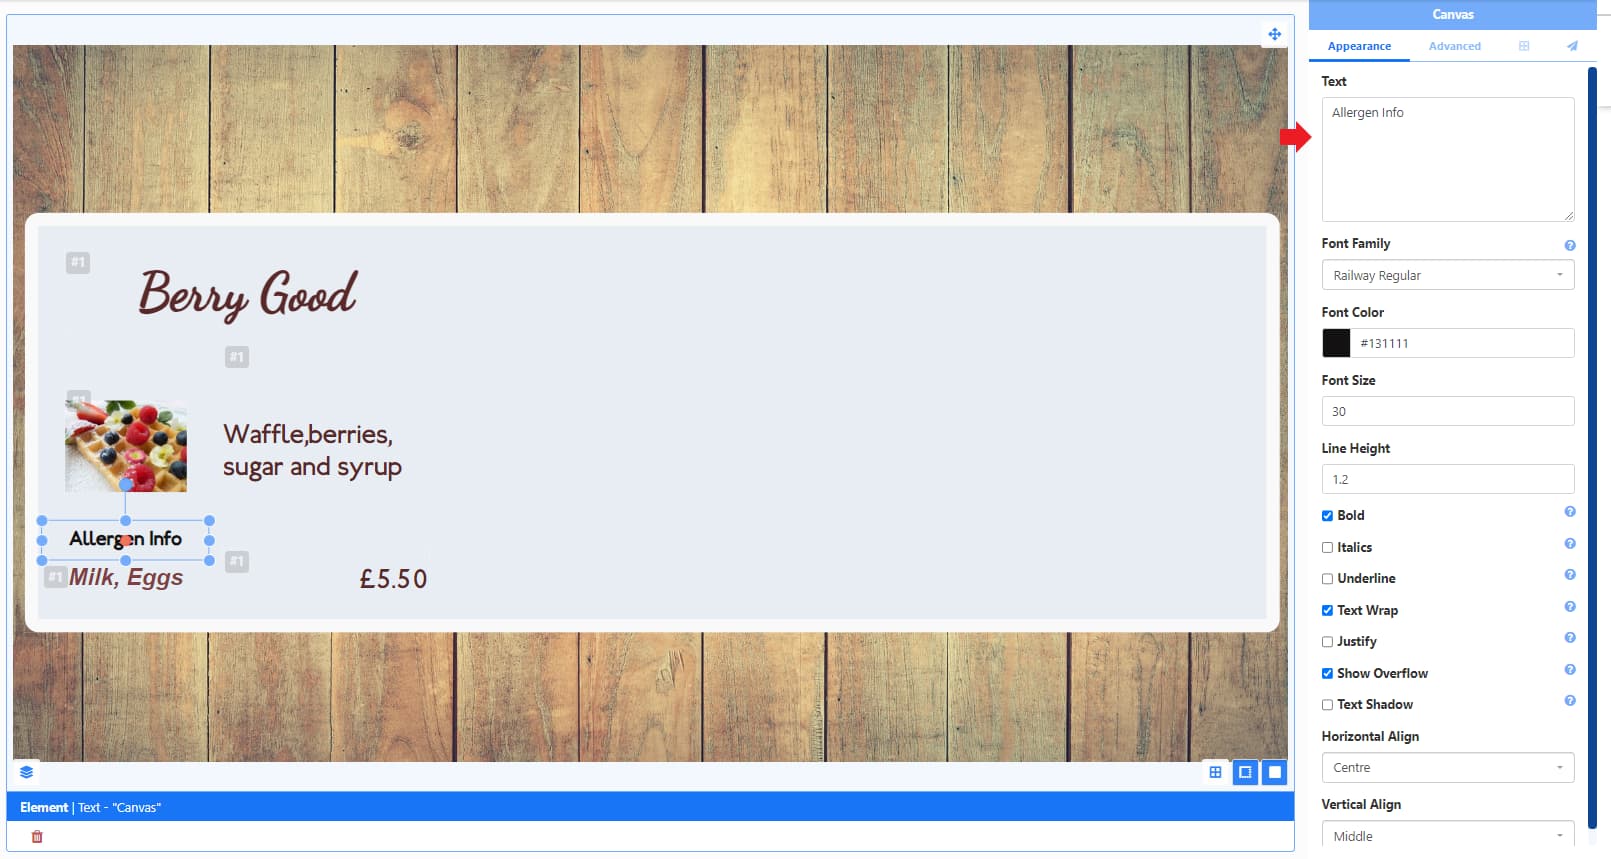
- I want to add some text so will drag the Text Element onto my Layout and position it above my allergy product information.
- Using the Configuration panel I can add the text I want to show and format using the available options:
I can now look at a Preview of my Layout to see how it looks by pressing the Play button underneath the canvas.
The preview will show my three products play in a cycle:
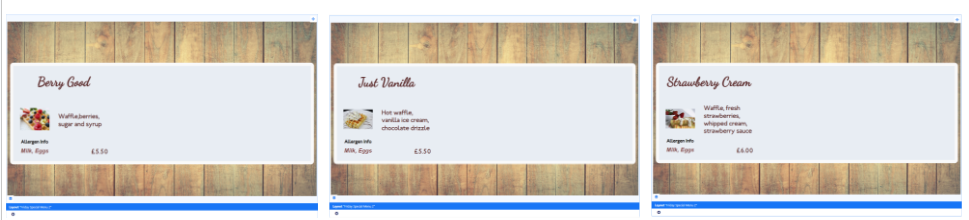
Playing a preview allows you to see if you need to make any adjustments so that it can play as you intend.
Use the toggle button in the top right of the viewer to play the preview in full screen!
I now need to duplicate this information for my other two Categories. I could do this by repeating the entire process and add on more Elements, but instead I can create an Element Group from the Elements I have already added and simply duplicate the entire group.
Element Groups
To create an Element Group hold down the shift key on your keyboard and click in each Element you want to group together:
Now grouped, I can easily make a copy by right clicking the group and selecting Duplicate and then move into position:
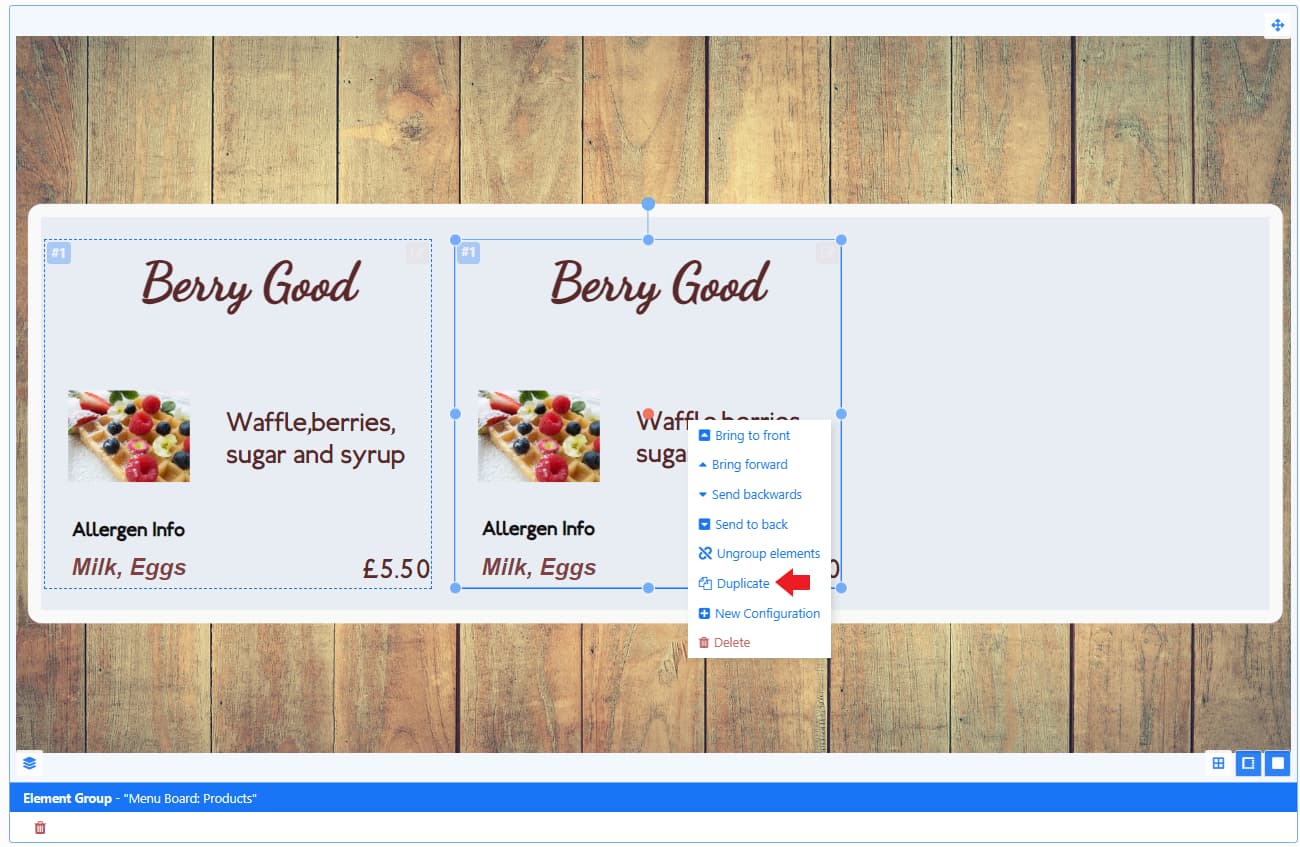
I need to duplicate twice in order to show all three of my Categories.
You can see that all three have the same Configuration as they are all pulling from the same Menu and Category. If I was to change this in the Configuration Panel it would change the data source for all three. If I want to change the data source for a selected group I need to create a New Configuration.
New Configuration
- Select the second Element Group, right click and select New Configuration:
You can see I now have a warning showing as the original data source has been removed.
-
Use the Menu dropdown to select the Menu Board to use.
-
Select the Category to use, this time I want to show products from Milkshakes.
- I need to repeat this process for my third Category.
- I can now adjust the sizing and positioning of my groups if required and then play a Preview to check:
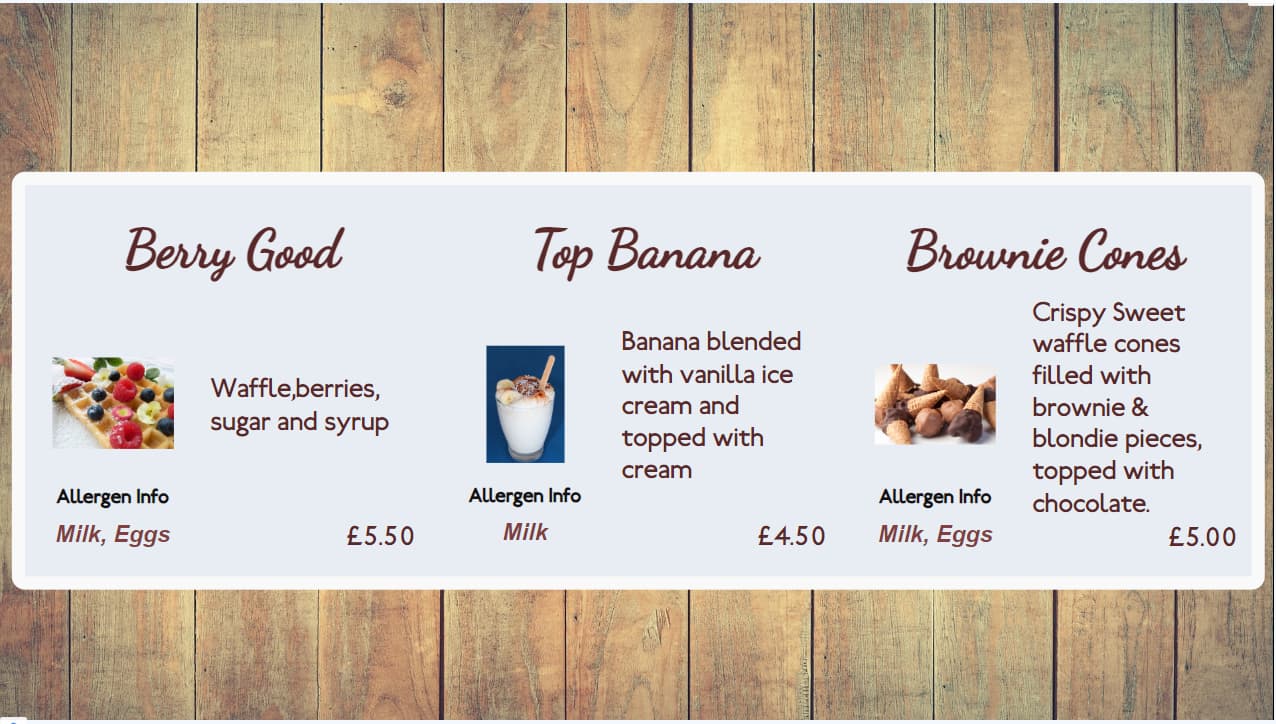
The preview will show the Products for each Category play in a cycle!
- I want to add further Text and some Line Global Elements to compliment my Layout.
I could also add Category headers using Text Elements if needed, as well as adding Elements from the Menu Board: Categories Data Elements as required for a Menu Board.
As I am happy with my Layout I need to Publish so I can Schedule it to my Displays.
Publish Layout
- From the top right menu, click Publish.
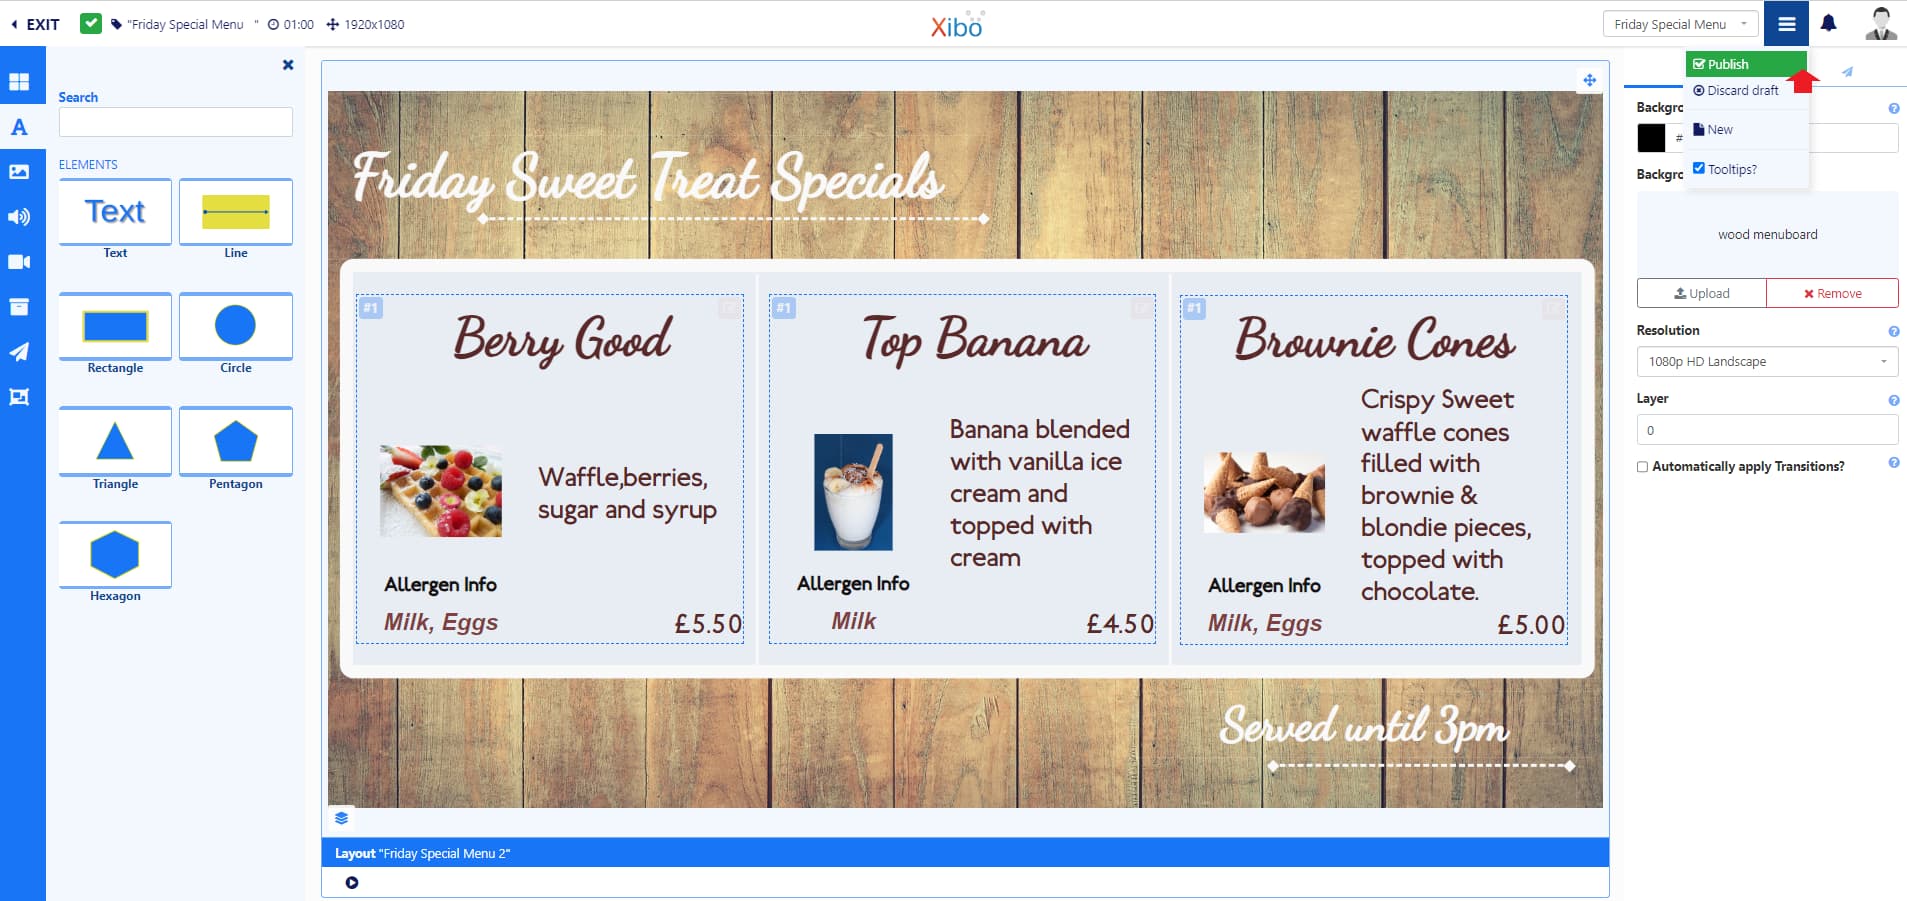
- Tick the Publish Now box and select the Publish button.
I could untick and provide a future date/time to Publish if required!
Schedule Layout
- Use the top menu again (the same one used to Publish) and select Schedule.
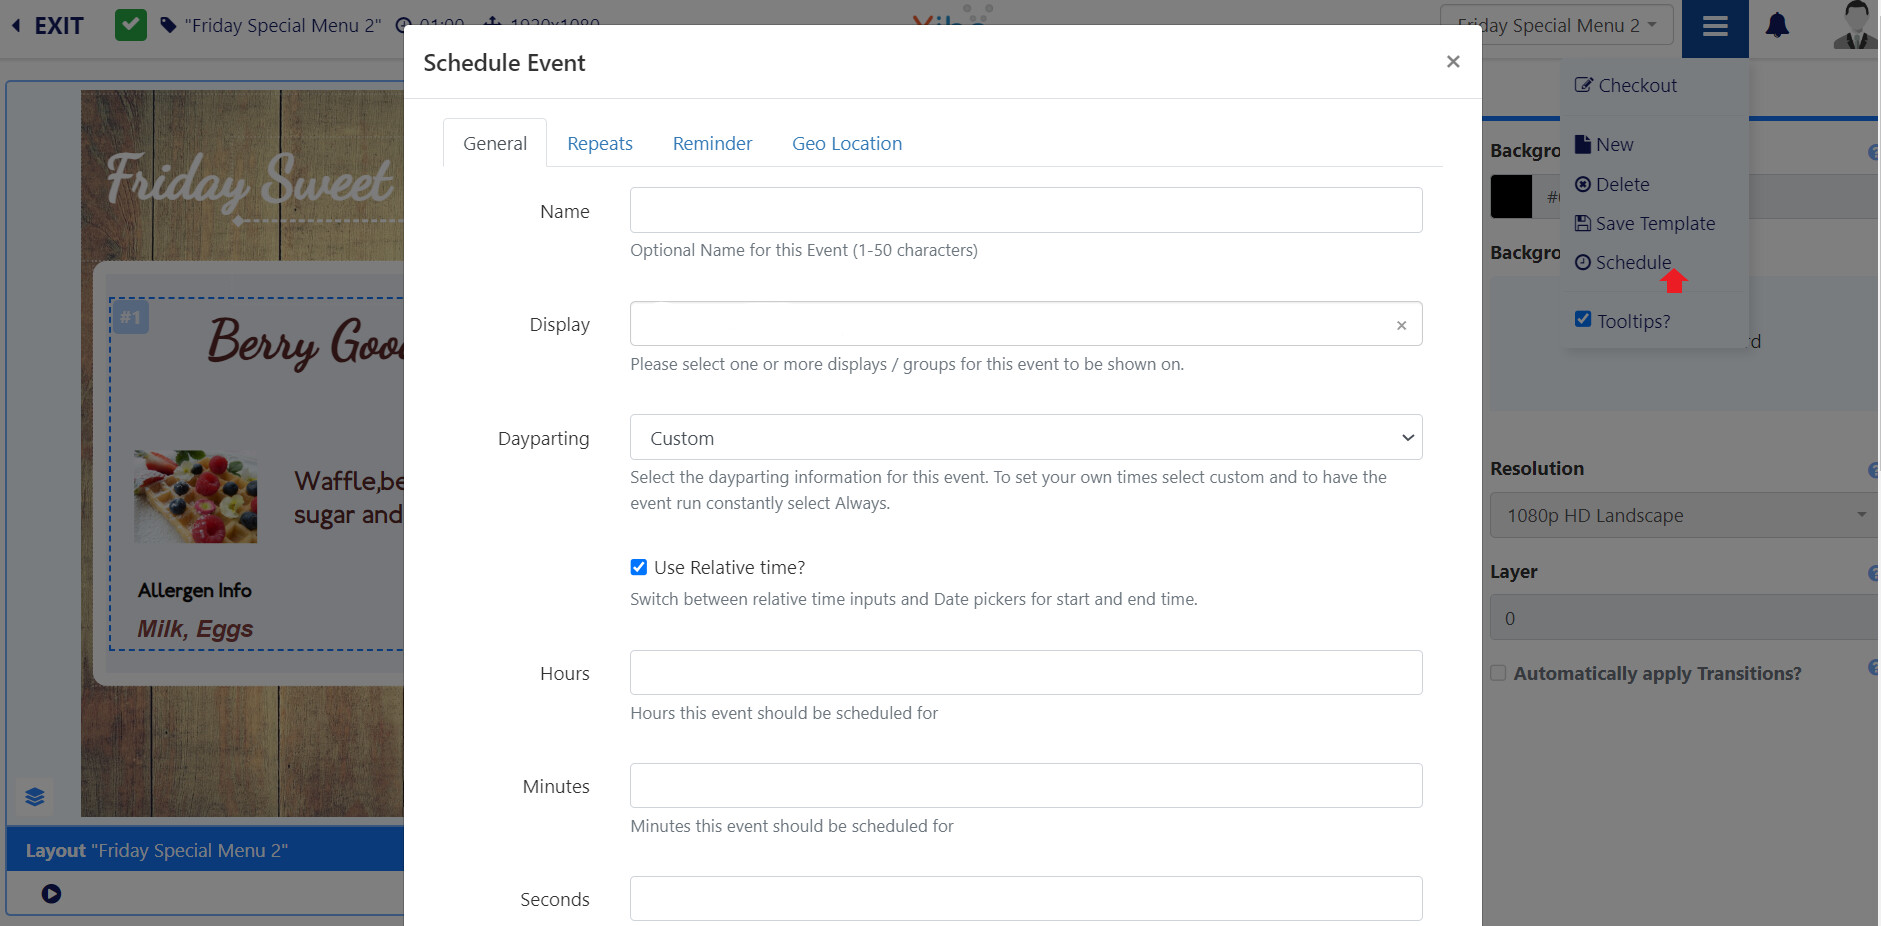
- I shall give my event a Name to make it easier to see within my other Schedules.
- Use the drop down to select the Displays/Display Groups to target.
- I am going to set my own times so will select Custom.
- And I want to specify times so will untick Use Relative time.
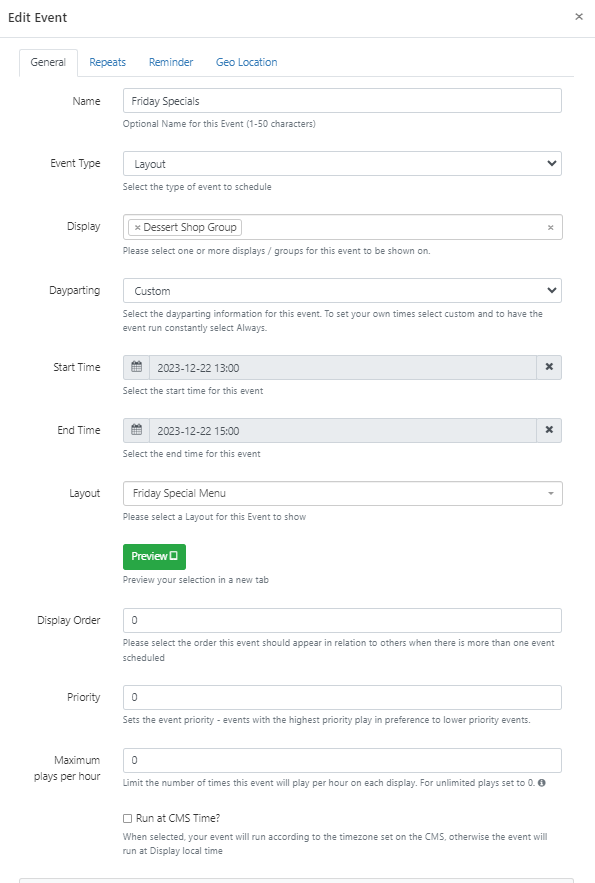
- I want this Event to Start on a Friday at 1pm and End on the same day at 3pm.
- My Layout is already selected here as I am Scheduling from the Layout Editor.
I also want to show this Layout every Friday so rather than saving this Event and creating duplicates for upcoming Fridays, I can easily create a Repeat Schedule.
- Click on the Repeats tab at the top of the form.
- I want to select a Weekly Repeat, and have that set to Friday.
- I want that to show every week so will enter 1 here to Repeat Every 1 week on a Friday.
- I don’t need to provide an End Date on this occasion so can leave this blank.
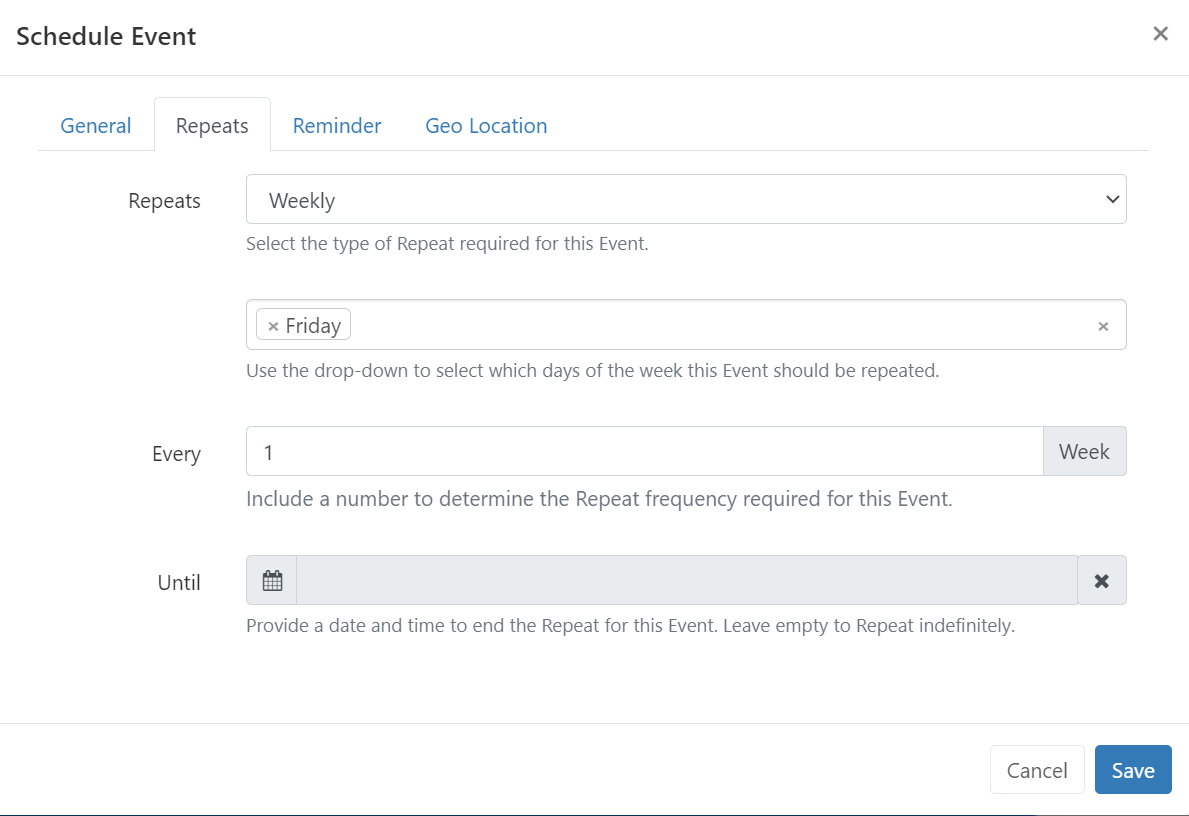
- Click to Save.
You sill see a green tick pop up at the bottom of the screen to say that the Event has been added.
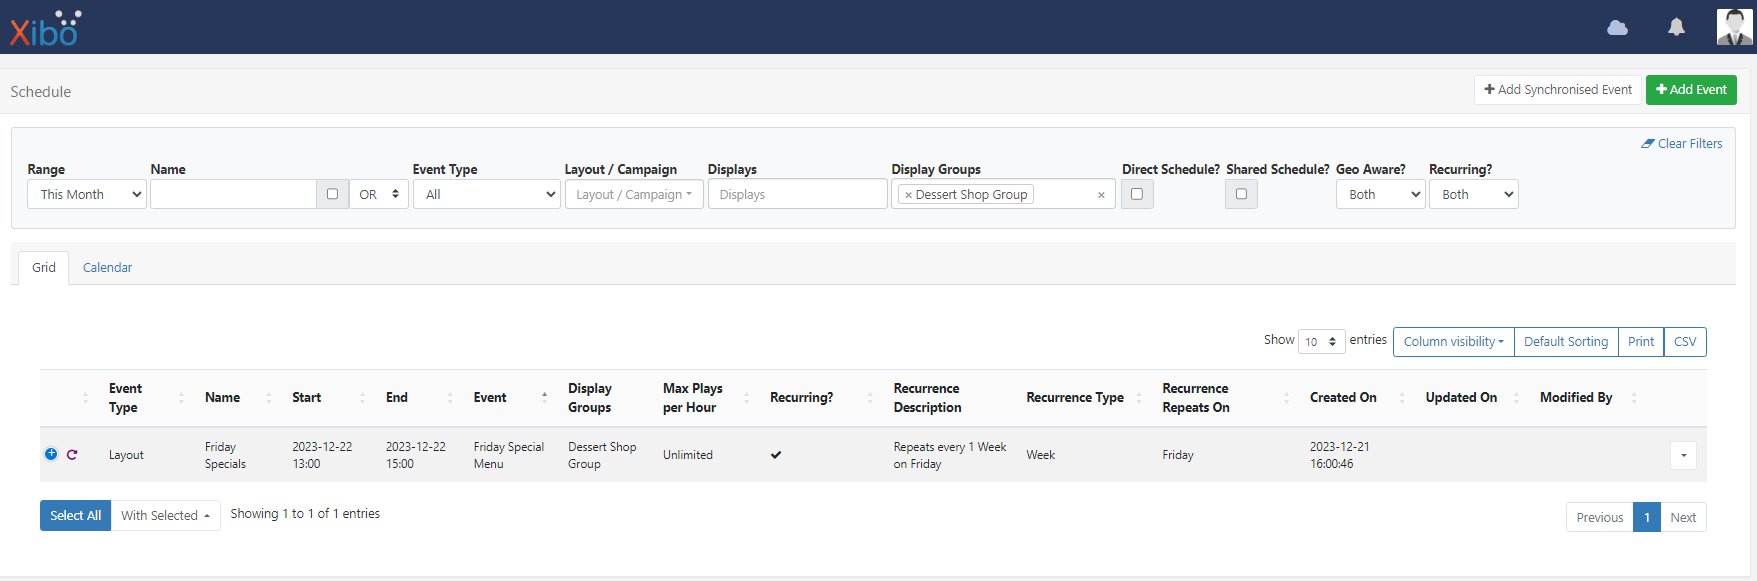
You can view this event from the Schedule:
- Click Exit to return to the main CMS menu.
- Select Schedule.
Use the available filters to search and use the tabs to see the Scheduled Event in the Grid View
and Calendar View:
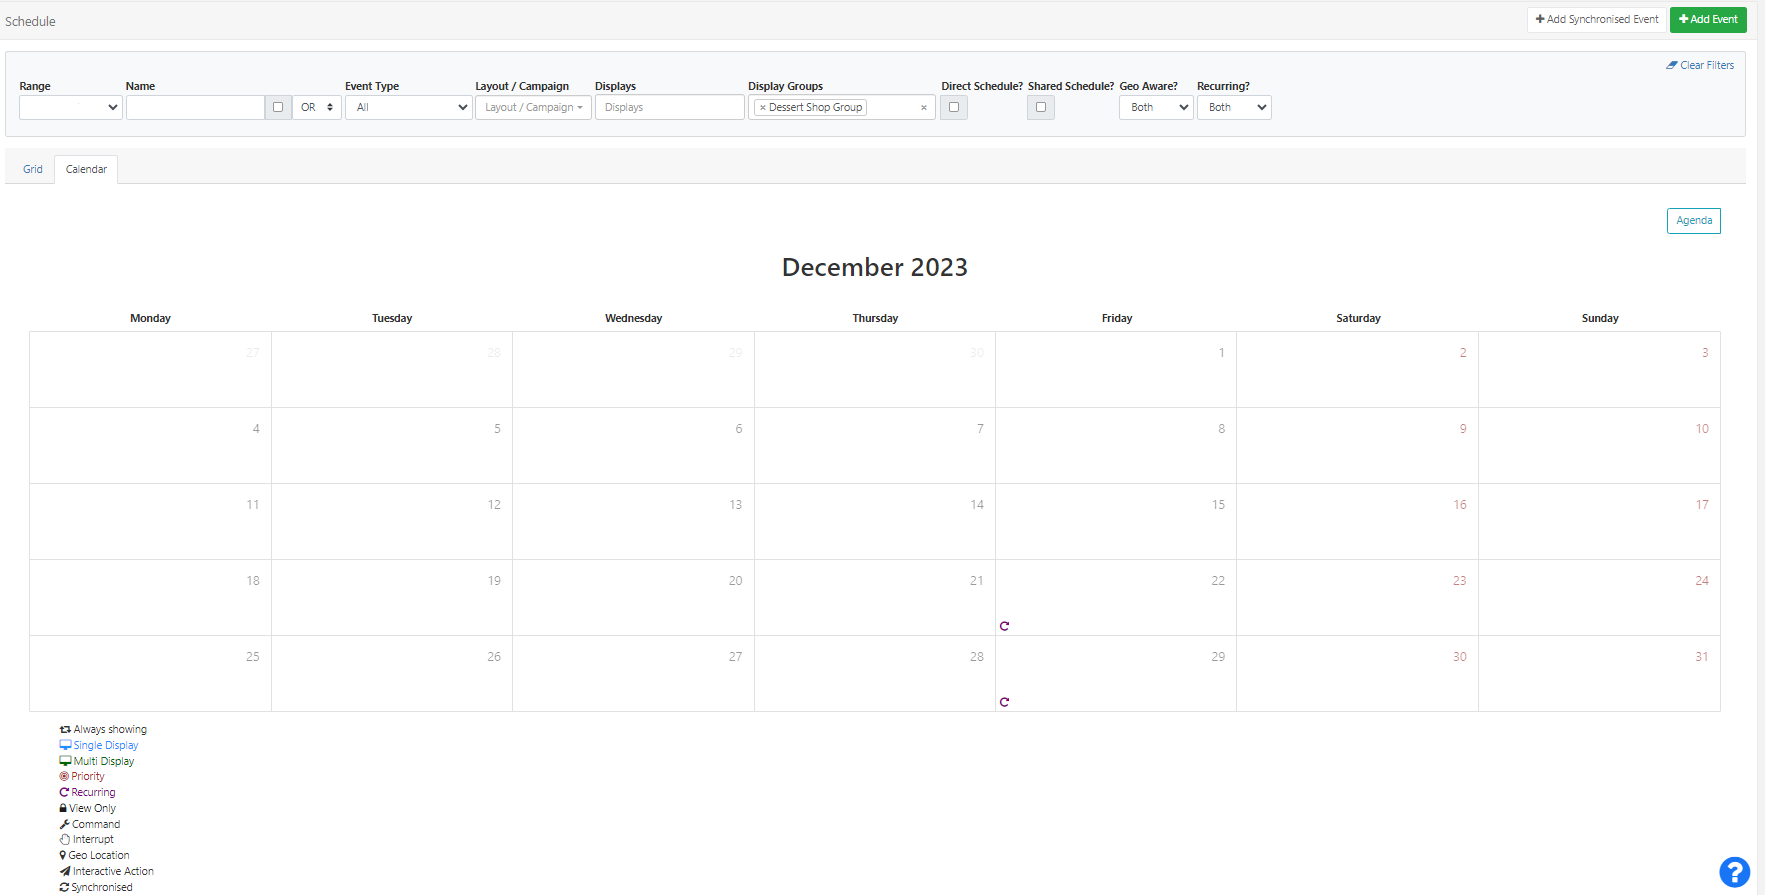
Use the row menu in the Grid view or click on the icon for the Event in the Calendar View to open to make edits.
We love to see how our Users utilise Xibo Features so if you want to show others what you have created, share instructions or give others some inspiration with Menu Boards, post in our Showcase Category!