This guide will take a User through the creation of a DataSet, which will be added to a Layout using DataSet Elements and Scheduled to Displays to show at a specific time using a v4.0.10 CMS.
For the purpose of this guide I am going to create a Layout to show upcoming birthdays of pupils in my fictional pre-school class to be shown each Wednesday morning.

Workflow:
- Create DataSet
- Create Layout
- Publish Layout
- Schedule Layout
First I need to create the data I am going to pull through to Layouts by adding a new DataSet.
Create DataSet
- From the CMS main menu, select DataSets under the Library section.
- Click the Add DataSet button to create a new record:
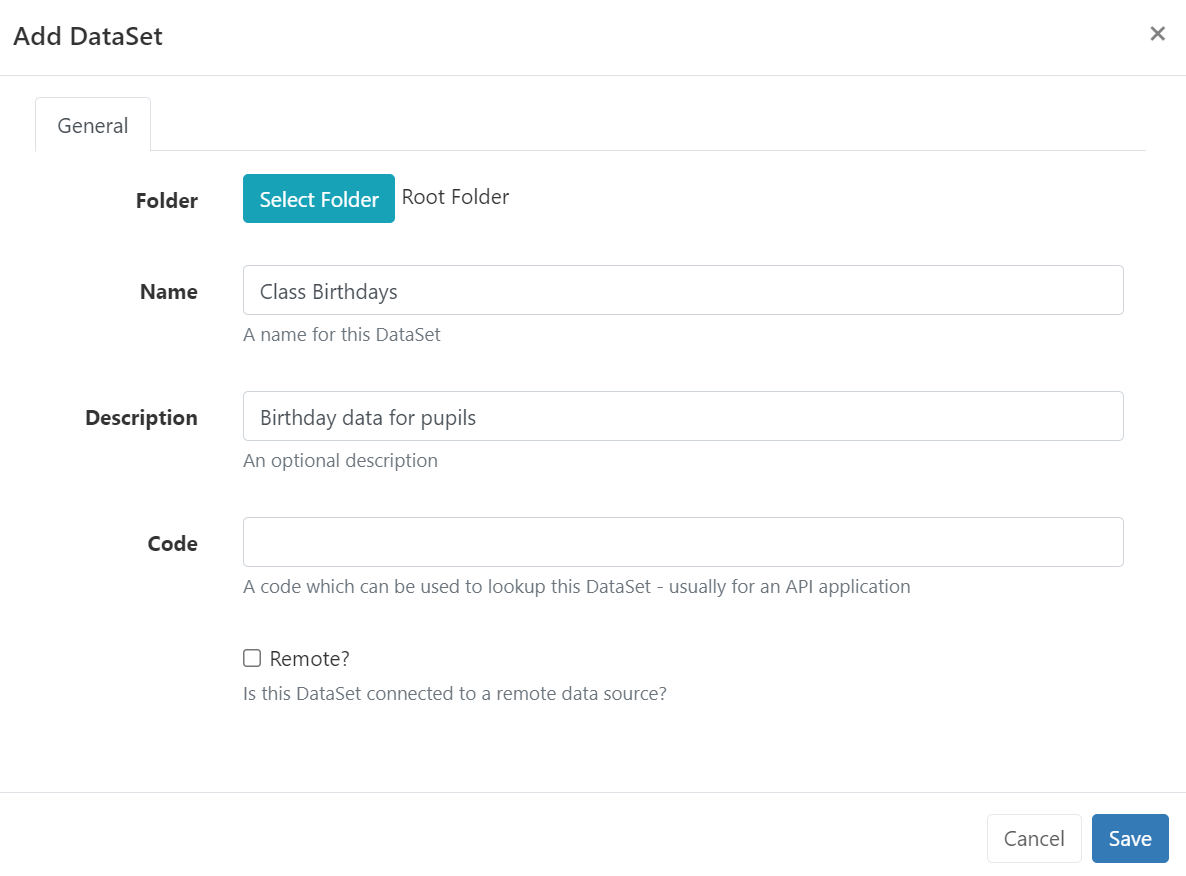
- Give the DataSet a Name so that its easily identified when it comes to selecting the data source in a Layout and an optional description.
- Save.
If you intend other Users to manage and maintain this DataSet it’s a good idea to save to a Folder!
If you are wanting to add Images to a DataSet now would be a good time to upload those to your CMS Library!
DataSets consist of Columns and rows of Data, so first I need to create some Columns.
Adding Columns
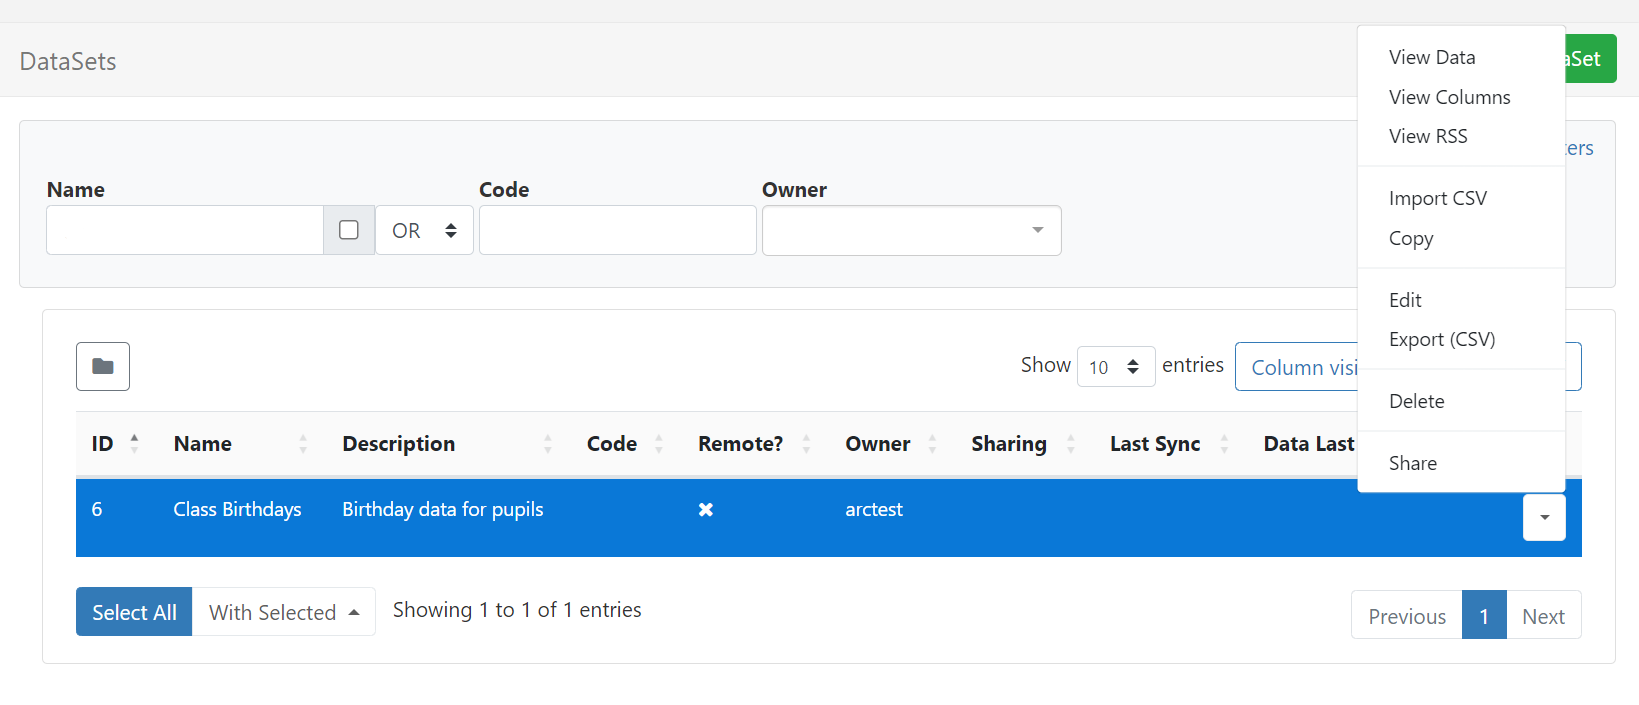
- Using the row menu for the new DataSet record, click to select View Columns:
- Use the row menu for the example entry
Col1and select Edit to overwrite the existing form fields:
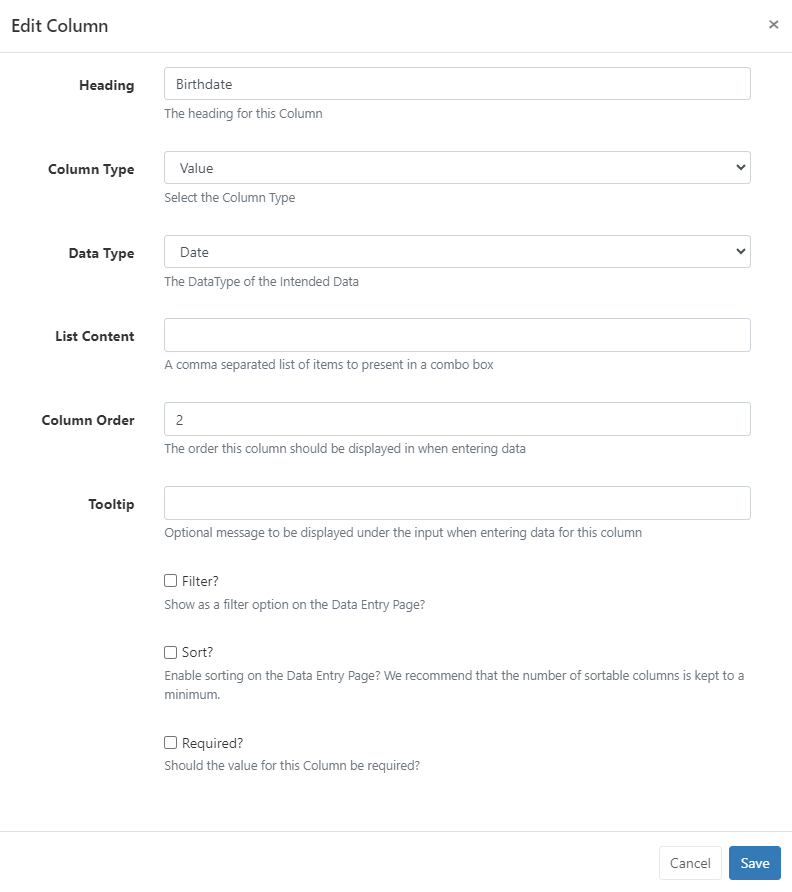
- This column is for the pupil “Birthdate” which is a “Value” column type with a “Date” data type.
- I have set a Column Order to show this column second when it comes to entering data.
- Click Save.
- Use the Add Column button to add another column and this time put “Name” for the Heading, “Value” for the Column Type and “String” for the Data Type.
- Set this as the first column to be shown when entering data.
- Click Save.
I want to ensure that each year the day of birth is shown correctly for the current year so need to add a formula column to my DataSet to handle that.
- Click Add Column and give it a Heading.
- Set “Formula” as the Column Type.
- And Data Type as “Date”.
I have provided the following MySQL statement which will set the year to the current year keeping the month and day from the Birthdate column:
STR_TO_DATE(CONCAT(YEAR(NOW()), '-', MONTH(Birthdate), '-', DAY(Birthdate)), '%Y-%m-%d')
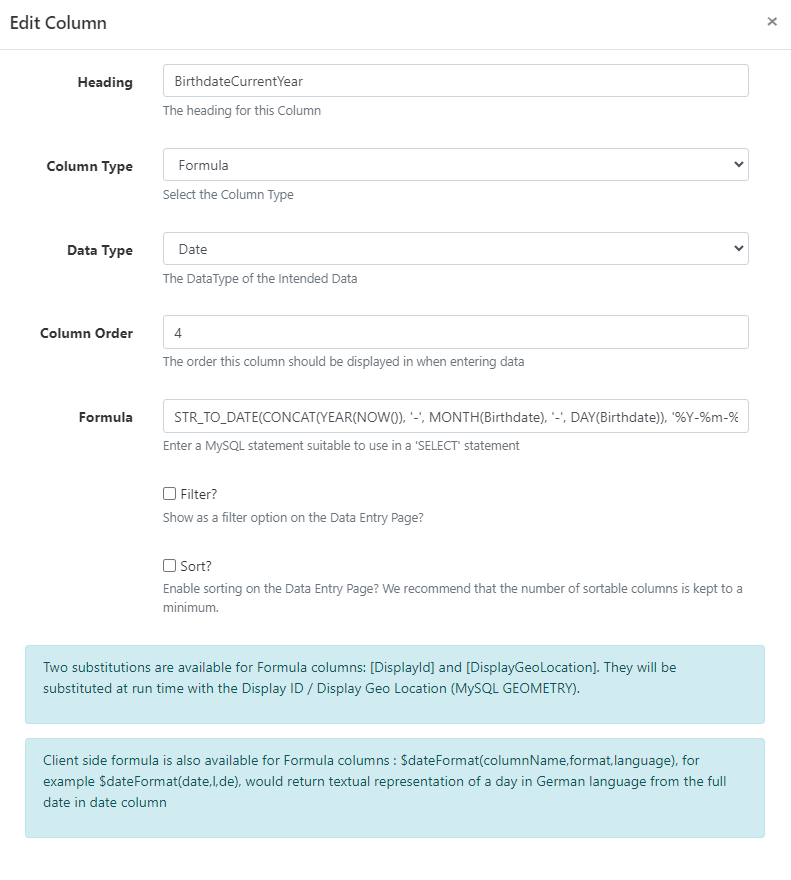
- Save.
I also want to add an image to identify each child individually (I have already uploaded image files to my CMS Library to use.)
- Add a further column and set the Heading as “Image”, Column Type “Value” and Date Type as “Library Image.” and Save.

Next I need to add data rows.
Adding Data
- Click the View Data button at the top of the grid.
- Use the Add Row button to add data:
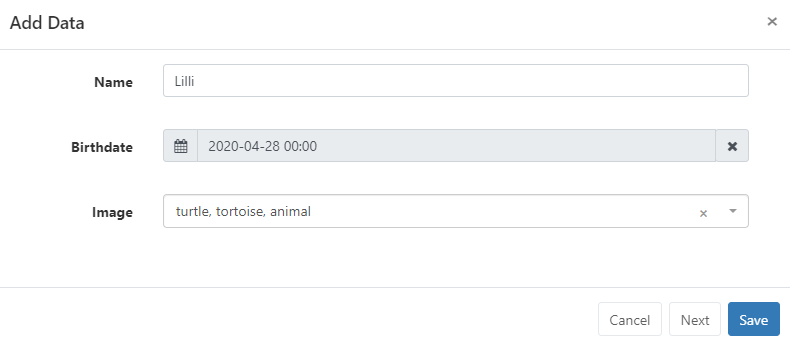
- Add a pupils name, date of birth and an image to the data record.
- Click Next to complete each record required.
- Click Save after entering the final pupil’s details.
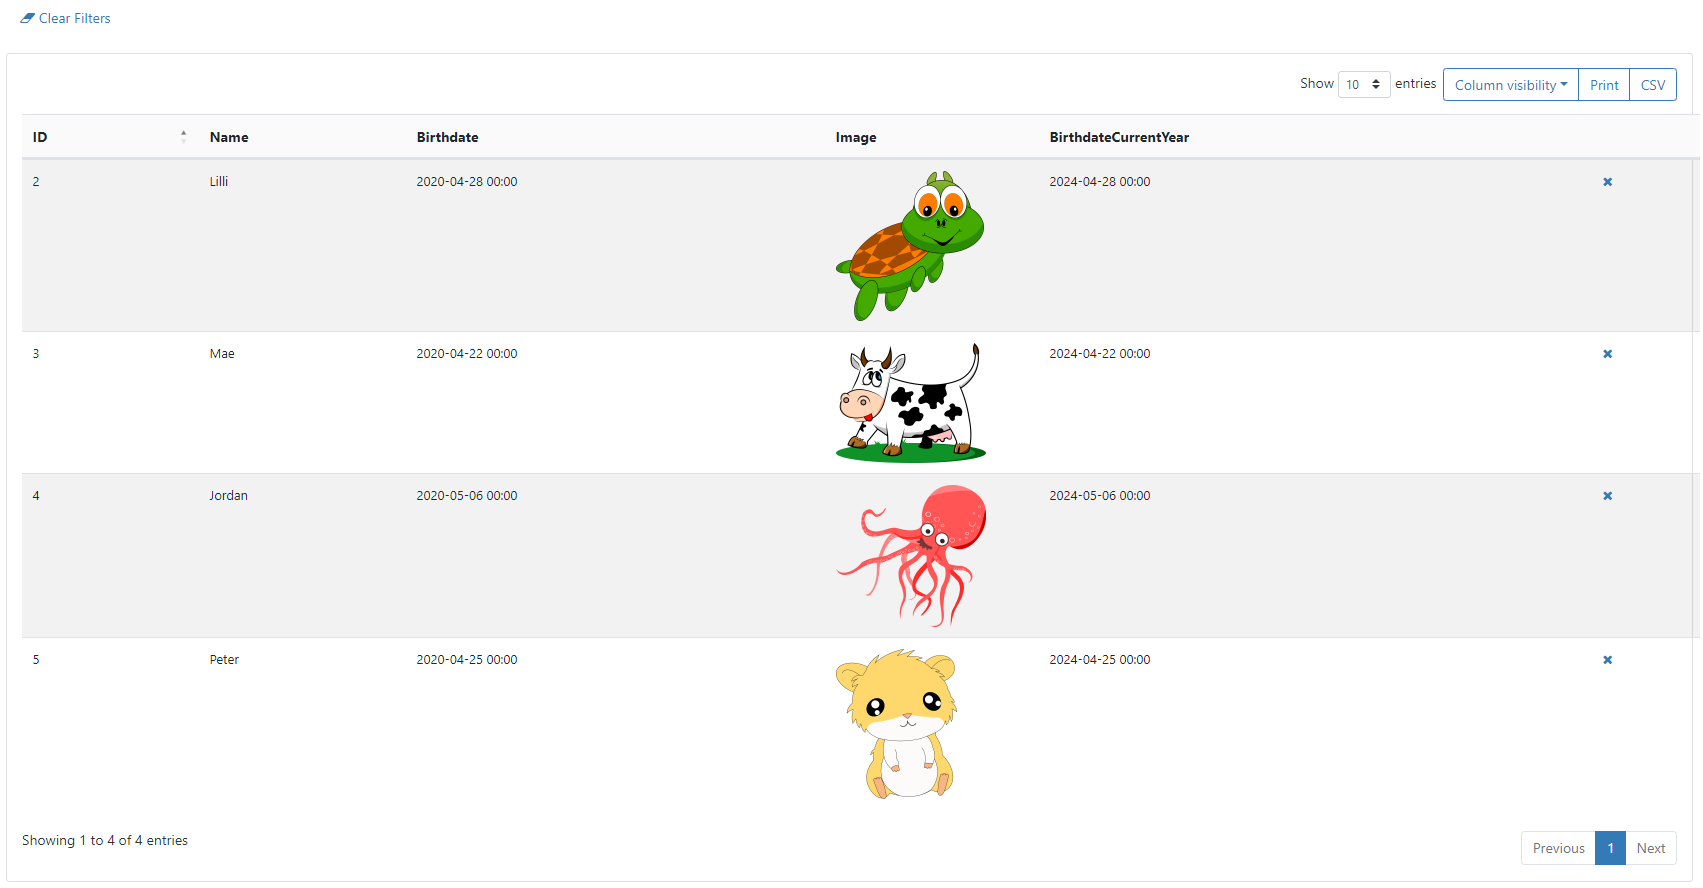
I can see my added data rows have been added to the grid:
Create Layout
- Click on Layout under the Design section of the main CMS menu.
- Use the Add Layout button to create a new Layout:
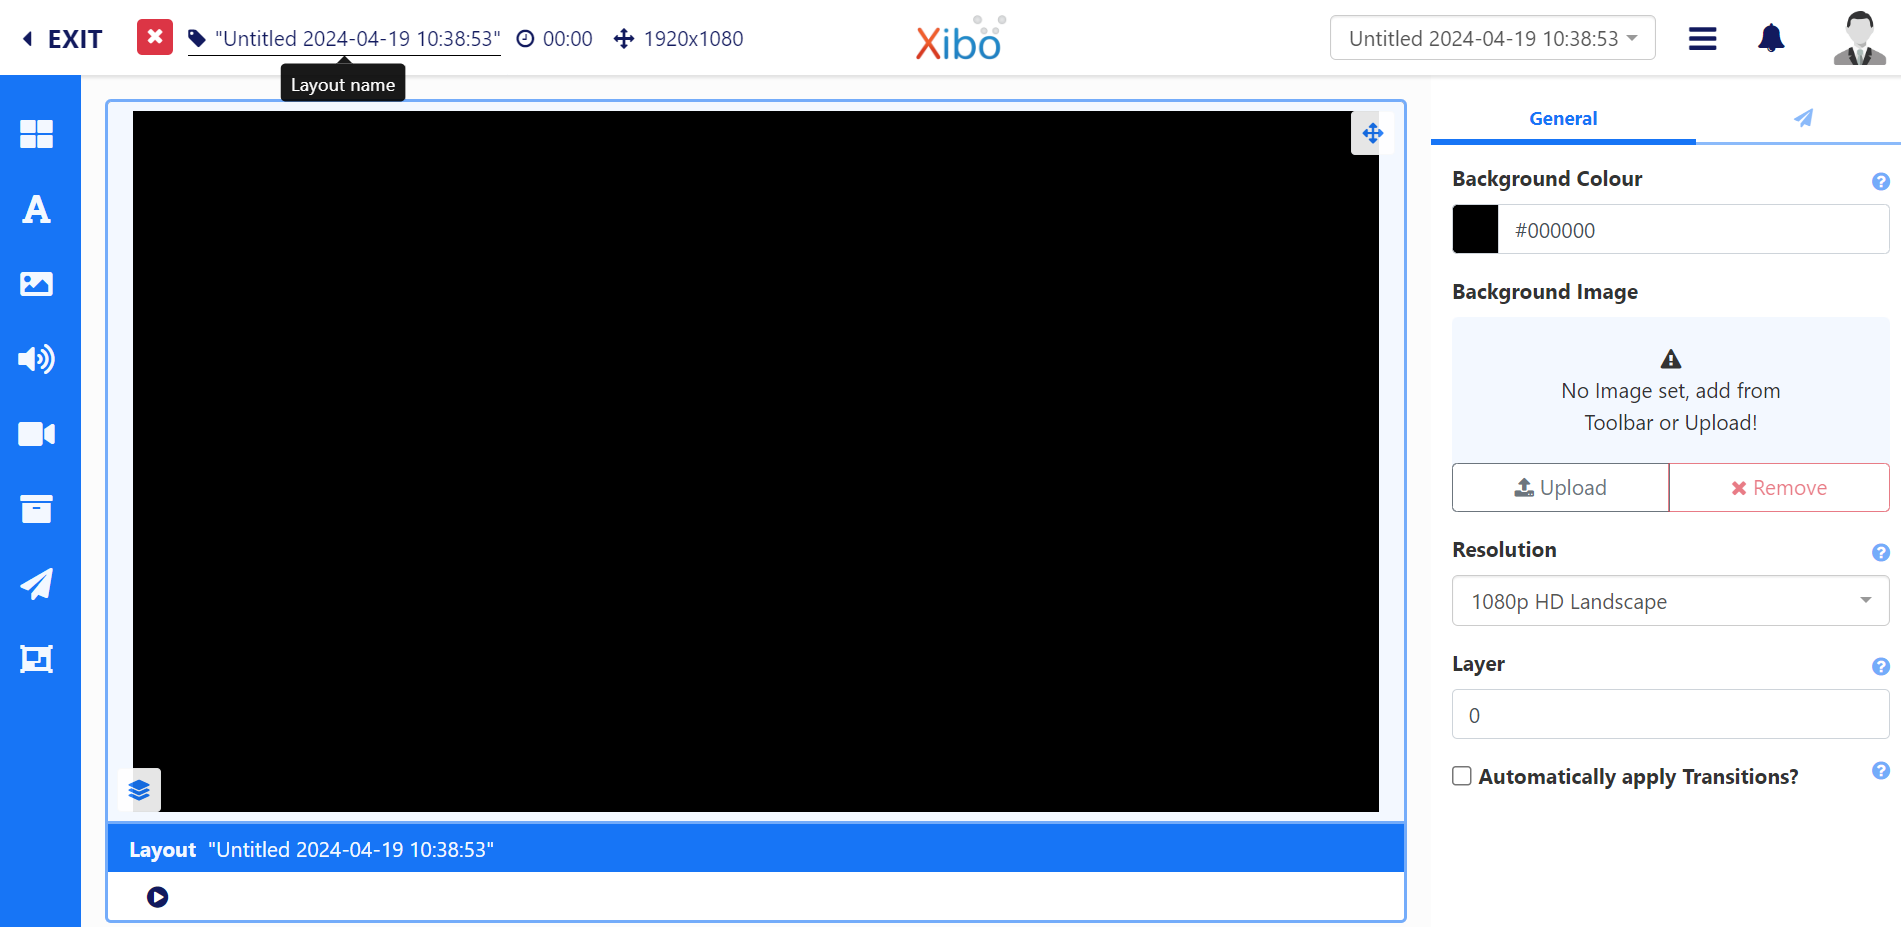
- Click on Untitled from the top left of the Layout editor to give the Layout a name:
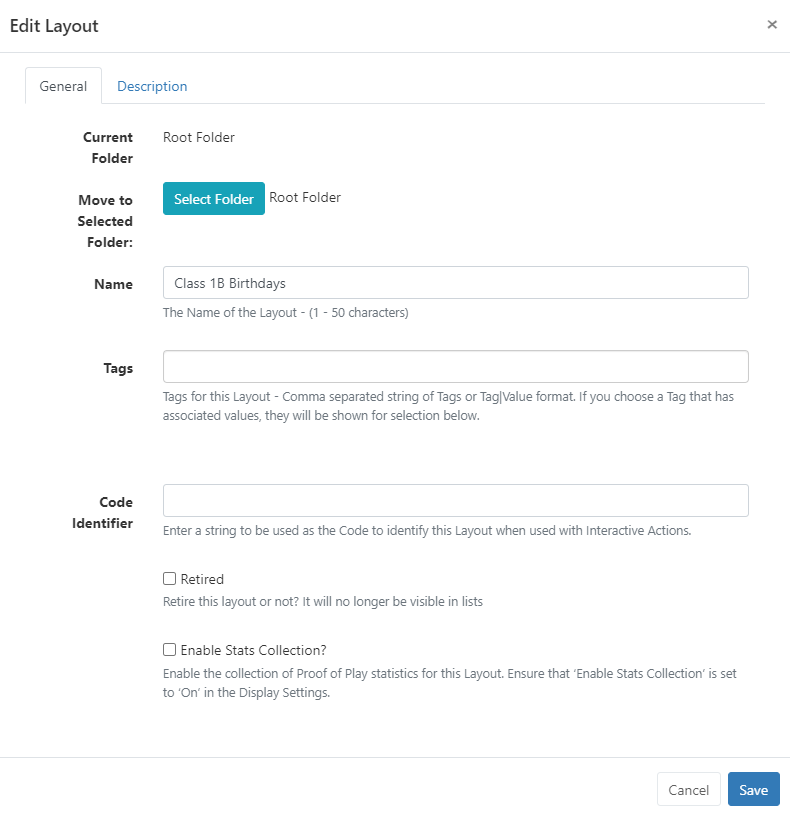
- Click to Save and return to the Layout Editor.
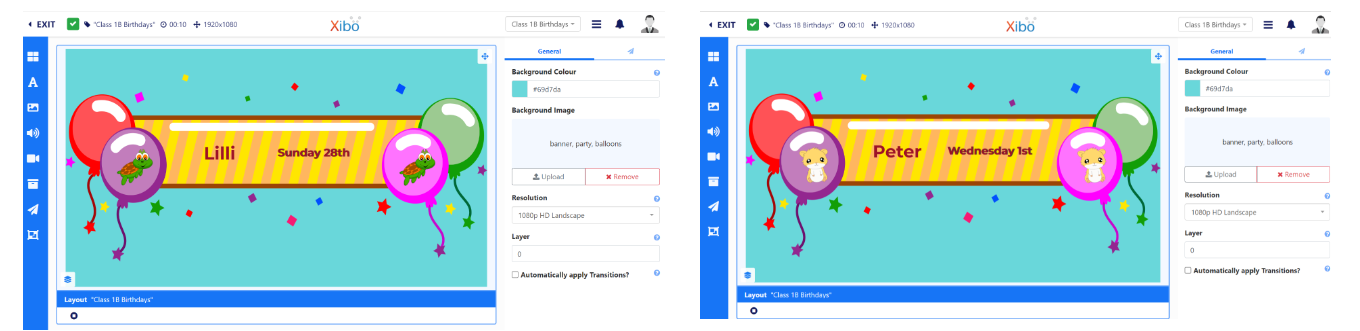
I want to use an image already saved to my Library to use as a Background.
- From the Toolbar, select the Library image search button.
Use the filters to make it easier to narrow down searches!
- Click to select the image to use and drag to the Background Image area, over on the Properties Panel:
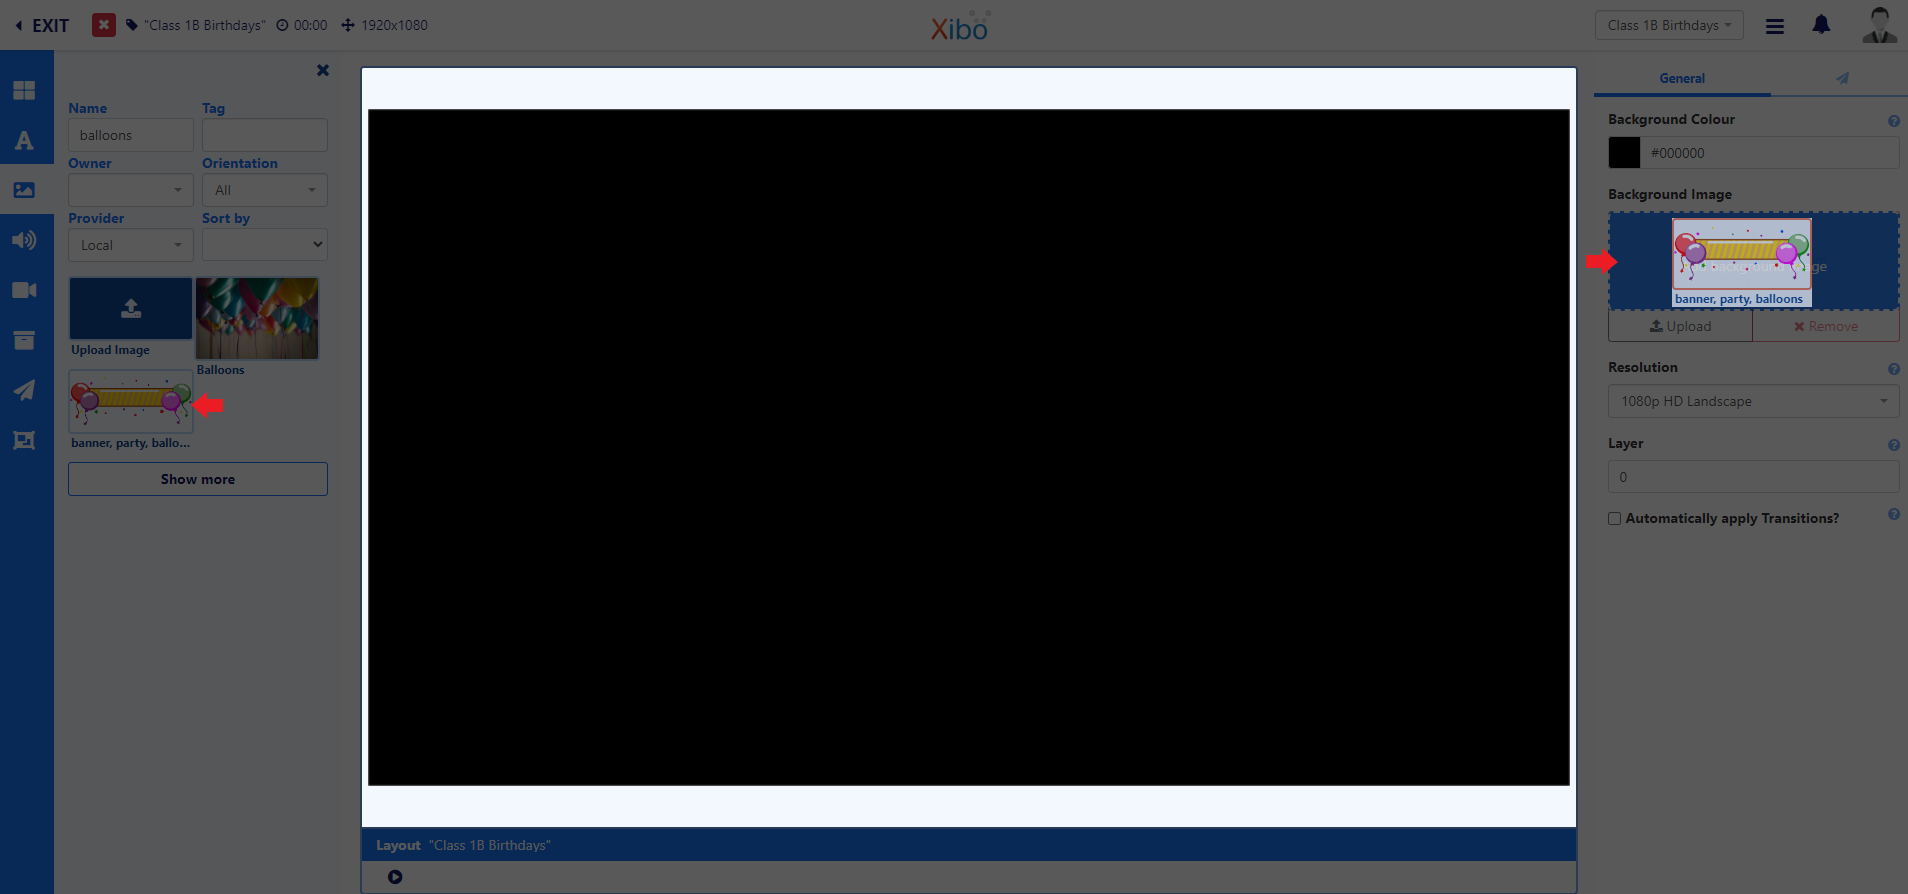
If you don’t have an image you could search through the many available stock images from Pixabay within the Layout Editor!
- I have also selected a Background Colour to use with this particular background.
- I can leave the Resolution at 1080p HD Landscape as this best matches the screen I shall be using to display this Layout.
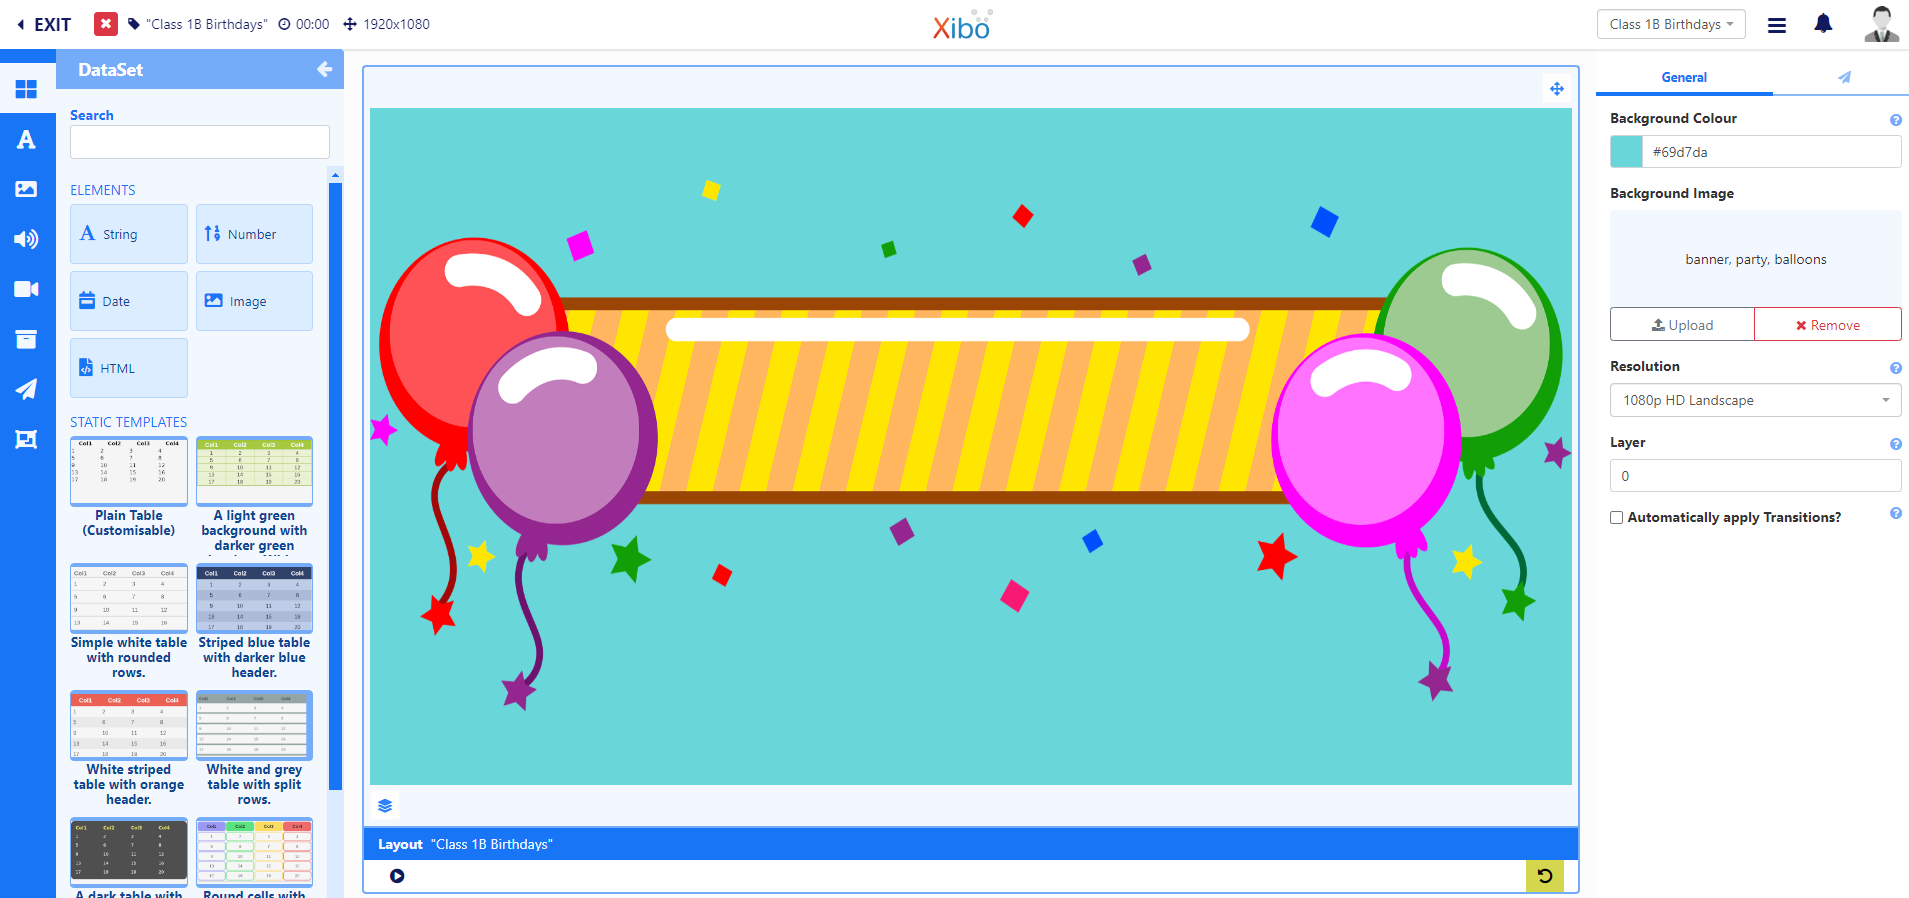
I can now start adding some Data Elements to my Layout to pull through the data I need.
Data Elements
- From the Toolbar, select the first option Add Widgets button.
- Scroll down to the the Data Widgets section, click DataSet to open:
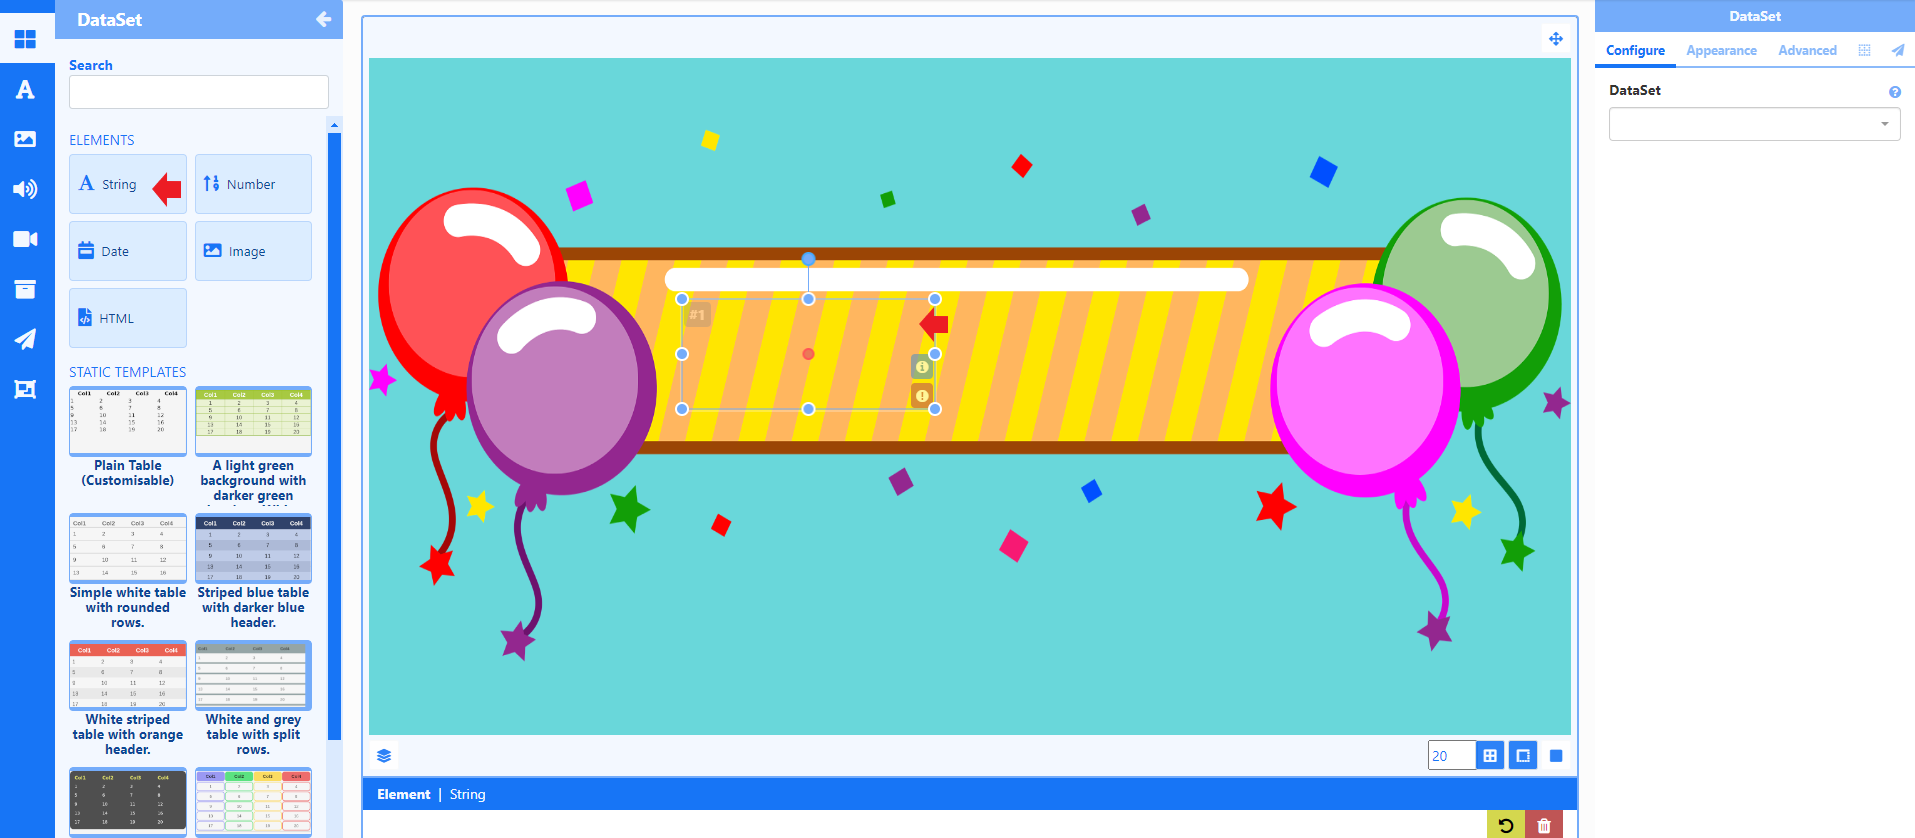
Now I need to select which Elements I want to use by dragging them onto the canvas.
- I will start by selecting and dragging the String Element onto the canvas and roughly position and resize:
- Use the DataSet drop down from the Properties Panel and select the DataSet to use from the list:
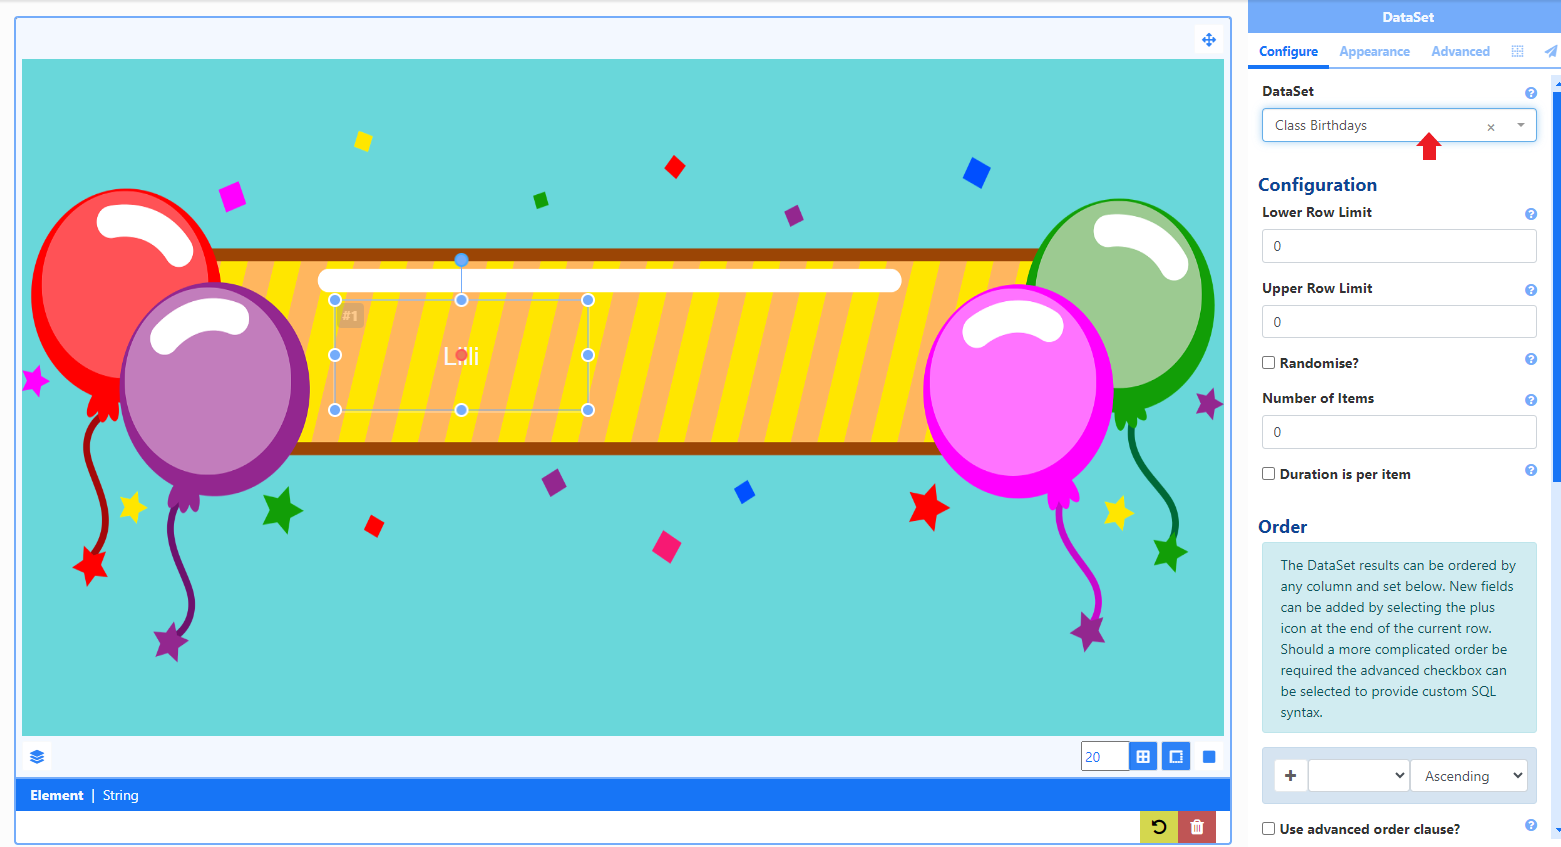
Once selected, you will see the Element update to show the first Name record (#1) held in the DataSet.
We can leave the Configure tab for the moment and look at how we want to format and style this Element.
- From the Appearance tab use the available formatting options to style:
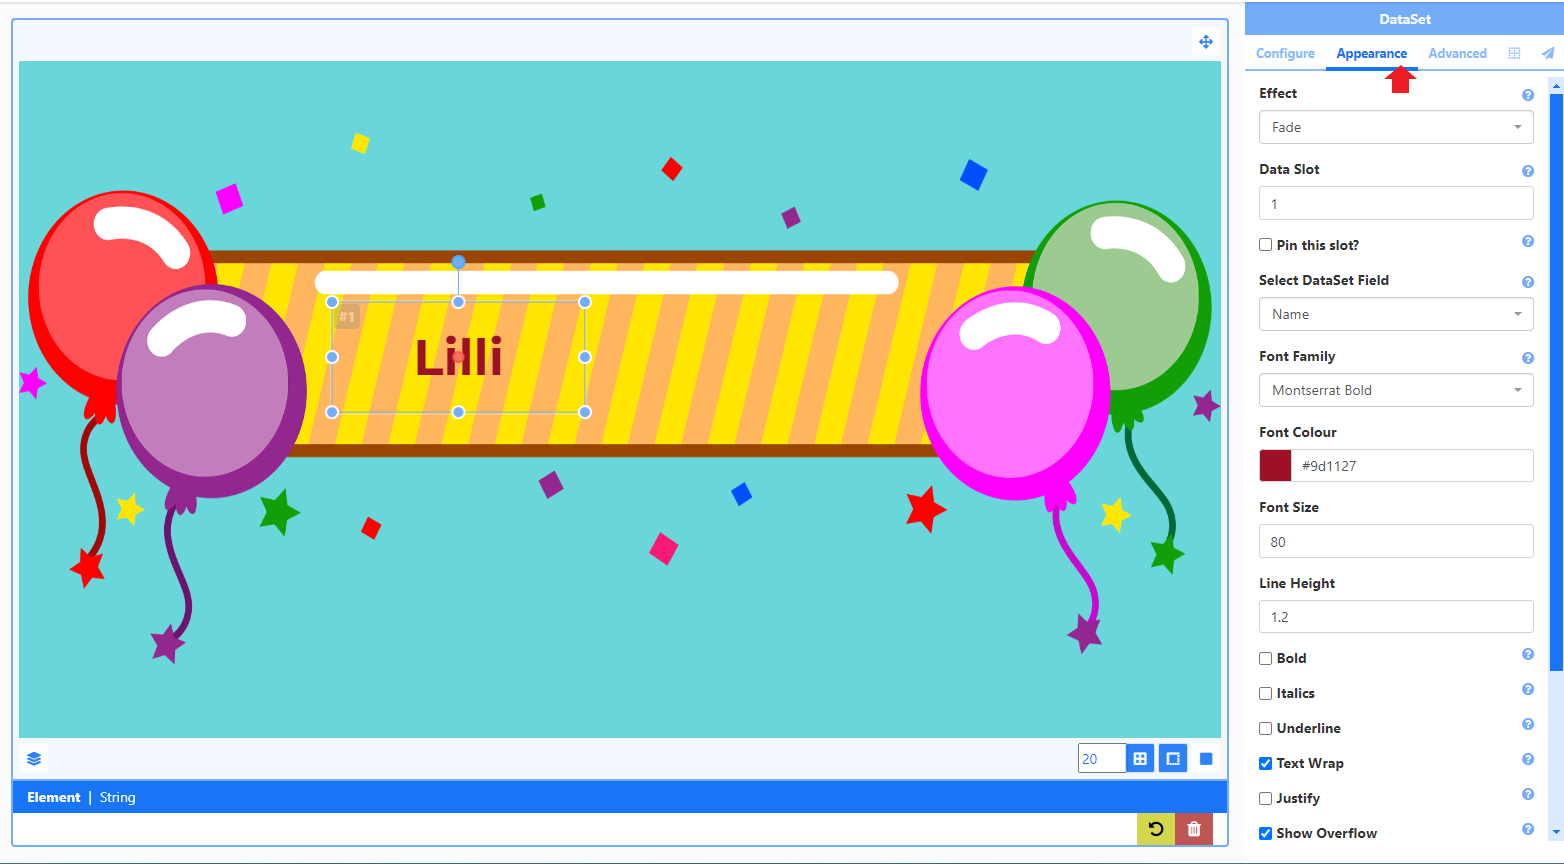
If I had more than one DataSet Field for String I could select from here. As I have only used a Name String, this is already selected.
- Next I want to add a Date Element to the canvas to pull through birthdates of pupils.
When adding further elements for this Widget, they will share the data source as set in the initial configuration.
- Format using the Appearance tab:
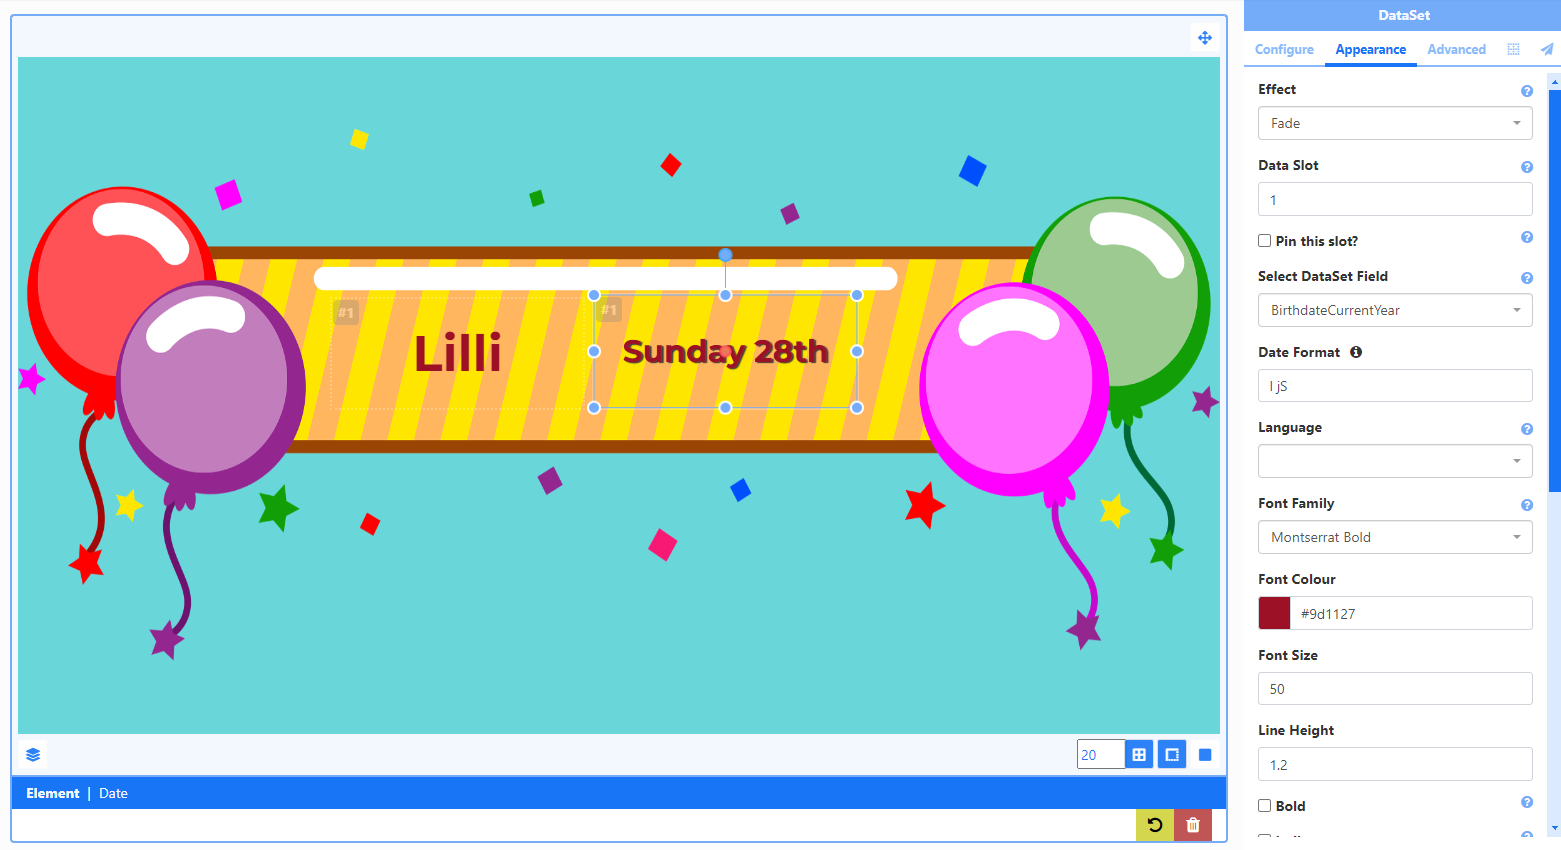
To show the day of the week and the date I have entered the following in the Date Format field - (lower case L) l jS
I can now make adjustments to the positioning of these elements if needed.
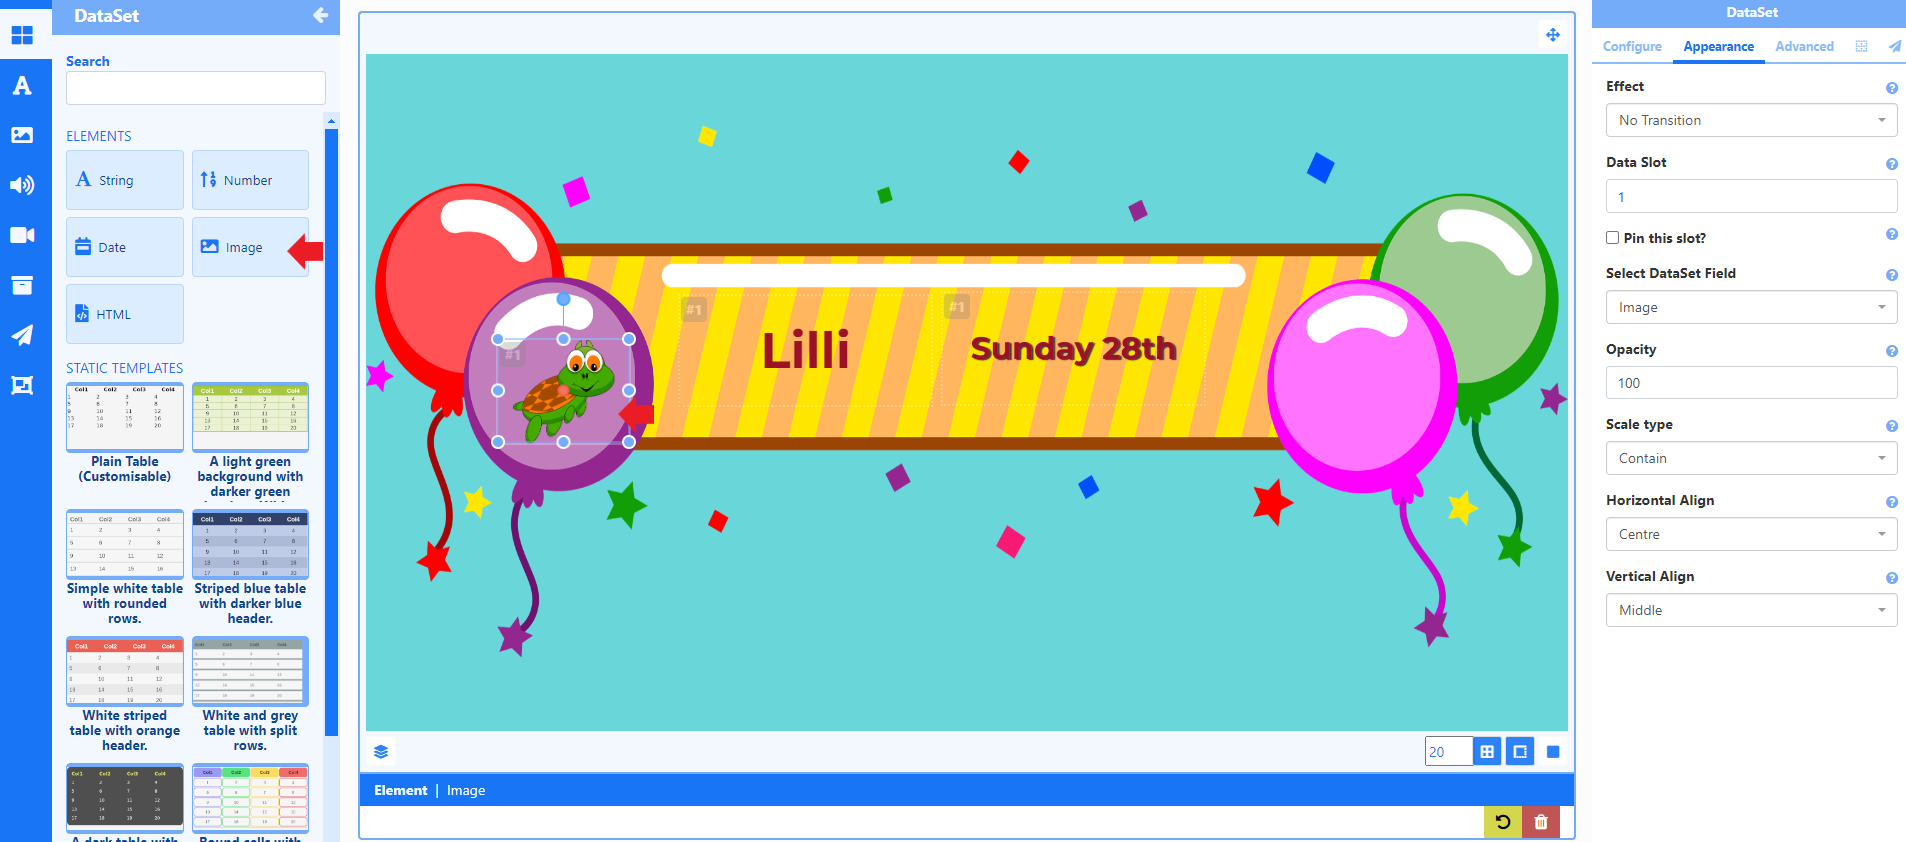
Next I want to pull through the image added to the DataSet.
- Drag the Image Element onto the canvas, position and resize:
- Right click on the Image Element and select Duplicate from the context menu.
- Position the duplicated image on the canvas.
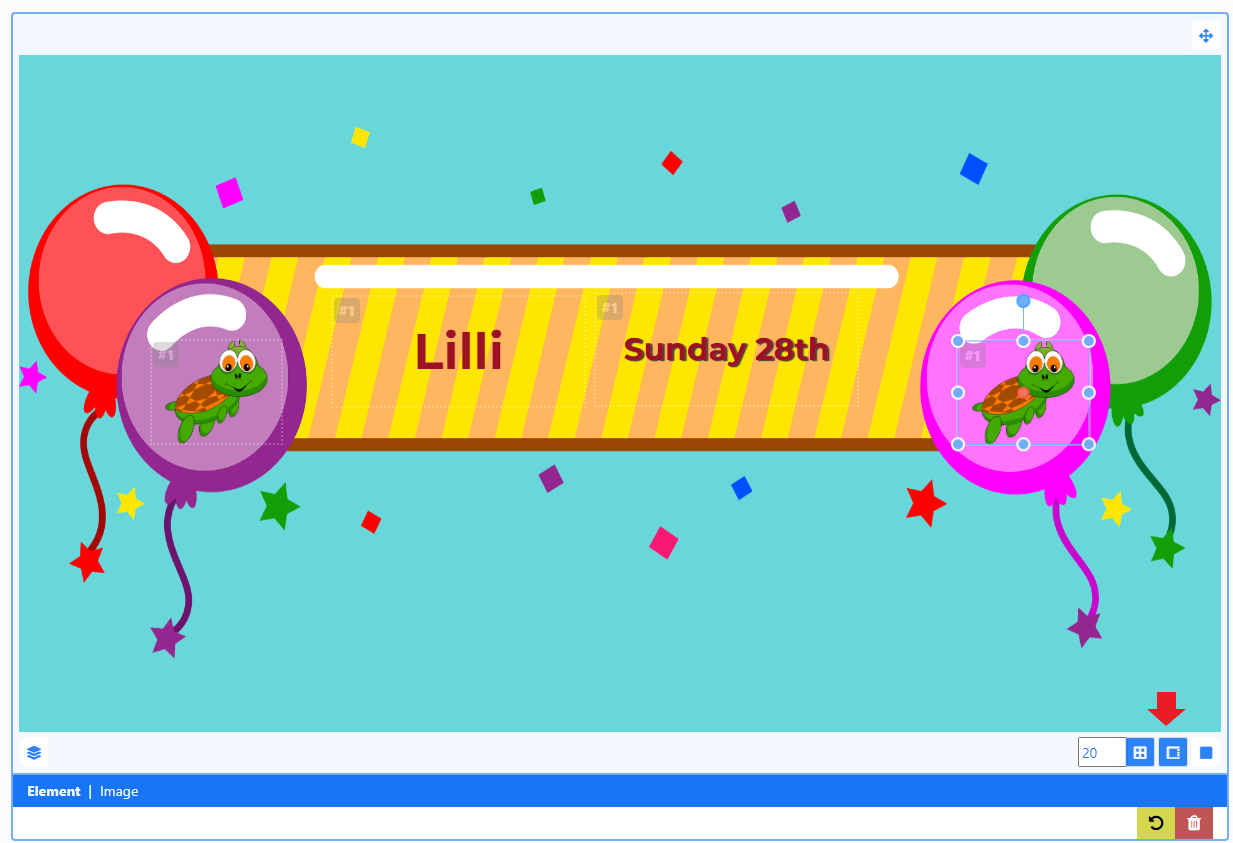
Use the buttons in the bottom right of the editor to help with the positioning of items!
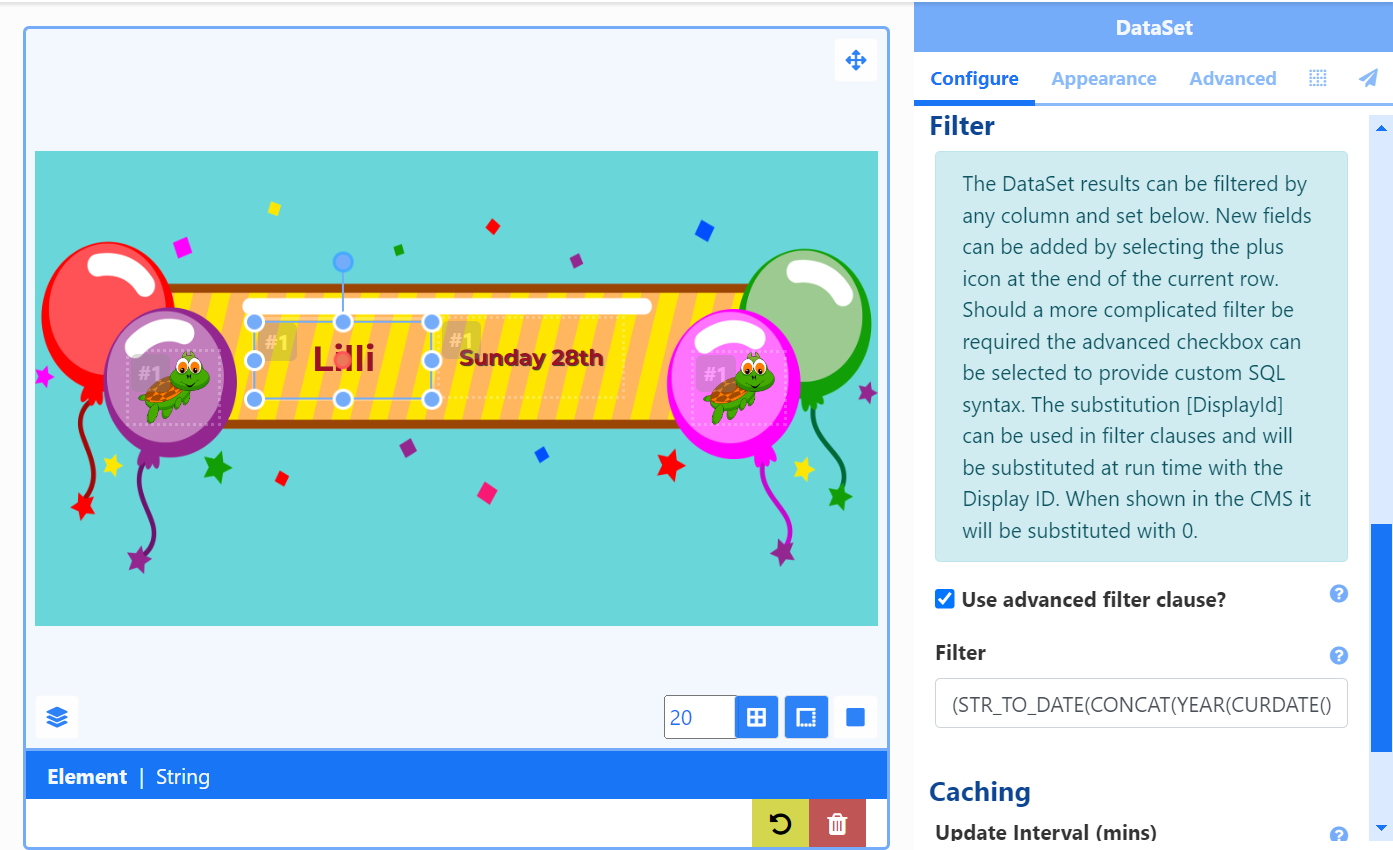
If I was to play a preview of this Layout, I would see all the names and birthdays of pupils cycle through. As I only want to show birthdays for the next 7 days I need to apply some filtering to one of the elements.
- Click in one of the Elements to access the Properties Panel.
- From the Configure tab, scroll down to the Filter section.
- Tick to use advanced filter clause.
I have used the following SQL clause to filter my DataSet:
(STR_TO_DATE(CONCAT(YEAR(CURDATE()), '-', MONTH(Birthdate), '-', DAY(Birthdate)), '%Y-%m-%d') BETWEEN CURDATE() AND CURDATE() + INTERVAL 7 DAY OR STR_TO_DATE(CONCAT(YEAR(CURDATE()) + 1, '-', MONTH(Birthdate), '-', DAY(Birthdate)),'%Y-%m-%d') BETWEEN CURDATE() AND CURDATE() + INTERVAL 7 DAY)- Enter or click into another field to save changes.
If I now Play a Preview of the Layout, I will only see names of pupils who birthdays fall in the next 7 days:
You can also see that this Layout currently has a duration of 10 seconds, which means all birthdays that meet the filter criteria will be shown in that time. So I want to increase that to something more sensible.
- Click in any Element and select the Advanced tab.
- Tick the Set a duration box.
- Enter a new Duration.

- Enter or click into another field to save changes.
You will notice that the Layout duration has now changed to reflect this.
Layout duration is based on the longest running ‘item’ on the Layout. By default all elements have a duration of 10 seconds so I only need to override the duration for 1 element to dictate the total length of this Layout!
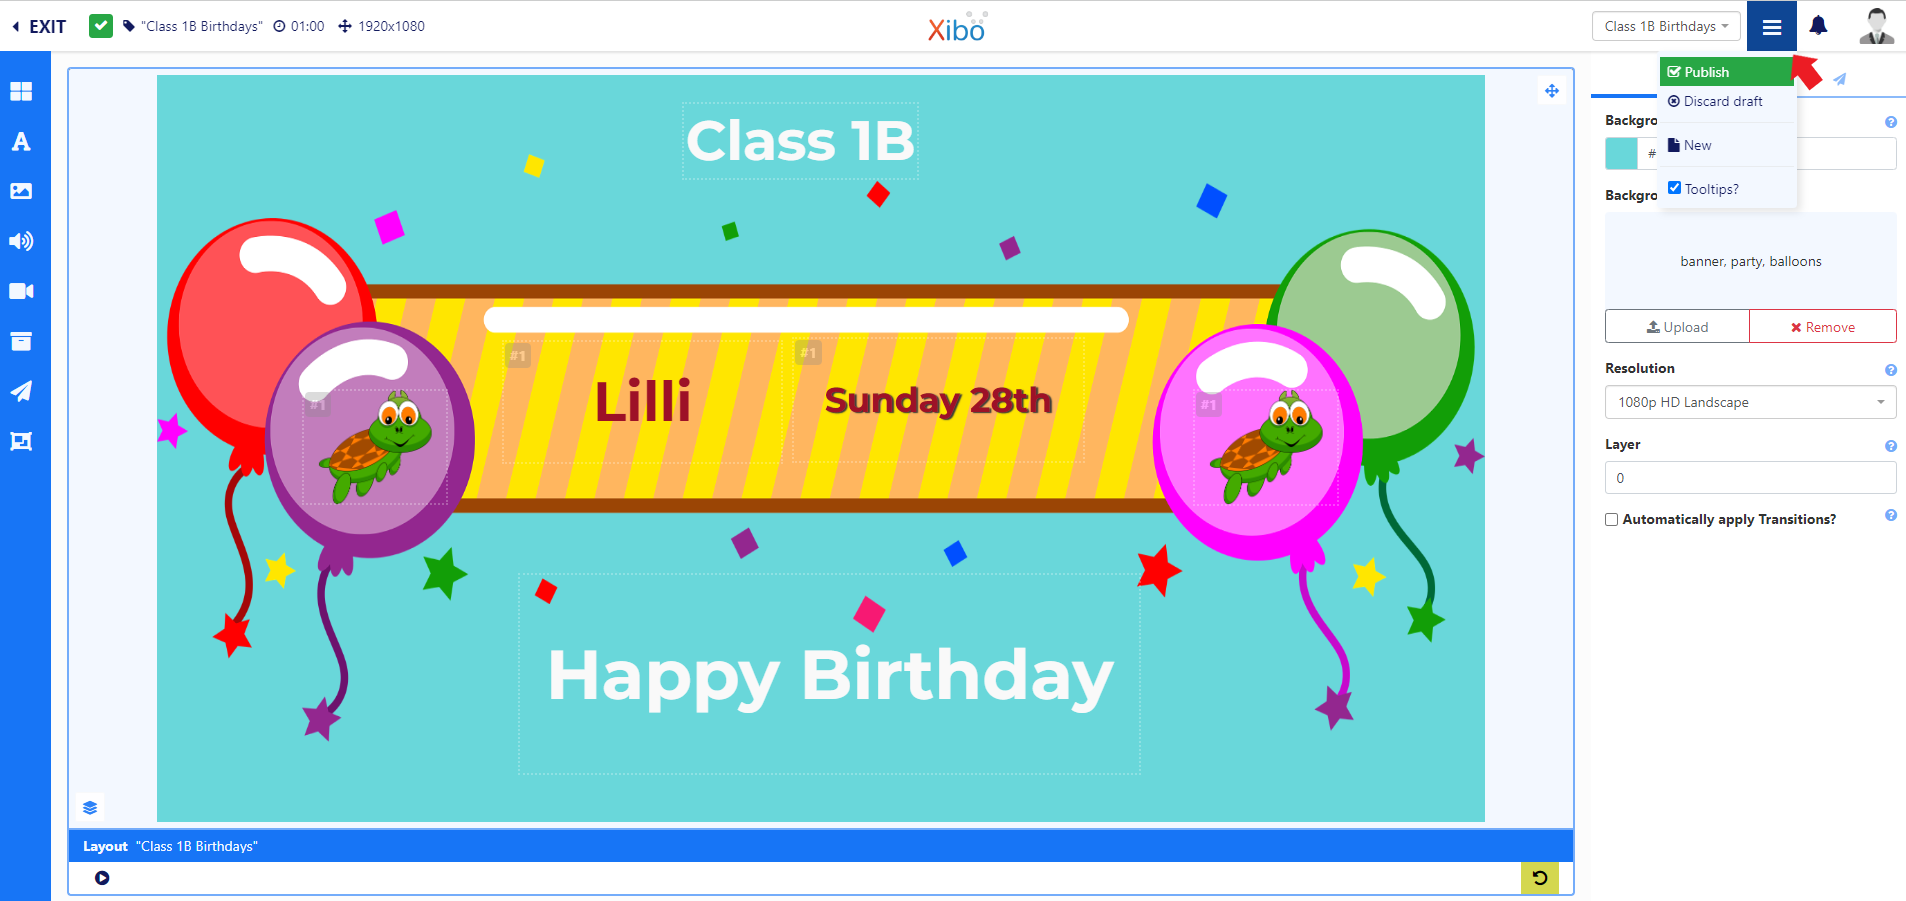
I also want to add the class name and a birthday message to my Layout for further context.
Global Elements
- From the Toolbar click the second button, A to open Global Elements.
- Drag Text onto the canvas.
- From the Properties Panel, add the Text you want to show and format.
- Repeat this process to add a birthday message to the bottom part of the Layout.

Play a preview of the Layout and make any adjustments that are needed.
As I am happy with my Layout I need to Publish so I can Schedule it to my Displays.
Publish Layout
- From the top right menu, click Publish:
- Tick the Publish Now box and select the Publish button.
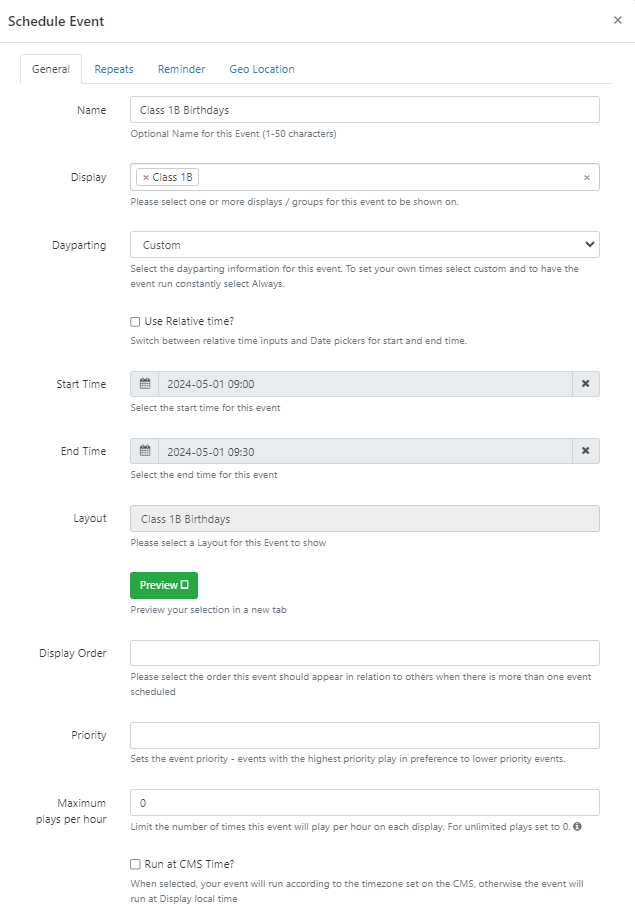
Schedule
- Once Published, use the top menu again and select Schedule.
- Give the event a Name to make it easy to see in Schedules.
- Use the drop down to select the Displays/Display Groups this Layout should be shown on.
- I am going to set my own times so will select Custom.
- And I want to specify times so untick Use Relative time.
- I want this Event to Start on the next Wednesday at 9am and End on the same day at 9:30am.
- My Layout is already selected on this form as I am Scheduling from the Layout Editor:
I want this Layout to show every Wednesday so need to create a Repeat Event.
- Click on the Repeats tab.
- Select a Weekly Repeat and set to Wednesday.
- As I want this to show every Wednesday, enter 1 here to Repeat Every 1 week.
- I shall provide an Until date to coincide with the end of the school year:
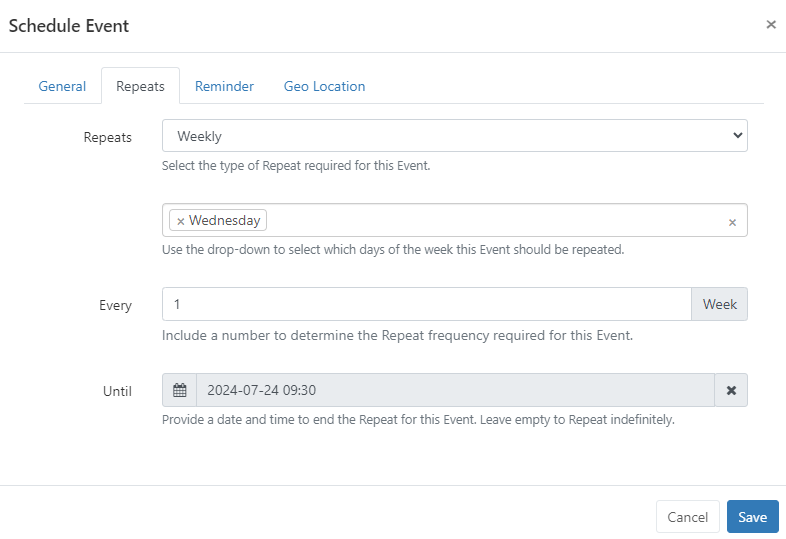
- Click to Save.
You will see a green tick pop up at the bottom of the screen to say that the Event has been added.
You can view this event by selecting Schedule from the main CMS menu and using the available filters in both a Grid and Calendar view!
Note:
You could also import data into your DataSet from a CSV file! Once the DataSet has been created and structured with Columns you can use the row menu for your DataSet and select the Import CSV option.
Further information on Importing data to DataSets can be found in this guide
This is just one example of many ways you can utilise DataSets to get dynamic content on your screens. If you would like to showcase your tried and tested examples we would love to hear from you by posting in our Showcase Category.