To be completed by the original poster:
CMS Version
Xibo 3.3.1
Installation Method
Docker
Operating System
The Ubuntu 20.4 LTS operating system and the Xibo CMS 3.3.1 is installed on a shared Linode hosted server.
Issue
I’m in need of assistance of adding SSL support to my Xibo CMS version 3.3.1 site. I’m a novice in server environments so please excuse my ignorance in this subject.
My production Xibo.Production.Server is up and running quite well with the exception that I’m connecting to it via HTTP not HTTPS.
I have created clone of this server name Xibo,Development.Server on Linode and started following the instructions to “Adding SSL Support” stated in the knowledge base article listed below.
I chose the simplest method by installing Apache on the host Ubuntu server, and have it proxy the SSL requests into our container, as the article suggested.
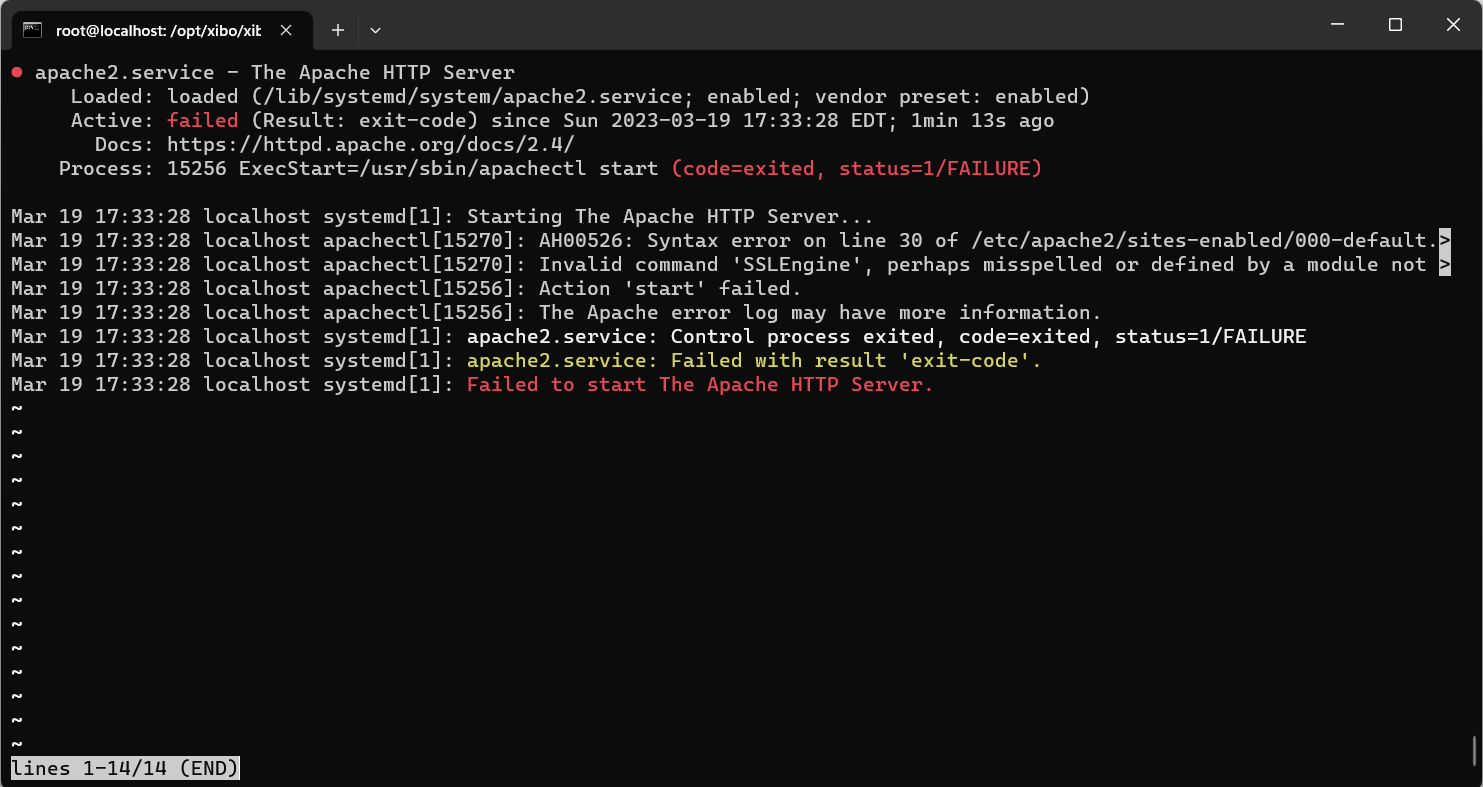
I seem to be confused where it says “Our CMS should be available back on port 80” right after restart Apache by service apache2 restart. Should I check if the CMS is working on port 80 via HTTP?
The next steps I’m hung up on is -
Then install letsencrypt.
When I run the command → add-apt-repository ppa:certbot/certbot, I receive this following message.

Can anyone provide me updated instructions on Adding SSL support to Docker CMS 3.3.1?
Adding SSL Support
There are several ways you could add SSL support to this configuration.
The simplest is to install Apache on the host Ubuntu server, and have it proxy the SSL requests into our container.
First, we need to stop the running CMS since we’ll need port 80 for our Apache server.
cd /opt/xibo
docker-compose down
Now move Xibo on to a different port number.
We’ll be following the instructions to install Xibo for Docker on Linux from the “Using different ports” heading.
cp cms_custom-ports.yml.template cms_custom-ports.yml
nano cms_custom-ports.yml
Edit the “ports” section of the cms-xmr and cms-web services so they read as follows:
version: "2.1"

services:
    cms-db:
        image: mysql:5.6
        volumes:
            - "./shared/db:/var/lib/mysql"
        restart: always
        environment:
            - MYSQL_DATABASE=cms
            - MYSQL_USER=cms
            - MYSQL_RANDOM_ROOT_PASSWORD=yes
        mem_limit: 1g
        env_file: config.env
    cms-xmr:
        image: xibosignage/xibo-xmr:release-0.7
        ports:
            - "9505:9505"
        restart: always
        mem_limit: 256m
        env_file: config.env
    cms-web:
        image: xibosignage/xibo-cms:release-2.1.0
        volumes:
            - "./shared/cms/custom:/var/www/cms/custom"
            - "./shared/backup:/var/www/backup"
            - "./shared/cms/web/theme/custom:/var/www/cms/web/theme/custom"
            - "./shared/cms/library:/var/www/cms/library"
            - "./shared/cms/web/userscripts:/var/www/cms/web/userscripts"
        restart: always
        links:
            - cms-db:mysql
            - cms-xmr:50001
        environment:
            - XMR_HOST=cms-xmr
        env_file: config.env
        ports:
            - "127.0.0.1:8080:80"
        mem_limit: 1g
So specifically, we changed the line:
            ports:
                 - "65500:9505"
to
            ports:
                 - "9505:9505"
and
            ports:
                 - "65501:80"
to
            ports:
                 - "127.0.0.1:8080:80"
Save your changes. That will ensure that XMR runs on port 9505 as before, and the web service runs on port 8080 only on the loopback interface.
Bring the containers back up with those changes:
docker-compose -f cms_custom-ports.yml up -d
Now protect that Container with an Apache server and a LetsEncrypt SSL certificate:
apt-get install apache2
a2enmod proxy
a2enmod proxy_http
a2enmod headers
Edit the default apache config file to create a reverse proxy to our container:
nano /etc/apache2/sites-available/000-default.conf
It should contain
<VirtualHost *:80>

        ServerAdmin webmaster@localhost
        DocumentRoot /var/www/html

        ErrorLog ${APACHE_LOG_DIR}/error.log
        CustomLog ${APACHE_LOG_DIR}/access.log combined

        ProxyPreserveHost On
        RequestHeader set X-Forwarded-Proto expr=%{REQUEST_SCHEME}

        ProxyPass / http://127.0.0.1:8080/
        ProxyPassReverse / http://127.0.0.1:8080/

</VirtualHost>
Save your changes, and then restart Apache
service apache2 restart
Our CMS should now be available back on port 80.
If you’re using ufw, lets put a rule in for https traffic now
ufw allow 443/tcp
Then install letsencrypt
add-apt-repository ppa:certbot/certbot
apt-get update
apt-get install python-certbot-apache
And then generate a certificate
certbot --apache -d xibo.alexharrington.co.uk
Do not select the option to automatically redirect requests to https connections. Once the certificate has been issued, try accessing the CMS over https. If it works as expected, log in to the CMS and in the Settings → Network tab, tick the option to “Force HTTPS” connections.