CMS White Label’s are managed from the Customer Portal My Products page.
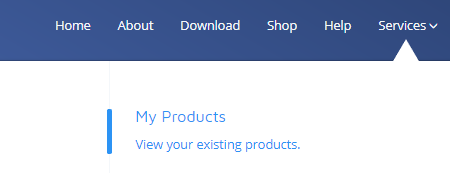
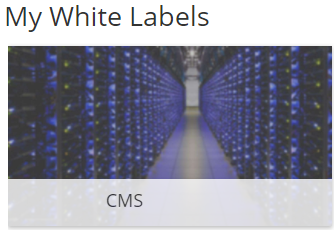
Click on the card to redirect you to your White Label CMS page, here you will see cards for each White Label theme you own.
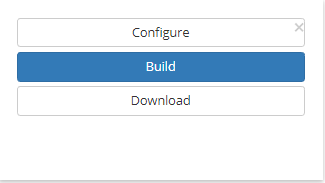
Click on the card to show action buttons to Configure , Build and Download as shown below:
First Build
Immediately after purchase your requested White Label will be available on the My Products page so that you can provide your branded resources needed to make the build.
Click on Configure and provide the following information for your required branding:

General tab
- Provide your Theme Name. (the name entered here will be converted to all lower case with no spaces)
- Provide a title for your theme. This will be shown in the browser tab header.
- Enter a home page URL for your theme.
{tip}
This will be the URL you are sent to on clicking your white label logo from the login page!
{/tip} - Enter the URL to the manual.
- Email alert email address
- Include an email address to be sent a notification when the build completes
{tip}
Please note: Once the Theme Name has been entered and the White Label is saved the chosen Theme Name cannot be changed!
{/tip}
Resources tab
- Upload an image for your logo in PNG format. (we recommend an image with dimensions of 200 x 150)
- Upload an ICO file for your icon.
- Optionally include any exported Layouts you wish to use with your White Label theme.
License tab
- Licence provision(*)
- About text(*)
(*)To unlock Licence Provision and About Text we need you to sign a special agreement, please refer to this article for more details - Open Source Xibo.
{tip}
Please open a Support Ticket to request an Alternative Provision Form.
{/tip}
CSS tab
Use the CSS tab to override the colours used throughout the CMS.
{tip}
If the User knows the exact colour hex they wish to use, paste it directly into the field!
{/tip}
Any changes made to CSS after the White Label has been applied will not be automatically updated to the CMS, please open a Support Ticket to request an update.
Building
Once you have provided your configuration, click on the Build button.
Downloading
Once the build is complete an email notification will be sent to the address that was entered in the ‘Notify when built’ field, and is ready to be downloaded.
Applying a Theme
Apply to a Cloud CMS Instance
Themes can be automatically applied to new CMS instances during checkout. Once a theme is built a selector for “Theme” will be available when adding a new CMS Instance to your basket/cart.
To apply a theme to an existing Xibo in the Cloud CMS instance, please open a Support Ticket.
Apply to an on-premise 1.7 series CMS Instance
Themes can be downloaded and applied to an on-premise CMS instance or a CMS instance hosted with a 3rd party provider. Themes are downloaded from the Resell → CMS White Label section of the customer portal, by selecting the required theme record and pressing the “download” button.
The downloaded files are in tar.gz format and can contain the following files:
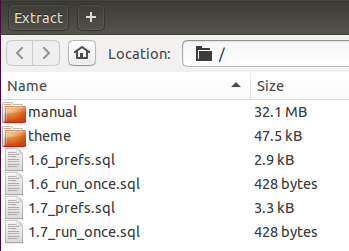
The archive is ready to be extracted over the top of an existing CMS installation.
Apply to an on-premise docker 2.0 / 1.8 series CMS Instance
In docker environment the theme name folder should be copied to /shared/cms/web/theme/custom/ (custom folder might need to be created manually)
For example, if your theme name is ‘Xibo’, then in the downloaded archive you will find theme/Xibo folder, you will want to copy the ‘Xibo’ folder to the path specified above, the end path to your white label theme should be:
/shared/cms/web/theme/custom/Xibo
Where ‘Xibo’ is an obvious example, it will be your own theme name in the downloaded archive with White Label CMS theme.
The manual folder from the archive, should be copied to shared/cms/web/userscripts/, meaning the full path will be shared/cms/web/userscripts/manual
Once files are in place, log in to the CMS and navigate to the Settings page under the Administration section of the menu.
On the Configuration tab, you should be able to select your theme in the CMS Theme dropdown.
Go to the General tab, enter the following as the ‘Location of the Manual’
userscripts/manual/en/
Please clear your browser cache (shift+F5 should suffice) to see your custom theme applied to your CMS Instance.
Apply to an on-premise custom/manual 2.0 / 1.8 series CMS Instance
The theme name sub-folder should be copied to the following path /web/theme/custom/.
For example, if your theme name is ‘Xibo’, then in the downloaded archive you will find theme/Xibo folder, you will want to copy the ‘Xibo’ folder to the path specified above, the end path to your White Label theme should be:
/web/theme/custom/Xibo
Where ‘Xibo’ is an obvious example, it will be your own theme name in the downloaded archive with White Label CMS theme.
Manual folder can be placed anywhere in the /web folder in the CMS Installation, for the purpose of this guide we will put it in the same place as in the docker installation, in this case in /web/userscripts/manual (userscripts folder will need to be created manually).
Once files are in place, log in to the CMS and navigate to the Settings page under the Administration section of the CMS.
On the Configuration tab, select your theme in the CMS Theme dropdown.
Go to the General tab, enter the following as the ‘Location of the Manual’
userscripts/manual/en/
Please clear your browser cache (shift+F5 should suffice) to see your custom theme applied to your CMS Instance.
SQL Files
The SQL files in the archive should not be copied - they are provided as examples of the changes we recommend for a 1.6, 1.7, 1.8 and 2.0 CMS installation. If the CMS is already configured in a suitable manner then do not run these files.
If the files are not run then CMS setting for GLOBAL_THEME_NAME should be updated to suit the new theme - the following SQL can be used:
UPDATE `setting` SET `value` = 'THEME_NAME', userSee = 0 WHERE `setting` = 'GLOBAL_THEME_NAME' ;
If you want to run the above (or other) sql on your docker installation please see the following topic: How can I run a SQL command when using a Docker Install?
Always take a full database and file backup before making changes to your CMS.